


Are you thinking about switching from Craft CMS to WordPress but unsure where to start? You’re not alone. Many site owners face this challenge, wanting to leverage WordPress’s user-friendly interface and powerful SEO tools.
In this guide, we’ll walk you through the entire process, ensuring a smooth and efficient migration. Imagine moving your content without losing SEO rankings or breaking site functionalities – sounds ideal, right? We’ll cover everything from preparation to going live. Did you know that WordPress powers over 43% of all websites on the internet? With such a robust support system and a vast plugin ecosystem, making the switch could be a game-changer for your site.
So, how do you migrate without the headaches? What steps should you follow to ensure nothing falls through the cracks? Let’s dive in and make this WordPress website migration as seamless as possible.
A Brief Overview of Craft CMS and WordPress
Craft CMS is a powerful and flexible content management system that developers love for its customizability and robust features. It’s particularly favored for projects that require tailored content structures and advanced functionality. Think of it as a blank canvas where you can create a highly customized website without many limitations. However, it does require a bit of technical know-how to get the most out of it.
WordPress, on the other hand, is the world’s most popular CMS, powering over 4% of all websites. It’s renowned for its user-friendly interface, extensive plugin ecosystem, and strong SEO capabilities.
Whether you’re a beginner or a seasoned developer, WordPress makes it easy to create, manage, and scale your website. With thousands of themes and plugins, you can quickly add new features without touching a line of code. For example, plugins like AIOSEO can help optimize your site for search engines effortlessly.
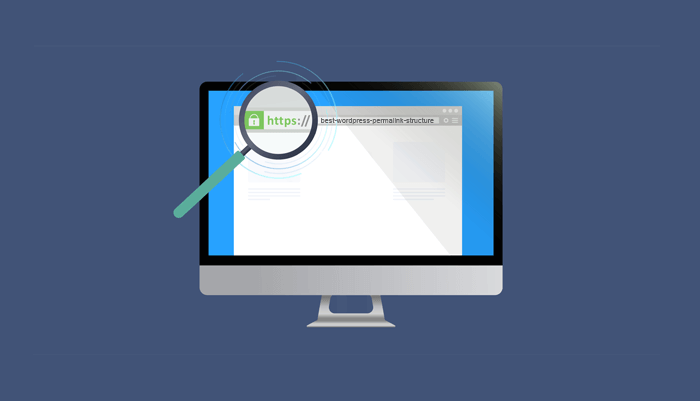
Migrate from Craft CMS to WordPress with Ease!
Looking to switch from Craft CMS to WordPress? Our expert team at Seahawk can help you make a seamless migration.
Key Considerations Before Starting the Craft CMS to WordPress Migration Process
Before diving into the migration from Craft CMS to WordPress, it’s essential to plan carefully to ensure a smooth transition. Here are some critical considerations:
Site Structure
Analyzing your current site structure is a good start. How are your pages, posts, and custom fields organized? Knowing this helps you map out how content will be transferred to WordPress. For instance, if Craft CMS entries are highly customized, you’ll need to figure out the best way to replicate that in WordPress.
SEO Settings
SEO settings are another critical factor. Losing your search engine rankings during a migration can be disastrous. Ensure you have all your meta titles, descriptions, and other SEO settings documented. WordPress plugins like AIOSEO can be a lifesaver here, helping you manage these elements post-migration.
Content Volume
Next, consider the volume of content you have. Do you have a lot of text, images, or videos? The amount and type of content can significantly impact the time and resources needed for the migration.
For example, a site with hundreds of blog posts will take longer to migrate than a simpler site.
Functionality
Functionality is key, too. List out any custom features or third-party integrations you’re currently using. How will these be replicated or replaced in WordPress? Researching WordPress plugins and themes that match or enhance your current setup is crucial.
Think about it – what if the functionality you rely on in Craft CMS isn’t readily available in WordPress?
Read In-depth blog: Umbraco vs WordPress
Backup
Don’t forget to backup your data. It’s like having an insurance policy for your website. Make sure you have a complete backup of all files and WordPress databases before starting. Setting up a staging environment to test the migration process can help avoid any hiccups on your live site.
URL Structure
Maintaining your URL structure is essential to avoid broken links. Consistent URLs help preserve SEO rankings. Planning for 301 redirects ensures that any changed URLs still point to the correct new locations, preventing a drop in traffic.
User Experience
Lastly, think about the user experience. Will the new WordPress site maintain or improve the design and usability of your current site? Conducting usability testing can help identify any issues that need addressing before going live, ensuring a seamless transition for your users.
By addressing these considerations, you’ll lay a strong foundation for a successful migration, ensuring your new WordPress site is just as effective and user-friendly as your current Craft CMS setup.
Learn: Sitecore to WordPress Migration Service
Migrating Craft CMS to WordPress: Steps Follow
Ready to get started with your WordPress website migration? Here’s a comprehensive step-by-step guide to ensure a smooth transition from Craft CMS to WordPress.

Step 1: Preparing for Migration
Backup Your Craft CMS Website
First things first, make sure you back up your Craft CMS website. This step is crucial to ensure that you don’t lose any data during the migration. Think of it as your safety net. Use tools like Craft’s built-in backup options or third-party backup solutions to save all your files and databases.
Evaluate the Current Site Structure
Next, take a close look at your current site structure. Mapping out this structure helps you understand how to transfer your content to WordPress effectively.
For example, if you have a lot of custom entries in Craft CMS, plan how these will translate into WordPress’s format.
Set Up a Staging Environment
Setting up a staging environment is like having a sandbox to play in. It allows you to test the migration process without affecting your live site. You can experiment, make mistakes, and perfect your migration strategy here. Use a subdomain or a local server to create this staging environment and install WordPress there.
Step 2: Installing WordPress
Choosing and installing WordPress is a critical step that sets the stage for a successful migration. Let’s break it down into two simple parts: selecting a hosting provider and getting WordPress installed.
Learn: Why You Need To Migrate From Drupal To WordPress
Choosing a Hosting Provider
The first step in installing WordPress is choosing a reliable hosting provider. Think of your hosting provider as the foundation of your website. You want one that’s fast, secure, and offers good customer support.
Popular choices include Hostinger, DreamHost, & WP Engine. They all offer one-click WordPress installations, making your job much easier. Ask yourself, what are your needs – shared hosting, VPS, or dedicated hosting? Pick the one that best suits your site’s requirements.
Installing WordPress
Once you’ve chosen your hosting provider, it’s time to install WordPress. Most hosting providers offer a simple one-click installation process. If you’re doing it manually, download WordPress from WordPress.org and upload it to your server.
Then, follow the setup wizard to configure your site. You’ll need to create a database and user for WordPress – most hosts have guides or support to help you with this.
Further reading: How to Migrate From Joomla to WordPress
Step 3: Exporting Data from Craft CMS

Now it’s time to get your data out of Craft CMS and prepate it for for WordPress. Don’t worry; it’s simpler than it sounds. Let’s walk through exporting your content and media files.
Exporting Content
Start by exporting your content from Craft CMS. This includes all your posts, pages, and any custom entries. Craft CMS has built-in tools for exporting data, typically found in the control panel under “Utilities” or a similar section.
Export your content into a format that WordPress can easily import, like XML or CSV. This step ensures that all your hard work doesn’t get lost in the transition.
Exporting Media Files
Next, you’ll need to export all your media files, including images, videos, and other uploads. Media files are usually stored in the “assets” folder within your Craft CMS installation.
Use an FTP client or your hosting control panel to download these files to your local machine. This way, you have all your visual content ready to be uploaded to your new WordPress site.
Learn: How To Migrate From PrestaShop To WooCommerce
Step 4: Importing Data into WordPress
With your data safely exported from Craft CMS, it’s time to bring it into WordPress. This step ensures all your content and media files find their new home without a hitch.
Importing Content
First, let’s get your content into WordPress. Navigate to the WordPress dashboard, go to “Tools,” and then “Import.” Here, you’ll find various options – choose the one that matches the format of your exported content, usually “WordPress” for XML files.
Install any necessary plugins if prompted, and follow the on-screen instructions to upload your content file. This step brings all your posts, pages, and custom entries into WordPress, preserving the structure and details you had in Craft CMS.
Know more about: How To Migrate From Magento To WordPress
Importing Media Files
Now, it’s time to upload your media files. If your content import didn’t automatically include media files, you can use a plugin like “Add From Server” to upload your media library.
Alternatively, you can manually upload your media files via FTP or the hosting control panel into the WordPress “uploads” directory. Once uploaded, you may need to update links within your posts to point to the new media locations.
Read: WordPress Importer Plugin
Step 5: Setting Up Themes and Plugins
With your data in place, it’s time to make your WordPress site look and function the way you want. This involves choosing the right theme and adding essential plugins.
Choosing a WordPress Theme
Start by selecting a WordPress theme that aligns with your site’s goals and aesthetics. The WordPress theme repository offers thousands of free themes, and there are plenty of premium themes available on sites like SeaTheme. Look for a theme that is responsive, well-supported, and customizable.
For example, if you’re running a blog, a clean and simple theme like Astra might be perfect. If you’re setting up an eCommerce site, consider something like an Organic Store.
Installing and Customizing the Theme
Once you’ve chosen a theme, install it by navigating to “Appearance” > “Themes” in your WordPress dashboard, then click “Add New” and search for your theme. After installing, activate it.
Now comes the fun part – customizing! Use the WordPress Customizer (found under “Appearance” > “Customize”) to tweak your theme’s settings. You can adjust colors, fonts, layout options, and more to match your brand.
If you’re using a premium theme, it may come with its own customization panel and additional features.
Essential Plugins for WordPress
To enhance your site’s functionality, you’ll need some essential plugins. Here are a few recommendations:
- AIOSEO: Helps optimize your site for search engines.
- Akismet: Protects your site from spam comments.
- Jetpack: Offers a suite of tools for security, performance, and site management.
- WooCommerce: Essential if you’re running an online store.
- Contact Form 7: Easily add contact forms to your site. Installing plugins is straightforward – go to “Plugins” > “Add New” in your dashboard, search for the plugin you need, install, and activate it.
Check out: Best WordPress Migration Plugins
Step 6: Configuring SEO and Permalinks
To ensure your new WordPress site is easily found by search engines and user-friendly, it’s important to configure SEO settings and permalinks properly.
SEO Best Practices for WordPress
Optimizing your site for search engines is crucial. Start by installing an SEO plugin like AIOSEO or All in One SEO Pack. These plugins help you manage your SEO settings directly from the WordPress dashboard. Focus on the following key areas:
- Meta Titles and Descriptions: Ensure each page and post has a unique, keyword-rich title and meta description.
- XML Sitemaps: Generate an XML sitemap to help search engines index your site more effectively.
- Content Optimization: Use the plugin to analyze your content for keyword usage, readability, and other SEO factors.
- Internal Linking: Strengthen your site’s SEO by creating a robust internal linking structure. This helps distribute page authority and improves user navigation.
Check: Complete SEO Checklist
Configuring Permalinks
Permalinks are the URLs used for your posts and pages. Clean, descriptive URLs improve both SEO and user experience. To configure permalinks, go to “Settings” > “Permalinks” in your WordPress dashboard. Here are a few tips:
- Post Name: Select the “Post name” option for a clean URL structure (e.g., yourdomain.com/sample-post). This is generally considered the best practice for SEO.
- Custom Structure: If you need more specific URL patterns, you can create a custom structure. For example, /category/post-name/ might be useful for sites with lots of content categories.
Also read: How To Migrate From Squarespace to WordPress
Step 7: Testing and Debugging
Before launching your new WordPress site, it’s essential to thoroughly test and debug to ensure everything works as expected. Here’s how you can do it:
Testing the Migration
Begin by thoroughly testing your new WordPress site to ensure all content has been migrated correctly. Check that all pages, posts, and media files are present and displayed as intended. Navigate through your site as a user would:
- Links: Verify that all internal and external links work correctly. Broken links can frustrate users and harm your SEO.
- Forms: Test all forms (contact forms, subscription forms, etc.) to ensure they are functioning and submitting data properly.
- Functionality: Ensure any custom functionalities, such as eCommerce features, galleries, or interactive elements, work as expected.
Learn: How To Migrate From Webflow To WordPress
Debugging Common Issues
During testing, you may encounter some issues. Here are common problems and their solutions:
- Broken Links: Use a broken link checker tool to identify and fix broken links on your site.
- Missing Media: If media files aren’t displaying correctly, check that they were uploaded to the correct directory and that the links are accurate. Use the “Add From Server” plugin if needed.
- Formatting Issues: If content formatting appears off, double-check your theme settings and any custom CSS. Sometimes minor tweaks can resolve these issues.
- Plugin Conflicts: If your site behaves unexpectedly, deactivate all plugins and reactivate them one by one to identify any conflicts. Once identified, you can look for alternative plugins or contact the plugin developers for support.
Step 8: Launching Your New WordPress Site
You’re almost there! It’s time to prepare for the big moment – launching your new WordPress site. Let’s make sure everything is in place for a smooth transition.
Final Pre-Launch Checklist
Before going live, go through this final website launch checklist to ensure everything is ready:
- SEO Settings: Double-check that all your SEO settings are correctly configured, including meta titles, descriptions, and permalinks.
- Backups: Ensure you have a final backup of your site in case anything goes wrong during the launch.
- Testing: Revisit the testing phase to confirm that all links, forms, and functionalities are working perfectly.
- Mobile Optimization: Make sure your site is fully responsive and looks great on mobile devices. Google’s Mobile-Friendly Test tool can be handy here.
- Analytics: Set up Google Analytics or another tracking tool to monitor your site’s performance from day one.
- Security: Contact security service providers or install plugins like Wordfence or Sucuri to protect your site from potential threats.
Going Live
Now, it’s time to flip the switch and go live! Here’s how to do it:
- Domain Settings: Update your domain settings to point to your new WordPress site. This might involve changing DNS settings with your domain registrar.
- Staging to Live: If you’ve been working in a staging environment, push the changes to your live server. Many hosting providers offer tools to make this process seamless.
- 301 Redirects: Implement 301 redirects from old Craft CMS URLs to the new WordPress URLs to maintain SEO rankings and avoid broken links.
- Announce the Launch: Share the news of your new site with your audience! Use social media, email newsletters, and any other channels to let everyone know.
Wrap Up: Craft CMS to WordPress Migration
Migrating from Craft CMS to WordPress is a significant step that can bring many benefits to your website, including easier content management, better SEO tools, and a vast array of plugins and themes. By following this step-by-step guide, you’ve prepared meticulously, ensuring that your data is safely transferred, your new site is thoroughly tested, and all potential issues are addressed before going live.
Remember, the key to a successful migration is thorough preparation and testing. Each step, from backing up your data and evaluating your site structure to configuring SEO settings and setting up your theme, plays a crucial role in ensuring a seamless transition. With your new WordPress site, you’re now equipped with a powerful platform that’s flexible, user-friendly, and ready to support your growing needs.
As you launch your new site, don’t forget to monitor its performance and make necessary tweaks to keep everything running smoothly. Keep engaging with your audience, updating your content, and exploring new features to make the most out of WordPress.
Congratulations on successfully migrating from Craft CMS to WordPress! Your new site is now ready to shine, offering an enhanced user experience and a solid foundation for future growth.
FAQs About Craft CMS to WordPress
Why should I migrate from Craft CMS to WordPress?
WordPress offers a user-friendly interface, extensive plugin ecosystem, and strong SEO capabilities. It’s easier to manage, especially for non-developers, and provides robust support through its vast community.
Will migrating to WordPress affect my SEO?
If done correctly, your SEO should not be negatively impacted. Ensure you preserve your SEO settings, implement proper 301 redirects, and use SEO plugins like AIOSEO to maintain your search engine rankings.
How do I handle media files during the migration?
Export your media files from Craft CMS and upload them to your WordPress site. You can use an FTP client or plugins like “Add From Server” to streamline this process and ensure all media files are correctly linked.
What are the common challenges during the migration process?
Common challenges include broken links, formatting issues, and plugin conflicts. Thorough testing and debugging can help identify and fix these issues before your site goes live.
Do I need technical skills to migrate from Craft CMS to WordPress?
While some technical knowledge is helpful, many aspects of the migration can be handled with the help of guides and tutorials. If needed, you can also hire a professional to assist with more complex tasks.


