If you have a passion, a business, or a unique perspective to share with the world, then building a website with WordPress can help you unlock a world of possibilities. In this how to create a WordPress website guide, we have listed the detailed process of building a cutting-edge WordPress website from scratch.
So, without further ado, let’s get started. And if you need professional help, get in touch with us right away.
Contents
Toggle1. Planning Your Website

Start by clearly defining your website’s purpose and goals. It is the foundational step in crafting a successful website. Whether you’re aiming to showcase your portfolio, sell products, or share valuable insights, a well-defined purpose guides your design and content decisions.
Your goals act as the roadmap, outlining what you want to achieve – be it increasing engagement, driving sales, or simply providing information. This clarity not only shapes the user experience but also helps measure your website’s success against predetermined benchmarks.
Identify Your Target Audience
Understanding your target audience is akin to speaking directly to the hearts and minds of those you wish to reach. Research your target audience’s demographics, interests, and needs. This will help you customize your content, design, and user experience to captivate and retain their attention.
Choose a Domain Name

A domain name is the digital address where visitors find you. Your domain name is a key part of your brand, so choose wisely and keep it memorable, relevant, and aligned with your website’s purpose. Here’s a quick look at domain offerings from popular hosting providers:
- DreamHost: DreamHost provides an affordable domain option with .COM domains starting at just $8.99/year. It also offers FREE Private Registration, enhancing security and privacy.
- Bluehost: While slightly pricier, Bluehost‘s .COM domains kick off at $12.99 for the first year. It also provides reliable services and excellent customer support.
- HostGator: Snag a .COM domain starting at $12.99/year with HostGator‘s straightforward domain registration process.
- GoDaddy: GoDaddy is a well-known domain registrar with various pricing options. While specific .COM prices may vary, GoDaddy often runs promotions and bundles for cost-effective domain registration.
Related: Tips For Choosing a Domain Name
Select a Reliable Web Hosting Provider

Since web hosting affects everything from performance and security to user experience, consider factors such as your website’s size, expected traffic, and technical requirements when selecting a hosting provider. Here’s a closer look at some of the reputable WordPress hosting providers.
DreamHost
DreamHost offers budget-friendly plans with a focus on WordPress hosting, making it an excellent choice for those starting out. It also provides a site builder and installer tailored for WordPress, streamlining website creation. It offers three plans as follows:
- WordPress Basic (Starting at $2.59/mo): Ideal for new sites, this plan provides essential features at a budget-friendly rate.
- DreamPress Managed WordPress (Starting at $16.95/mo): Offering managed services for optimal performance and security.
- VPS WordPress (Starting at $10.00/mo): Supporting up to 5 WordPress websites with increased resources.
WP Engine
WP Engine is known for its managed WordPress hosting, ensuring industry-leading speed, security, and support. It caters to various needs with five distinct plans:
- Lite (£10/mo): Suitable for a single site, providing essential features.
- Startup (£16/mo): Expanding to one site with enhanced capabilities.
- Professional (£32/mo): Supporting up to three sites with additional resources.
- Growth (£60/mo): Ideal for larger websites, accommodating up to ten sites.
- Custom (Starting at £468/mo): Tailored premium hosting solutions for advanced needs.
Learn: Best HIPAA-Compliant WordPress Hosting Services
Get Started on Building Your Dream Website Today
Our expert team can help you create a professional site in no time with WordPress Quicksite Services.
2. Setting Up WordPress
With your domain and hosting in place, setting up WordPress on your server is the next step. This process involves installing the platform, paving the way for you to build your website. Let’s explore two common methods for WordPress installation.

One-Click WordPress Installation
Many hosting providers, like DreamHost and Bluehost, offer user-friendly one-click installation options. This streamlined process allows you to install WordPress with just a click, minimizing technical complexities.
Users typically access these options through their hosting provider’s control panel or dashboard. One-click installations automatically handle tasks like database creation and configuration.
If you’re just starting, the one-click option is convenient and efficient.
Manual WordPress Installation Process
Manual installation is an alternative for those who prefer a more hands-on approach or have specific customization needs.
- This involves downloading the latest WordPress version from the official website (WordPress.org) and uploading it to your hosting server.
- Users need to create a database, configure the wp-config.php file, and complete the installation process manually.
While this method demands technical know-how, manual installation provides greater control over settings and configurations.
Know more: How to Install WordPress on Windows 11
Struggling with WordPress Installation?
Don’t worry, Seahawk has got your back! Let us help you set up your website. No more frustration, just a seamless experience.
Configuring Basic WordPress Settings
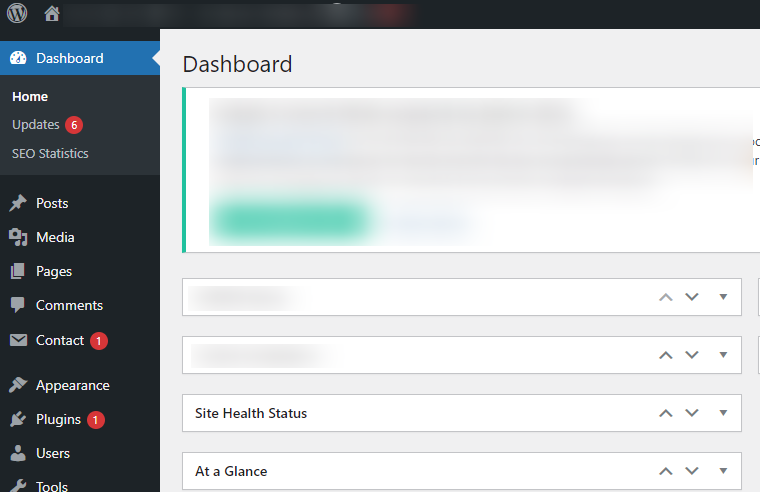
Configuring the basic settings in WordPress is crucial to tailor your website to your specific needs and preferences. Let’s delve into each section:
- General: Start by setting the title and tagline that best represents your website. These appear prominently on your site and in search engine results. Next is the WordPress Address (URL) and Site Address (URL). Ensure these URLs reflect your domain accurately. Lastly, set your site’s timezone to sync your content and schedules.
- Writing: Select a default category for your posts. Choose the format for your posts, such as standard, image, gallery, etc. Plus, configure email settings if you plan to publish posts via email.
- Reading: Choose between displaying your latest posts or a static page as your homepage. Move on to determine the number of blog posts displayed per page. Lastly, set the number of posts to show in your site’s feeds.
- Discussion: Configure settings like allowing or disallowing comments on new articles. Also, adjust settings for comment moderation and email notifications. Finally, choose whether to display gravatars for commenters.
- Media: Adjust the default sizes for thumbnail, medium, and large images. Also, define the folder structure for organizing media uploads.
- Permalinks: Choose a URL structure for your site. Common options include post name, day and name, month and name, etc. Customize the permalinks using custom settings.
Read: How To Set Up And Launch Your WordPress Site
3. Choosing a WordPress Theme
The third crucial step in creating your WordPress website is selecting a theme. Your website’s theme dictates its appearance and functionality. Let’s explore the key aspects of this step.

Exploring the WordPress Theme Repository
The WordPress theme repository is a treasure trove of free themes with diverse designs and features. Accessible directly from your WordPress dashboard, the repository allows you to preview and install themes seamlessly. Themes in the repository are also regularly updated, ensuring compatibility with the latest WordPress version.
Premium vs Free Themes
Free Themes: These are readily available in the WordPress theme repository, allowing you to choose from a wide range of designs at no cost. While free WordPress themes are budget-friendly, they may have limited customization options and features.
Premium Themes: Premium themes or templates, like those offered by SeaTheme, often come with advanced features, dedicated support, and unique designs. They provide greater flexibility for customization and are usually more robust in terms of functionality.
Related: Best AI WordPress Themes: Free & Premium
Installing and Activating Your Chosen Theme
After deciding on a theme for your WordPress website, the next steps involve installing and activating it.
- Installing the Theme: Navigate to your WordPress dashboard. Go to Appearance → Themes → Add New.Now, either upload the theme’s ZIP file. Or search for it in the theme repository. Once the theme is displayed, click “Install.”
- Activating the Theme: Click “Activate” after installation to make the theme live on your website. You’ll receive a confirmation message indicating that the theme is now active. Visit your website to see the new theme in action.
Customizing the Theme Settings
Now that your theme is active, it’s time to customize it to align with your vision.
- Accessing the Customizer: From the WordPress dashboard, go to Appearance → Customize. The Customizer lets you make real-time changes to your theme.
- General Theme Settings: Some themes offer general settings, such as site identity (logo and site title), color schemes, and typography. Explore these options to ensure your website’s branding is consistent.
- Header and Footer Settings: Customize the header by adjusting elements like navigation menus, header images, or logo placement. Footer settings may include options for widget areas or copyright text. Tailor these to suit your preferences.
- Homepage Settings: Depending on your theme, you might have options to configure the layout and content of your homepage. This could include selecting a static page or choosing a blog display.
- Widgets and Menus: Customize widget areas by adding or removing widgets for features like recent posts, categories, or social media links. Adjust your navigation menus to ensure they reflect the structure you desire.
- Additional Customization Options: Some themes provide extra customization options like custom CSS, allowing advanced users to fine-tune the design.
- Preview and Save Changes: Always preview changes before saving them to see how they appear on your live site. Once satisfied, click “Save Changes” to apply the customizations.
Stop Settling for Generic Pre-designed Themes & Templates
Instead, stand out with a custom WordPress design. Learn more about our professional WordPress web design services.
4. Installing Essential WordPress Plugins
WordPress plugins help add functionalities and enhance the performance of your website. In this phase of building your WordPress site, we’ll focus on essential plugins that cover SEO, security, contact forms, and performance optimization.
SEO Plugins
SEO plugins help optimize website content, enhance visibility, and improve search engine rankings. They offer various SEO features that help ensure your website performs well in SERPs. Two of the most popular WordPress SEO plugins are:
- All-in-One SEO (AIOSEO): A powerful tool for optimizing your site’s SEO, AIOSEO simplifies tasks like meta tag management, sitemap creation, and content optimization.
- Yoast SEO: A widely-used SEO plugin, Yoast SEO offers features like content analysis, XML sitemap generation, and social media integration. It’s user-friendly and perfect for beginners.
Security Plugins
WordPress security plugins are vital for safeguarding websites against cyber threats. They provide essential features to enhance overall site security and protect sensitive customer data from unauthorized access.
- BlogVault: A comprehensive WordPress security plugin, BlogVault provides automated and real-time backups, robust website staging, and a powerful security scanner. With easy restoration options, it ensures your website remains protected and resilient against potential threats.
- Wordfence Security: Wordfence protects your site from malware, hackers, and other online threats. It includes firewall protection, malware scanning, and login attempt monitoring.
- Sucuri Security: Sucuri provides a web application firewall, malware scanning, and security hardening. It helps safeguard your site from potential vulnerabilities and attacks.
Related: Ultimate WordPress Security Guide
Contact Form Plugins
WordPress contact form plugins help streamline communication by allowing visitors to easily send messages without revealing email addresses. They enhance user experience, facilitate engagement, and enable website owners to manage inquiries efficiently, making interaction seamless and more secure.
- Contact Form 7: A popular and flexible contact form plugin that allows you to easily create and manage multiple forms. It supports customization and integrates well with various third-party services.
- WPForms: Known for its user-friendly interface, WPForms allows you to build various forms, including contact forms, surveys, and payment forms, without any coding skills.
Know more: Best HIPAA-Compliant WordPress Forms
Performance Optimization Plugins
Performance optimization plugins help enhance website speed and efficiency by compressing files, caching content, and optimizing scripts. They contribute to a smoother user experience by reducing page load times and improving overall site performance.
- W3 Total Cache: Improve your website’s speed and performance by caching elements and optimizing various aspects. W3 Total Cache reduces page load times and enhances the overall user experience.
- Autoptimize: This plugin optimizes your site by minifying CSS, JavaScript, and HTML. It also provides options for image optimization and lazy loading, contributing to faster page loading times.
5. Creating Pages and Content

The next step is to create website content. While creating content, maintain consistency in design and tone across pages. This will ensure a cohesive and user-friendly experience. Also, regularly update dynamic content like blog posts while keeping static pages informative and relevant. In WordPress, you can create pages as well as posts.
- Pages: Static and timeless, pages are ideal for essential content like Home, About Us, Services/Products, and Contact Us. They form the framework of your site.
- Posts: Dynamic and time-sensitive, posts are suitable for regularly updated content, such as blogs, tutorials, etc.
6. Optimizing Your Site for Search Engines

SEO (Search Engine Optimization) enhances visibility, driving organic traffic to your site. It improves search engine rankings, making your content easily discoverable by users interested in your niche. To optimize your site for search engines, ensure that you:
- Use SEO-Friendly URLs: Craft concise and descriptive URLs. Include relevant keywords in URLs to make it easier for search engine crawlers and users to understand your content.
- Add Meta Titles and Descriptions: Write compelling meta titles with relevant keywords. Craft meta descriptions that summarize the content and encourage clicks.
- Optimize Images for Search Engines: Compress and optimize image dimensions for faster loading times. Plus, use descriptive file names and alt text, including keywords where relevant.
- Use Google Analytics and Search Console: Leverage analytics tools to monitor your site’s performance and make data-driven decisions for continuous site improvement.
Having a Strong SEO Foundation is Essential for Your Website’s Success
So, don’t risk it with a rushed launch. Make sure to lay a robust SEO foundation with our expert package.
7. Ensuring Website Security

Use security tools and integrate security plugins like Wordfence or Sucuri to enhance overall site protection, detect threats, and provide real-time monitoring. Additionally, set up a firewall to monitor and control incoming & outgoing network traffic to prevent unauthorized access.
Use complex usernames and passwords to fortify login security. Here, you can utilize a combination of uppercase letters, lowercase letters, numbers, and symbols for robust authentication.
Lastly, post-launch, consistently update your WordPress core, themes, and plugins to patch vulnerabilities and enhance security. Or better yet, enable automatic updates to stay protected against emerging threats.
Read: WordPress Security Mistakes to Avoid
8. Testing Your Website
Use testing tools, browser developer tools, and online testing platforms to streamline the testing process. Address any issues or glitches before the official launch to provide a seamless experience for your visitors.
- Check Website Responsiveness: Ensure your website displays correctly and functions seamlessly across various devices. Test different screen sizes to guarantee a positive user experience for all visitors.
- Cross-Browser Compatibility Testing: Verify that your website appears and functions consistently across browsers like Chrome, Firefox, Safari, and Edge. Address any compatibility issues to ensure a uniform experience for all users.
- Verify Links and Navigation: Conduct a thorough check of your website’s internal and external links. Fix any broken links. Plus, confirm that navigation menus and buttons function correctly, providing users with easy and intuitive navigation.
- Test Contact Forms and Interactive Elements: Test all contact forms to ensure they submit information correctly and that you receive notifications. Also, check other interactive elements, such as sliders, buttons, and pop-ups, to ensure they work as intended.
9. Launching Your Website
In the last step, conduct a final review of all content, ensuring accuracy, relevance, and consistency. Verify that all images and multimedia elements are optimized for performance. Also, double-check SEO settings, ensuring meta titles, descriptions, and keywords are in place.
- Check Site Speed: Utilize Seahawk’s website speed test tool to assess your site’s loading speed. Address any identified issues to optimize performance and provide a seamless user experience.
- Make Your Website Public: If your website is in maintenance mode or under construction, switch it to public mode. Adjust privacy settings to ensure search engines can index and rank your site.
- Announce Your Website on Social Media: Create engaging posts on your social media channels to announce the launch of your website. Include key information, such as the purpose of the website, exciting features, and a link to encourage user visits.
Hire a Professional for WordPress Maintenance

After building and launching your WordPress site, prioritize its ongoing success with Seahawk’s professional website maintenance plans. Choose between the $99 SeaCare Monthly and the $999 SeaCare Annual packages to ensure your website stays secure, optimized, and up-to-date. Sign up for Seahawk’s maintenance plans for a worry-free and well-maintained online presence.
To Sum Up
Crafting a WordPress website is a pretty simple and straightforward process. By following this step-by-step guide, you can easily navigate through planning, creating, optimizing, testing, and launching your website.
Also, if any challenges arise during this process, Seahawk‘s professional assistance is available 24/7. Building your website is a journey made smoother with the right guidance and support. And that’s what we are here for!
So, embrace the creativity, functionality, and limitless possibilities of the WordPress platform to create a website today!


