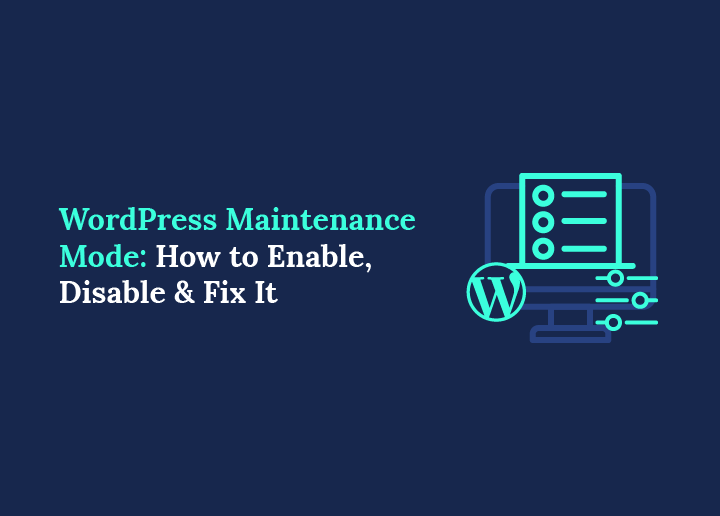
WordPress maintenance mode is a temporary state that displays a maintenance or coming soon page to visitors while updates, fixes, redesigns, or other site changes are being performed in the background.
Your site suddenly goes blank. Visitors see nothing but a vague message. That is WordPress maintenance mode, and it can happen when you least expect it. A simple update can trigger it, but fixing it isn’t always easy.
If handled incorrectly, it can hurt user trust and SEO. The good news is you can control it. With the right steps, you can enable, manage, and fix maintenance mode without risking your site’s performance or reputation.
TL;DR: Keep Your Site Running Smoothly
- Temporary downtime protects your site during updates, but it must be handled carefully
- Getting stuck in maintenance mode is one of the top 5 most common WordPress errors reported by site owners
- Most issues come from plugin conflicts, failed updates, or leftover maintenance files
- Quick troubleshooting and proactive monitoring help prevent downtime and keep your site accessible
Understanding WordPress Maintenance Mode
WordPress maintenance mode is a built-in feature introduced with WordPress 3.0. This feature is automatically activated when you perform updates or maintenance tasks on your site, such as updating plugins, themes, or the WordPress installation.

When maintenance mode is activated, visitors to your site will see a simple message that says, “Briefly unavailable for scheduled maintenance. Check back in a minute.” This message is displayed on a blank page, with no other content or distractions.
In addition to the maintenance message, WordPress returns a 503 HTTP status code to search engines when the site is in maintenance mode.
This code indicates that the site is temporarily unavailable due to maintenance or a technical issue. This is important for SEO, as it tells search engines that the site will be back up and running soon and that they should check back later.
While your site is in maintenance mode, administrators can still access it. This means you can log in and edit your site as usual without affecting visitors’ experience.
Read More: How to Fix a Corrupt or Broken WordPress Website Most Effectively
Stuck in Maintenance Mode After an Update?
Prevent this from happening again, Seahawk maintenance plans include staged updates and rollback. From $49/month.
Possible Scenarios for Turning On the Maintenance Mode on WordPress
Here are some situations where you might want to activate Maintenance Mode:

- Updating plugins and themes: You have several outdated plugins and themes that need attention. Instead of risking compatibility issues or security vulnerabilities, activate maintenance mode and give your site a little TLC.
- Performing routine backups: You’re a responsible website owner who knows the importance of backups. But you don’t want to interrupt your visitors’ experience while you’re at it. Maintenance mode to the rescue!
- Migrating to a new server: You’re switching to a new hosting provider or server and want to ensure a smooth transition. Activate maintenance mode, take a deep breath, and let the migration magic happen.
- Making significant design changes: You’re giving your site a facelift and want to ensure your visitors aren’t shocked by the sudden change. Give them a heads-up with a friendly maintenance mode message.
- Rolling out new features: You’ve got some exciting new features or functionality to share with your visitors. However, you want to ensure everything works flawlessly before unveiling it. Maintenance mode can help you test and fine-tune your new features without distractions.
- Dealing with unexpected downtime: Your site is down for reasons beyond your control, and you want to inform your visitors about the issue. Activate maintenance mode and reassure them that you’re working on a solution.
Methods to Set Up WordPress Maintenance Mode in Your WordPress Site
Learn how to enable Maintenance Mode on your WordPress site with these steps:
Method 1: Prevent Maintenance Mode Issues with a Professional Plan
Avoiding maintenance mode errors is not just about quick fixes. It requires consistent monitoring, timely updates, and a proactive approach to site health. That is where a structured maintenance plan makes all the difference.
At Seahawk Media, we manage everything behind the scenes so your site stays stable, secure, and accessible without unexpected downtime.

With our professional maintenance plans, you can prevent issues before they happen:
- Proactive updates: We handle core, theme, and plugin updates safely to avoid conflicts and broken sites
- Real-time monitoring: Our team tracks uptime, errors, and performance to catch issues early
- Automated backups: Regular backups ensure quick recovery if your site gets stuck in maintenance mode
- Advanced security: We protect your site from malware, brute force attacks, and vulnerabilities
- Performance optimization: Faster load times reduce the risk of crashes during updates
- Expert support: Our WordPress specialists are available to troubleshoot and fix issues.
Instead of reacting to problems, we help you stay ahead of them. With our ongoing maintenance, your WordPress site remains fast, secure, and fully functional at all times.
Method 2: Using cPanel in WordPress Dashboard
Log in to your cPanel account and navigate to the WordPress Dashboard section. Select the Core option to find the Maintenance Mode feature.

Toggle the slider to enable or disable maintenance mode. This method is straightforward and doesn’t require any additional plugins. However, it doesn’t offer customization options for the maintenance page.
Method 3: Using the SeedProd Plugin
Ensure you use actively maintained, up-to-date plugins to avoid compatibility issues.
Start by downloading and installing the SeedProd plugin on your WordPress site. Once installed, access the plugin’s dashboard and select a maintenance mode template of your choice.

Utilize the drag-and-drop builder to customize templates of your choice by adding text, images, and custom branding elements.
After making the desired changes, save them and activate the maintenance mode page. This method provides extensive customization options but requires a premium plugin.
Method 4: Using the WP Maintenance Mode Plugin
Download and install the WP Maintenance Mode plugin on your WordPress site. In the WordPress dashboard, navigate to Settings → WP Maintenance Mode.

Here, you’ll find tabs such as General, Design, Modules, Manage Bot, and GDPR, where you can configure various settings.
Activate the maintenance mode and customize the splash page by adding a title, heading, text, background color, and image. This plugin offers free customization options; however, its interface may be confusing for some users.
Keep Reading: Impact of Chatbots on WordPress Websites
Method 5: Using the WP Maintenance Plugin
Install and activate the WP Maintenance Plugin on your WordPress site. Customize the maintenance landing page by navigating through sections such as General, Colors & Fonts, Pictures, Countdown, CSS Style, SEO, Social Networks, Footer, and Settings.

This plugin offers numerous customization options and is generally easy to use, but requires a premium version.
Method 6: Using a Custom Function
Access the Appearance → Theme Editor section in the WordPress admin dashboard.
Navigate to the Theme Functions file and add custom code to activate the maintenance mode.
In the fourth line of the code, locate the wp_die function and the HTML code enclosed in parentheses. Modify the content of this HTML text to convey any desired message, such as “The site is currently undergoing maintenance. Please revisit after 4 pm EST.”

Edit the HTML message as required and update the file.
This method requires some coding knowledge but provides flexibility and extensive customization options.
Note: This approach involves modifying the functions.php file. We highly advise creating a backup of your WordPress site before proceeding.
Method 7: Using the .htaccess File
Create or upload a maintenance.html file containing your desired message. Locate the .htaccess file in the public_html directory of your WordPress installation and edit it to redirect all traffic to the maintenance.html file.

This method requires some technical knowledge, but it can be a good option if you’re comfortable editing files directly.
How Significantly Can WordPress Maintenance Mode Affect Your Site Performance?
WordPress maintenance mode can affect your site’s performance in specific ways. The primary purpose of maintenance mode is to allow updates and maintenance tasks to be performed without disrupting the user experience, in line with user-centered design.
Understanding how it can affect your site’s performance remains essential.
- Activating maintenance mode will temporarily make your site inaccessible to visitors. If your site receives a lot of traffic, you could gain significant traffic during maintenance. However, this is usually a short-term issue, and your site should return to normal once maintenance mode has been deactivated.
- Maintenance mode can also affect your site’s SEO. When your site is in maintenance mode, it returns a 503 HTTP status code to search engines, indicating that it is temporarily unavailable. This is generally not a cause for concern, as search engines understand that sites need maintenance and will typically re-crawl the site once maintenance mode is deactivated. However, if your site is in maintenance mode for an extended period, it could potentially harm your site’s ranking in search results.
- The performance impact of maintenance mode depends on the specific method you use to activate it. For example, using a plugin to activate maintenance mode may have a different impact on performance than manually activating it through code.
How to Disable WordPress Maintenance Mode?
WordPress occasionally enters maintenance mode, which temporarily disables website access for non-administrative users.

This mode is typically activated during updates, plugin installations, or significant site changes. While the maintenance mode is essential for ensuring a smooth transition during these processes, it’s crucial to disable it once the tasks are complete to restore full access to your website.
Follow these five simple steps to disable WordPress maintenance mode and get your site back online.
Step 1: Access Your WordPress Dashboard
Log in to your WordPress admin dashboard by navigating to your website’s URL and appending “/wp-admin” to the end (e.g., https://yourdomain.com/wp-admin). Enter your administrator credentials to gain access to the dashboard.
Step 2: Locate the “Coming Soon” or “Maintenance Mode” Plugin
If you’ve previously installed a plugin like “Coming Soon” or “Maintenance Mode” to enable maintenance mode, navigate to the “Plugins” section in your WordPress dashboard. Locate the plugin you used and deactivate it by clicking the “Deactivate” link beneath its name.
Step 3: Check for a Maintenance File
Sometimes, WordPress creates a temporary maintenance file during updates or plugin installations. To check for this file, access your website’s root directory via an FTP client or your hosting provider’s file manager. Look for a file named “.maintenance” and delete it if present.
Step 4: Clear Your Website Cache
After disabling maintenance mode, you must clear your website’s cache to ensure the changes are reflected immediately. If you’re using a caching plugin, locate the “Clear Cache” button within its settings and click it. Alternatively, you can manually clear your browser’s cache.
Step 5: Test Your Website
Once you’ve completed the previous steps, visit your website’s homepage to verify that maintenance mode has been successfully disabled. If everything works correctly, your website should be accessible to all visitors.
How Do You Fix WordPress’s “Maintenance Mode Not Working”?
Sometimes, even after following the correct steps to enable maintenance mode in WordPress, you may encounter an issue where the maintenance mode seems to need to be fixed.
This can be frustrating, especially if you’re trying to update or change your website without disrupting the user experience. Fortunately, you can take several troubleshooting steps to resolve this issue.
Step 1: Check for Plugin Conflicts
Ensure you use actively maintained, up-to-date plugins to avoid compatibility issues. Plugins are a common cause of WordPress conflicts, including issues with maintenance mode.
Start by deactivating all site plugins except the maintenance mode plugin you use. This can help eliminate any potential conflicts caused by other plugins.
Step 2: Clear Browser Cache
If the maintenance mode isn’t working, try clearing your browser’s cache and cookies. Sometimes, your browser may display a cached version of your website, which can prevent the maintenance mode from appearing.
Step 3: Check File Permissions
Ensure that the maintenance mode plugin has the necessary file permissions to create and modify the maintenance file. The recommended permissions for WordPress files and directories are 644 for files and 755 for directories.
Step 4: Manually Create the Maintenance File
If the maintenance mode plugin isn’t automatically creating the maintenance file, you can make it manually. Navigate to your website’s root directory using an FTP client or file manager, and create a new file named “.maintenance” (without quotes) in the root directory. This file should be empty, but its presence should trigger maintenance mode.
Step 5: Check for Server-Side Caching
If you’re using server-side caching, such as Varnish or Nginx, this could override the maintenance mode functionality. You may need to temporarily clear or disable the server-side cache to allow the maintenance mode to take effect.
Step 6: Disable and Reinstall the Plugin
If none of the above steps work, try disabling and reinstalling the maintenance mode plugin. Sometimes, a fresh installation can resolve any underlying issues with the plugin.
Discover: Best WordPress Caching Plugins
Conclusion
Mastering WordPress Maintenance Mode means you never have to worry about your website appearing broken or unprofessional again. When enabled correctly, this temporary page reassures visitors that your site is simply undergoing improvements, not experiencing technical failure.
Always remember to deactivate maintenance mode once updates are complete, clear the site cache, and test your pages thoroughly to confirm everything runs smoothly.
If your WordPress site is stuck in maintenance mode, use an FTP client or your web host’s file manager to locate and delete the maintenance file from your site’s root directory.
This small step can quickly restore full site access. By managing maintenance mode properly, you protect website traffic, preserve search engine rankings, and maintain a polished online presence.
With the correct plugin settings, a custom maintenance page, and a straightforward maintenance process, you ensure your WordPress website stays professional, functional, and visitor-ready at all times.
FAQs About WordPress Maintenance Mode
What is WordPress maintenance mode, and why is it used?
WordPress maintenance mode is a temporary state that shows a message to visitors while you update your site. It activates during core, theme, or plugin updates. It helps prevent users from seeing broken pages and protects your site during changes.
How do I fix a WordPress site stuck in maintenance mode?
Delete the .maintenance file from your root directory using FTP or a file manager. Then clear your cache and reload the site. This issue often happens after interrupted updates or plugin conflicts.
How can I enable maintenance mode without a plugin?
You can enable it manually by adding a .maintenance file or editing the functions file.
Does maintenance mode affect SEO rankings?
Short-term use does not harm SEO. WordPress sends a 503 status code, which tells search engines the downtime is temporary. However, keeping your site in maintenance mode for too long can impact rankings and traffic.
When should I use professional WordPress maintenance services?
Consider expert help if your site frequently crashes, gets stuck during updates, or faces security issues. Professional services handle updates, backups, and monitoring to keep your site stable, fast, and secure.