Have you ever thought about how great it would be to white-label your WordPress admin dashboard? Customizing the dashboard can make a difference, whether to reflect your brand more clearly or make things straightforward for your clients.
The standard WordPress dashboard is functional, but there’s always room to make it feel more “you.” And that’s precisely what white labeling can achieve.
This guide will walk you through how to white-label your WordPress admin dashboard, ensuring it aligns with your client’s preferences. Ready to make the dashboard uniquely yours? Let’s dive in!
Contents
ToggleWhat is White Labeling?

Have you ever seen a store-brand cereal that resembles a famous brand? That’s a bit like white labeling. One company makes the product, but another puts its name on it. It’s like getting a bicycle, painting it in your favorite color, and then saying it’s your unique design.
Read: How To Delete Invisible WordPress Admin Users?
White labeling WordPress is like giving your website a makeover so that everything, even the parts visitors don’t see, feels like it belongs to your brand. The main area we’re talking about here is the admin dashboard – that’s the place where you or your clients log in to make changes to the website.
Learn: 15+ Tips To Speed Up WP-Admin In WordPress
Why Should You Think About White Labeling?
You might wonder, “Why should I bother changing the look of the admin area? Most people won’t even see it!”
If you’re making a website for someone (let’s say a client), is it cool if everything, from the website they see to the dashboard they use, feels like it’s uniquely theirs? It’s like giving them a custom car where even the inside matches their style.
Plus, tweak the dashboard to make it easier for your client to use. They may only need certain buttons or features. You can make those changes with white labeling to fit their needs. It’s all about making things simple and branded just right.
Read: How To Speed Up WordPress Page Loading Time
Customizing WordPress Admin Dashboard With White Labeling
Have you ever wanted to give your WordPress admin area a makeover to align more with your brand or your client’s? With the White Label CMS plugin, you can achieve exactly that! Here’s a simple walkthrough to get you started:
1. Getting Started With White Label CMS Plugin
First off, you’ll want to get the White Label CMS plugin. It’s free and designed specifically to help you customize the WordPress admin area.
- Installation: Begin by installing and activating the White Label CMS plugin. To familiarize yourself with this process, refer to our guide on installing a WordPress plugin.
- Accessing Plugin Settings: Go to Settings » White Label CMS in your WordPress dashboard once activated. This is where the magic happens.
Read: How To Optimize Images And Improve Website Speed
2. Using the Setup Wizard
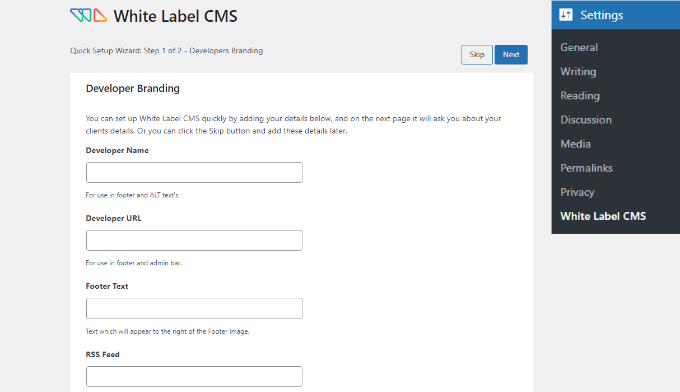
The plugin provides a handy setup wizard to make things smoother:
- Developer Details: You can add a developer name, which will be displayed in the footer. There’s also a field for alt text.
- Additional Details: Add a developer URL, footer text, and an RSS feed. Click ‘Next’ after inputting your details.
- Client Branding: You can insert your client’s business name and upload a logo for the login screen. If you want a sharper image for high-res screens, you can also upload a Retina login logo.
- Finalizing: Once everything looks good, hit the ‘Save’ button to finish your changes and exit the setup wizard.
Related: Fastest WordPress Themes With PageSpeed Scores
3. Dive into Detailed Settings
Want to fine-tune further? The main settings page of the plugin lets you do just that:
- Branding: Adjust branding elements to fit your desired look and feel.
- Login: Customize the login screen and functionality.
- Dashboard: Control what’s displayed on the main dashboard page.
- Menus: Decide which menus your clients or users can access and see.
- Settings: General settings for the plugin and its functionalities.
By navigating and tweaking these sections, you can fully white-label your WordPress admin dashboard, creating a more branded and tailored experience for yourself or your clients.
Learn: Best Website Speed Test Tools
Personalizing Your WordPress With Custom Branding
Want to swap out WordPress branding for your unique touch? Here’s how:
- Step 1: Start with the branding options – Decide whether to display or hide the WordPress logo and its links. You can even tuck away the WordPress version from the footer.
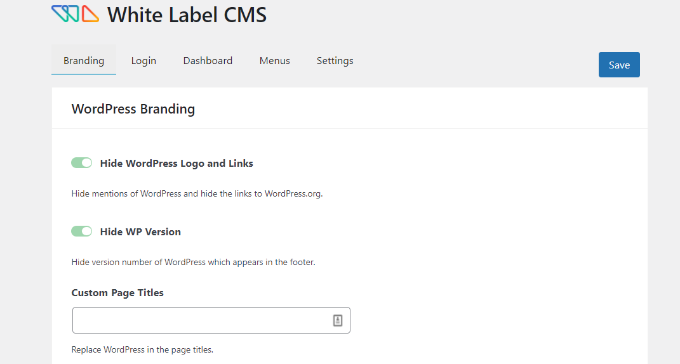
- Step 2: Head down to upload your logo, replacing the standard WordPress one in the admin bar.
- Step 3: Update the familiar “Howdy” greeting and default WordPress.org link to something more personalized.
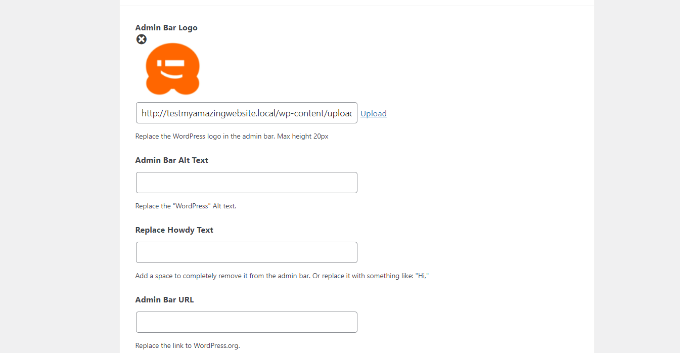
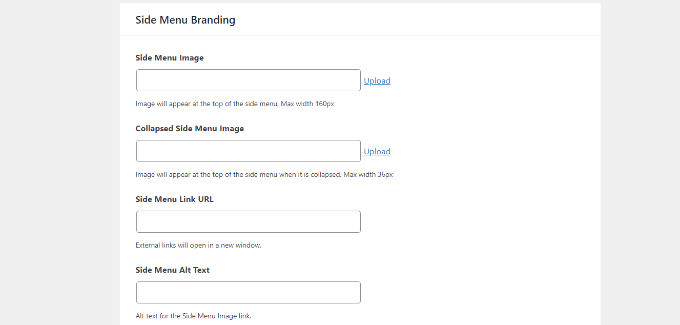
- Step 4: Refine the side menu: Add your brand image, customize the collapsed view, set specific link URLs, and add alt text for accessibility.
- Step 5: Update the Gutenberg exit button with your choice of icon and branding.
- Step 6: Spice up the footer – Incorporate a footer image, craft a message, set a URL, and even inject custom HTML code for a unique touch.
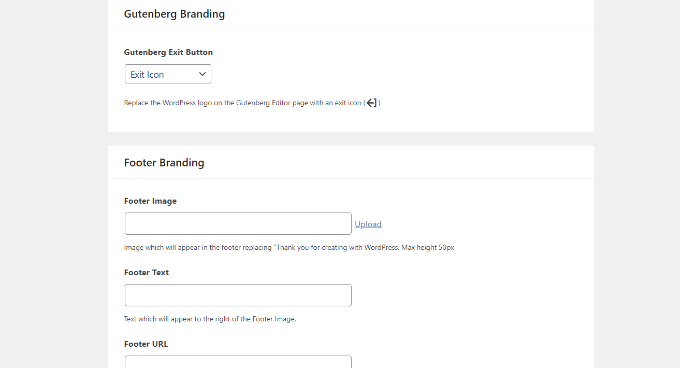
- Step 7: Once you’ve made all these tweaks, hit ‘Save’ to apply.
When you log in, the WordPress dashboard will feel tailored to your brand.
Know: How To Quickly Change The Admin Color Scheme In WordPress?
Revamping Your WordPress Login Page With White Labeling
Heading to the ‘Login’ tab in White Label CMS? Here’s a quick breakdown:
- Step 1: Begin by uploading your own login and retina logos.
- Step 2: Adjust logo dimensions and choose a background color.
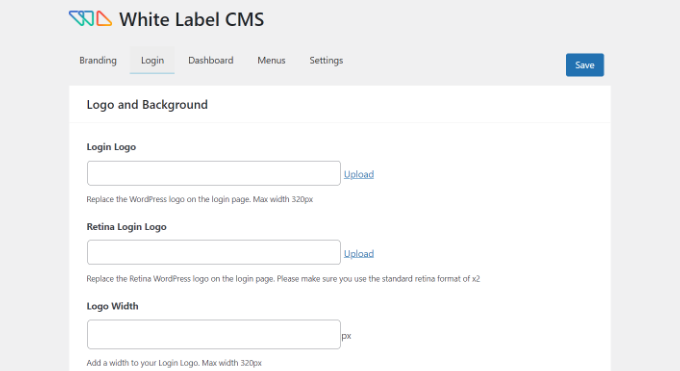
- Step 3: Further down, select a background image and decide its placement.
- Step 4: Set the background image to cover the full login screen for a bold look.
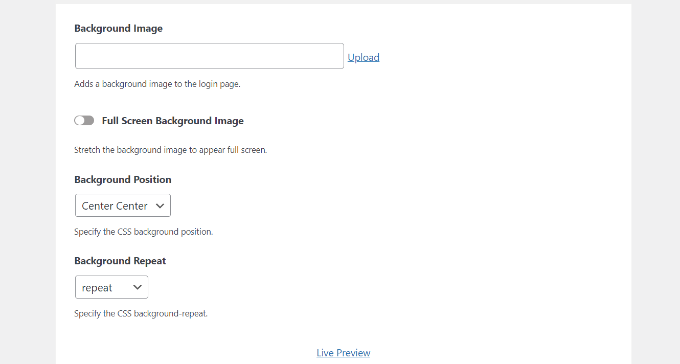
- Step 5: Use the ‘Live Preview’ button to see changes in action.
- Step 6: Happy with the look? Click ‘Save’.
For those desiring a deeper design dive, consider tools like SeedProd for more intricate customization.
Learn: How to create a WordPress website
White Label Your WordPress Dashboard Panel
When you log into WordPress, the first thing you see is the dashboard. It’s the main admin screen that provides a snapshot of your website.
However, for many, this dashboard can feel cluttered with its default panels, leaving users a bit overwhelmed or uncertain about their next steps.
That’s where White Label CMS comes in handy.
- Step 1: Go to the ‘Dashboard’ tab in the plugin.
- Step 2: Here, you’ll find easy options to decide what panels show up. You can even add unique dashboard icons or change the dashboard’s heading.
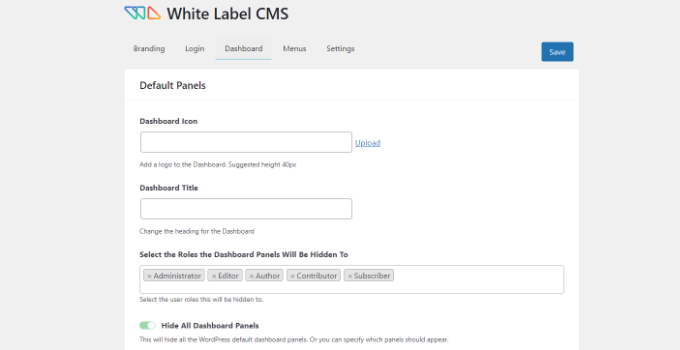
- Step 3: Select which WordPress user roles can see specific dashboard panels for user-specific customization.
- Step 4: Dive deeper, and you’ll find an option to create a personalized user welcome panel.
Make sure to hit save after making your tweaks, and voila! Your dashboard now has a cleaner, more user-friendly appearance.
Read More: Best WordPress Security Service Providers Of 2023
White Label WordPress Admin Menu
Want a cleaner and more tailored admin menu? Here’s a quick guide:
- Step 1: Open the ‘Menus’ tab in the White Label WordPress plugin.
- Step 2: This section lets you hide certain menu items for users, keeping them visible only for White Label CMS admins and super admins.
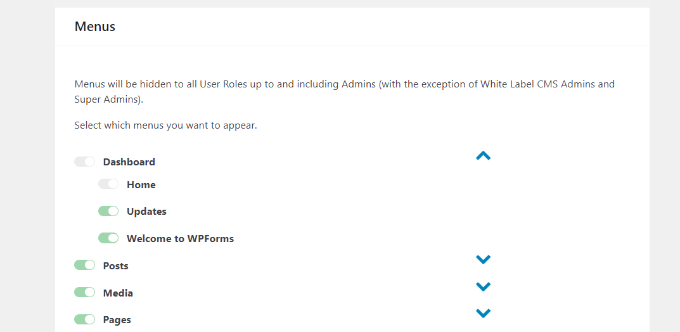
- Step 3: Got plugins? They often add extra menus. You can tidy things up if your clients or users do not need them.
- Step 4: Activate the ‘Want to hide menus for your clients’ option.
- Step 5: You’ll see a list of menus and their sub-menus (accessible via the blue arrow). Toggle off the ones you wish to hide.
- Step 6: Don’t forget the top admin bar menus – they can be adjusted here too.
- Step 7: Once everything’s set, click save.
Your WordPress admin area is now cleaner and more streamlined!
You Might Be Interested: Best WordPress Development Agencies In 2023
Customize WordPress Admin Settings
Jump into the ‘Settings’ tab in the White Label CSS plugin to refine your WordPress admin view:
- Step 1: Options are available to hide elements like the front-end admin bar, the help box, and other screen toggles.
- Step 2: Switch off those nagging messages, such as prompts to rate the plugin or buy premium versions.
- Step 3: You can add custom CSS or modify the editor stylesheet to personalize further.
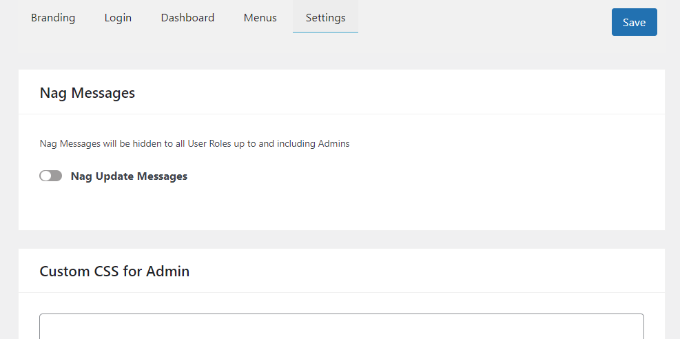
- Step 4: Once satisfied, hit ‘Save.’
Caution: Avoid hiding vital admin menus or silencing important notifications when creating sites for clients without ongoing management.
Your Thoughts on White Labeling WordPress?
White labeling WordPress allows for a personalized touch, transforming the default setup into something that resonates with your brand. By replacing standard branding elements, adjusting the admin dashboard, refining the login page, and more, you can create an interface that’s professional and aligns seamlessly with your brand’s identity. This customization elevates the user experience and instills a sense of brand consistency and professionalism. As you continue to explore and implement these changes, remember that the aim is to simplify, enhance, and make your WordPress truly yours.
What are your thoughts on this? Have you tried white-labeling WordPress? Do you have any insider tips, innovative tricks, or preferred strategies you’d like to share? Drop a comment below, and let’s discuss! Your insights could be invaluable to someone just starting on this journey. Looking for a White Label Agency? connect with us today.
Need A Tailored WordPress Experience?
Dive into our white label WordPress services and transform your backend to match your brand!


