


If you’re a WordPress user, you might be interested in a handy feature called “maintenance mode.” This feature is a lifesaver when performing your site’s updates, backups, and other WordPress maintenance tasks demanded on your site. WordPress maintenance mode allows you to temporarily make your website unavailable to visitors while you work on it behind the scenes.
When you activate maintenance mode, visitors will receive a friendly message informing them the site is temporarily unavailable and providing an estimated return time. This simple step can help you avoid potential lost traffic or reduce queries at customer support due to unexpected downtime when your site is undergoing maintenance.
But maintenance mode isn’t just for routine updates and backups. It can also be used strategically when making significant changes to your site, like a website redesign or major content update. By putting your site in maintenance mode, you can manage visitor expectations and ensure a smooth transition by informing them about the upcoming changes.
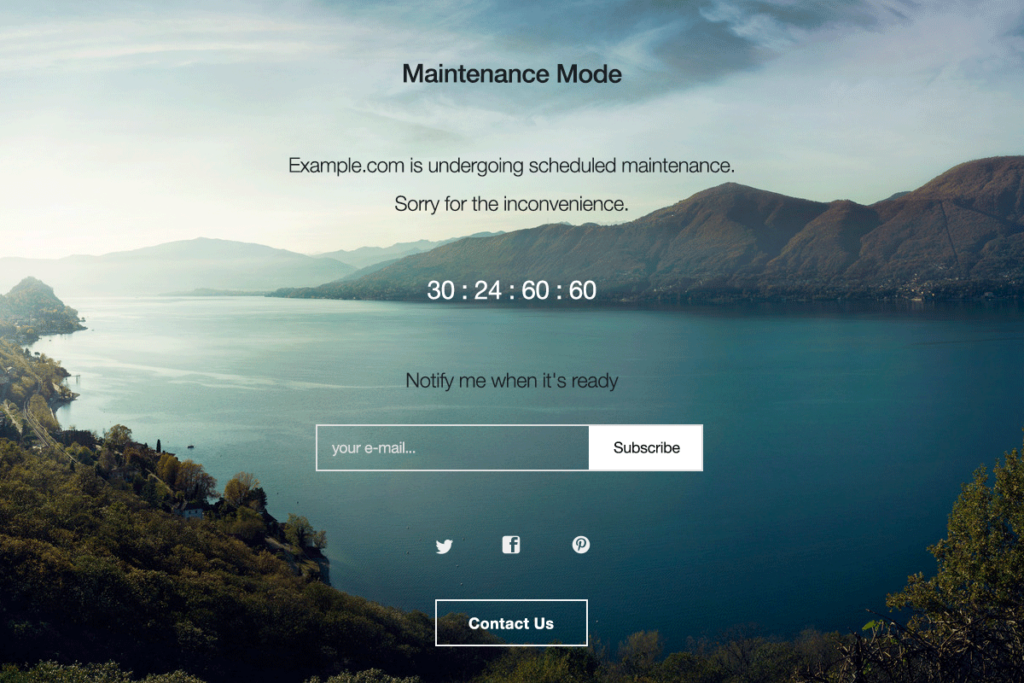
You might think, “Okay, but a maintenance mode page could be boring for my audience.” Well, that’s where you can get creative! Many WordPress plugins and tools allow you to customize your maintenance mode page with engaging elements, such as custom graphics, behind-the-scenes sneak peeks, interactive or gamified elements (like the T-Rex game for Chrome’s offline mode), and social media integrations.
Understanding WordPress Maintenance Mode
WordPress maintenance mode is a built-in feature introduced with version 3.0 of the WordPress core. This feature is automatically activated when you perform updates or maintenance tasks on your site, such as updating plugins, themes, or the WordPress installation.
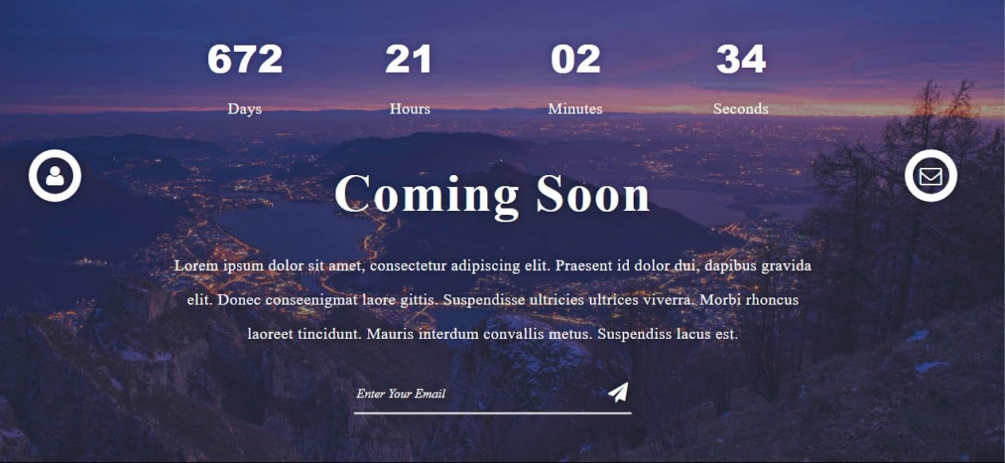
When maintenance mode is activated, visitors to your site will see a simple message that says, “Briefly unavailable for scheduled maintenance. Check back in a minute.” This message is displayed on a blank page without other content or distractions. In addition to the maintenance message, WordPress returns a 503 HTTP status code to search engines when the site is in maintenance mode. This code indicates that the site is temporarily unavailable due to maintenance or a technical issue. This is important for SEO, as it tells search engines that the site will be back up and running soon and that they should check back later.
While your site is in maintenance mode, administrators can still access it. This means you can log in and edit your site as usual without affecting visitors’ experience.
Read More: How to Fix a Corrupt or Broken WordPress Website Most Effectively
Looking for Ways to Troubleshoot Issues without Disturbing Your Live Site?
Let our maintenance experts handle updates, troubleshoot, and modify your WordPress site with precision and care.
Possible Scenarios for Turning On the Maintenance Mode on WordPress
Here are some situations where you might want to activate Maintenance Mode:
- Updating plugins and themes: You’ve got a bunch of outdated plugins and themes that need some love. Instead of risking compatibility issues or security vulnerabilities, activate maintenance mode and give your site a little TLC.
- Performing routine backups: You’re a responsible website owner who knows the importance of backups. But you don’t want to interrupt your visitors’ experience while you’re at it. Maintenance mode to the rescue!
- Migrating to a new server: You’re moving to a new hosting provider or server and want to ensure everything goes smoothly. Activate maintenance mode, take a deep breath, and let the migration magic happen.
- Making significant design changes: You’re giving your site a facelift and want to ensure your visitors aren’t shocked by the sudden change. Give them a heads-up with a friendly maintenance mode message.
- Rolling out new features: You’ve got some exciting new features or functionality to share with your visitors. But you want to ensure everything works flawlessly before you unveil it. Maintenance mode can help you test and fine-tune your new features without distractions.
- Dealing with unexpected downtime: Your site is down for reasons beyond your control, and you want to let your visitors know what’s happening. Activate maintenance mode and reassure them that you’re working on a solution.
Learn More: Fix “There Has Been A Critical Error On Your WordPress Website”
Steps to Set Up WordPress Maintenance Mode in Your WordPress Site
Learn how to enable Maintenance Mode on your WordPress site with these steps:
1. Using cPanel in WordPress Dashboard

Log in to your cPanel account and navigate to the WordPress Dashboard section. Select the Core option, where you’ll find the Maintenance Mode feature. Toggle the slider to activate or deactivate the maintenance mode functionality. This method is straightforward and doesn’t require any additional plugins. However, it doesn’t offer customization options for the maintenance page.
Find Out: How To White Label Your WordPress Admin Dashboard?
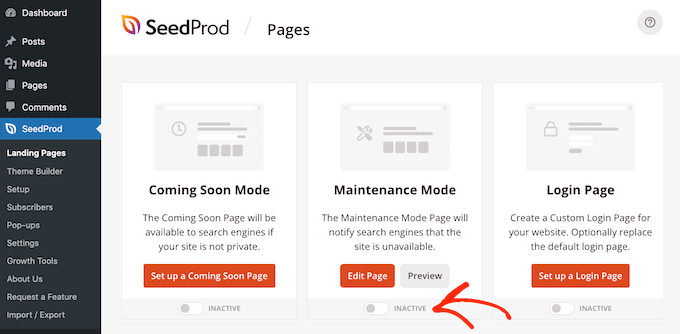
2. Using the SeedProd Plugin
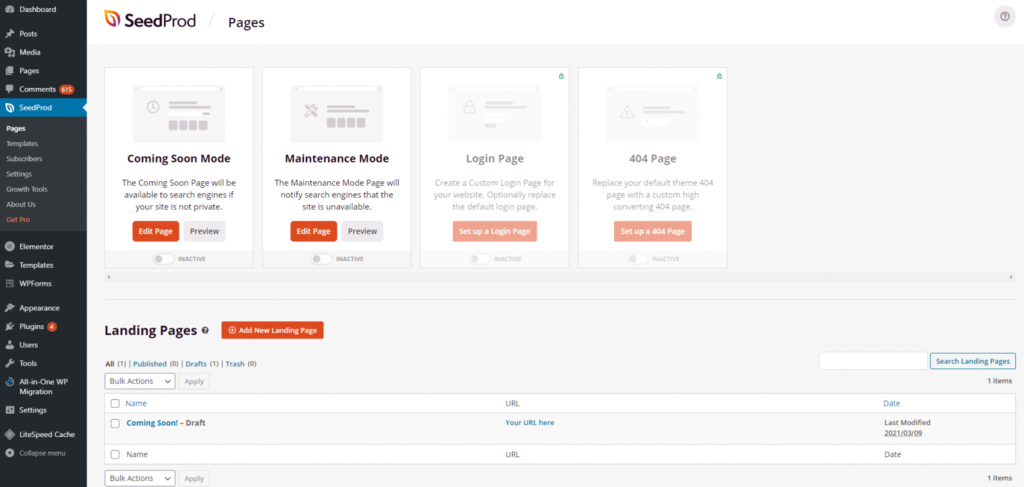
Start by downloading and installing the SeedProd plugin on your WordPress site. Once installed, access the plugin’s dashboard and select a maintenance mode template of your choice. Utilize the drag-and-drop builder to customize templates of your choice by adding text, images, and custom branding elements. After making the desired changes, save them and activate the maintenance mode page. This method provides extensive customization options but requires a premium plugin.
Learn More: AI Website Templates You Need To Know About
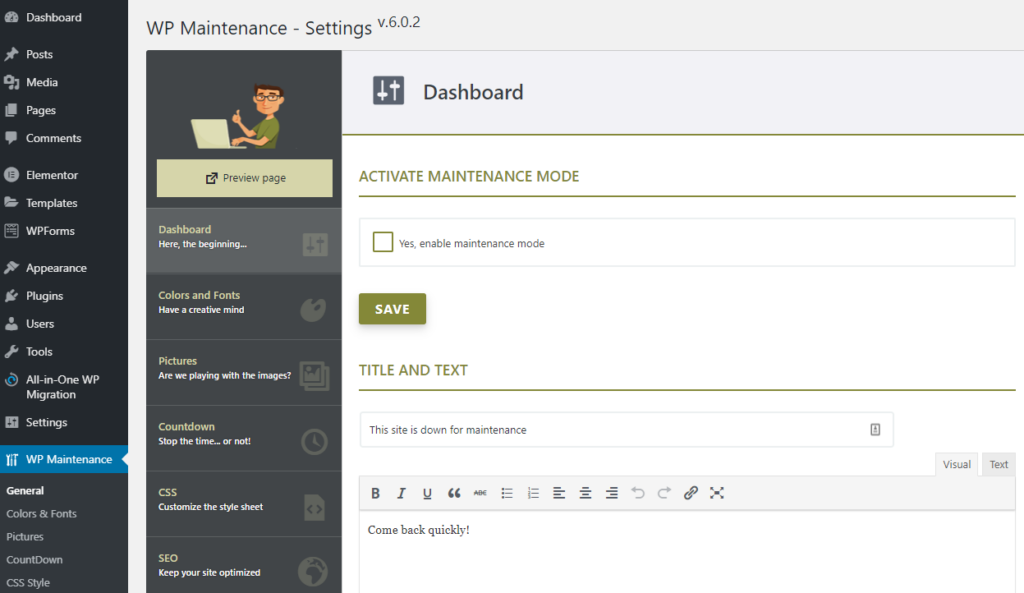
3. Using the WP Maintenance Mode Plugin
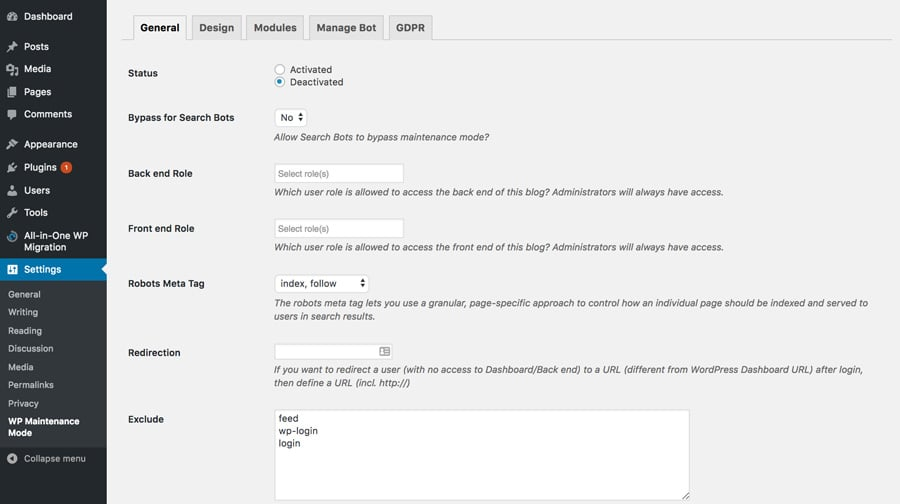
Download and install the WP Maintenance Mode plugin on your WordPress site. In the WordPress dashboard, navigate to Settings → WP Maintenance Mode. Here, you’ll find various tabs, such as General, Design, Modules, Manage Bot, and GDPR, where you can configure different settings. Activate the maintenance mode and customize the splash page by adding a title, heading, text, background color, and image. This plugin offers free customization options, but the interface may confuse some users.
Keep Reading: Impact of Chatbots on WordPress Websites
3. Using the WP Maintenance Plugin
Install and activate the WP Maintenance Plugin on your WordPress site. Customize the maintenance landing page by navigating through sections such as General, Colors & Fonts, Pictures, Countdown, CSS Style, SEO, Social Networks, Footer, and Settings. This plugin offers numerous customization options and is generally easy to use but requires a premium version.
Also Check: How To Remove Unused CSS In WordPress?
5. Using a Custom Function
Access the Appearance → Theme Editor section in the WordPress admin dashboard.
Navigate to the Theme Functions file and add custom code to activate the maintenance mode.
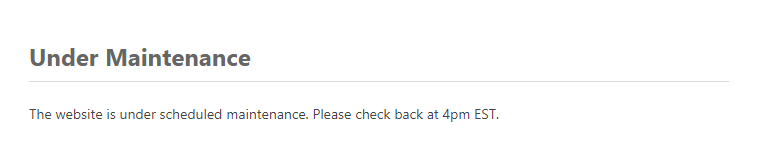
In the fourth line of the code, locate the wp_die function and the HTML code enclosed in parentheses. Modify the content of this HTML text to convey any desired message, such as “The site is currently undergoing maintenance. Please revisit after 4pm EST.”
Learn More: How to Convert HTML to WordPress Theme?
Edit the HTML message as per your requirements and update the file.
This method requires some coding knowledge but provides flexibility and extensive customization options.
Note: This approach involves modifying the functions.php file. We highly advise creating a backup of your WordPress site before proceeding.
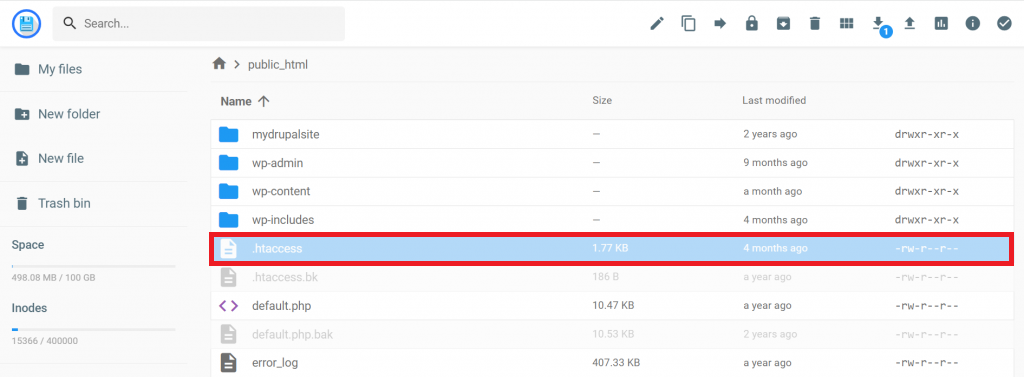
6. Using the .htaccess File
Create or upload a maintenance.html file containing your desired message. Locate the .htaccess file in the public_html directory of your WordPress installation and edit it to redirect all traffic to the maintenance.html file.
This method requires some technical knowledge but can be a good option if you’re comfortable editing files directly.
Further Reading: Outsourcing WordPress Maintenance Tasks to Maximize Efficiency
How Significantly Can WordPress Maintenance Mode Affect Your Site Performance?
WordPress maintenance mode can affect your site performance in specific ways. The primary purpose of maintenance mode is to allow updates and maintenance tasks to be performed without disrupting the user experience, aligned to user context-oriented design. Understanding how it can impact your site’s performance is still essential.
1. Activating maintenance mode will temporarily make your site inaccessible to visitors. If your site receives a lot of traffic, you could gain significant traffic during maintenance. However, this is usually a short-term issue, and your site should return to normal once maintenance mode has been deactivated.
2. Maintenance mode can also affect your site’s SEO. When your site is in maintenance mode, it returns a 503 HTTP status code to search engines, indicating that it is temporarily unavailable. This is generally not a cause for concern, as search engines understand that sites need maintenance and will typically re-crawl the site once maintenance mode is deactivated. However, if your site is in maintenance mode for an extended period, it could potentially harm your site’s ranking in search results.
Know More: Best WordPress SEO Plugins
3. The performance impact of maintenance mode depends on the specific method you use to activate it. For example, using a plugin to activate maintenance mode may impact performance differently than manually activating it through code.
Find Out More: White-label WordPress Support For Positive Client Experience
Finding Minute WordPress Woes Beyond Your Own Fixing Capability?
Get expert developers on standby, ready to fix the most nagging of issues with our WordPress support team.
How to Disable WordPress Maintenance Mode?
WordPress occasionally enters maintenance mode that temporarily disables website access for non-administrative users. This mode is typically activated when performing updates, installing plugins, or making significant changes to the site. While the maintenance mode is essential for ensuring a smooth transition during these processes, it’s crucial to disable it once the tasks are complete to restore full access to your website.
Follow these five simple steps to disable WordPress maintenance mode and get your site back online.
Step 1: Access Your WordPress Dashboard
Log in to your WordPress admin dashboard by navigating to your website’s URL and appending “/wp-admin” to the end (e.g., https://yourdomain.com/wp-admin). Enter your administrator credentials to gain access to the dashboard.
Step 2: Locate the “Coming Soon” or “Maintenance Mode” Plugin
If you’ve previously installed a plugin like “Coming Soon” or “Maintenance Mode” to enable maintenance mode, navigate to the “Plugins” section in your WordPress dashboard. Locate the plugin you used and deactivate it by clicking the “Deactivate” link beneath its name.
Read a Review: Elementor Vs SeedProd: Detailed Comparison
Step 3: Check for a Maintenance File
Sometimes, WordPress creates a temporary maintenance file during updates or plugin installations. To check for this file, access your website’s root directory via an FTP client or your hosting provider’s file manager. Look for a file named “.maintenance” and delete it if present.
Step 4: Clear Your Website Cache
After disabling maintenance mode, you must clear your website’s cache to ensure the changes are reflected immediately. If you’re using a caching plugin, locate the “Clear Cache” button within its settings and click it. Alternatively, you can clear your browser’s cache manually.
Also Check: How Server-Side Caching Improves Your WordPress Performance
Step 5: Test Your Website
Once you’ve completed the previous steps, visit your website’s homepage to verify that maintenance mode has been successfully disabled. If everything works correctly, your website should be accessible to all visitors.
Read More: WordPress Accessibility Guide: Compliance with WCAG Standards
How Do You Fix WordPress’s “Maintenance Mode Not Working”?
Sometimes, even after following the correct steps to enable maintenance mode in WordPress, you may encounter an issue where the maintenance mode seems to need to be fixed. This can be frustrating, especially if you’re trying to update or change your website without disrupting the user experience. Fortunately, you can take several troubleshooting steps to resolve this issue.
Step 1: Check for Plugin Conflicts
Plugins are a common cause of WordPress conflicts, including maintenance mode issues. Start by deactivating all site plugins except the maintenance mode plugin you use. This can help eliminate any potential conflicts caused by other plugins.
Step 2: Clear Browser Cache
If the maintenance mode isn’t working, try clearing your browser’s cache and cookies. Sometimes, your browser may display a cached version of your website, preventing the maintenance mode from appearing.
Step 3: Check File Permissions
Ensure that the maintenance mode plugin has the necessary file permissions to create and modify the maintenance file. The recommended permissions for WordPress files and directories are 644 for files and 755 for directories.
Step 4: Manually Create the Maintenance File
If the maintenance mode plugin isn’t automatically creating the maintenance file, you can create it manually. Navigate to your website’s root directory using an FTP client or file manager, and create a new file named “.maintenance” (without quotes) in the root directory. This file should be empty, but its presence should trigger maintenance mode.
Also Know: Difference Between SFTP And Shell Users
Step 5: Check for Server-Side Caching
If you’re using server-side caching, such as Varnish or Nginx, this could override the maintenance mode functionality. You may need to temporarily clear or disable the server-side cache to allow the maintenance mode to take effect.
Step 6: Disable and Reinstall the Plugin
If none of the above steps work, try disabling and reinstalling the maintenance mode plugin. Sometimes, a fresh installation can resolve any underlying issues with the plugin.
Discover: Best WordPress Caching Plugins
Conclusion
Putting your WordPress site into maintenance mode is just intelligent business hygiene. Whether updating plugins, migrating servers, or unveiling significant changes, temporarily offlining your site ensures your audience avoids partial products or unexpected downtime frustrations.
But who says maintenance mode has to be a bore? With some creative flair, that “under construction” page can be an engaging brand experience. Tease upcoming features, share behind-the-scenes sneak peeks, or inject whimsy with custom graphics and interactive elements. The options to surprise and delight your visitors are limitless.
From simple code tweaks to full-fledged plugins, customizing your maintenance mode has always been challenging – no matter your WordPress expertise. So ditch the drab “briefly unavailable” cop-out. A little thoughtful effort during downtimes keeps your audience hooked and primed for what’s next.
Because, at its core, meticulous maintenance keeps the WordPress engine purring for years. Embrace these periods as opportunities to refine your digital interaction. Your audience will appreciate the Polish you’ve lovingly applied to every aspect of their online experience with you.

