404 errors are one of the most common reasons visitors abandon a website. Because of 404 error pages, a website owner might also lose a lot of traffic and potential backlinks in addition to losing business. 404 errors can be caused by a variety of issues, including:
- Content on the webpage has vanished: This might happen when a server goes down, or a website is being transferred.
- Updating older blog entries: When individuals change the title of a blog post, they generally change the URL as well. Visitors who access your site using the old URL will be directed to a 404 error page.
In this post, we’ll go through different methods for fixing and redirecting 404 error pages.
Contents
ToggleWhat is a 404 Error?
A 404 error is a Hypertext Transfer Protocol (HTTP) standard response code. It occurs when a webpage is not found on the server, signaling to users that the requested page is missing or no longer available. This hiccup can result from deleted pages, broken links, or mistyped URLs. To address this, website owners must ensure a seamless user experience by fixing or redirecting 404 pages.
Variations of 404 Error Not Found
Error 404 Not Found is a standard HTTP response code indicating that the server couldn’t find the requested webpage. Variations of this error include:
- 404 Page Not Found: This variation is the most common form of the error, indicating that the server cannot locate the requested webpage.
- Error 404: A concise version of the error message, it is often accompanied by a generic explanation of the issue.
- 404 File or Directory Not Found: Specifies that the server couldn’t locate the specified file or directory, indicating a potential issue with the URL path.
- 404 Not Found: The Requested URL Was Not Found on This Server: A more detailed variation of the error message, this provides additional information about the server’s inability to locate the requested URL.
- HTTP 404: Not Found: This variation is commonly seen in browser error messages and logs. It indicates the HTTP protocol and the specific error code.
- 404 – Page Not Found: The Page You Are Looking for Might Have Been Removed, Had Its Name Changed, or is Temporarily Unavailable: A user-friendly version of the error, it offers possible explanations for why the requested page is unavailable.
- Error 404: We Couldn’t Find That Page: Some websites personalize their 404 error messages to maintain a consistent brand tone and provide a friendlier experience for users.
- 404 Not Found – Nginx: Specific to websites using the Nginx web server, this variation denotes that Nginx couldn’t locate the requested resource.
Understanding these variations helps users and web developers identify and address issues related to missing or inaccessible web content, facilitating a smoother troubleshooting process.
Read: Common WordPress Errors And How To Fix Them
Struggling with 404 Error on Your WordPress Website?
Don’t waste time trying to fix it yourself. Seek professional WordPress help and support for a quick and effective solution.
Take a Backup Before Troubleshooting 404 Errors
Before tackling 404 errors in WordPress, ensure you have a backup in place to safeguard your website’s data. Utilize tools like the BlogVault plugin, known for its user-friendly interface and one-click restoration options. Alternatively, consider managed WordPress hosting plans from providers like DreamHost. DreamHost offers quick backup and restore features directly through their control panel.
Furthermore, regularly schedule backups, store them in multiple locations for redundancy, and verify their integrity to ensure a seamless recovery process in case of troubleshooting complications.
Related: Best WordPress Backup Plugins
How to Fix or Redirect a 404 Error in WordPress?
Below, we will look at the different methods or ways to tackle these errors.
Find the Cause via Debugging
When encountering 404 errors in WordPress, start by enabling debugging to identify the root cause. Edit your wp-config.php file, setting define(‘WP_DEBUG’, true). This activates the debugging mode and displays error messages on your site. Inspect the messages to pinpoint issues with themes, plugins, or misconfigurations causing the 404 errors.
Clear Browsing Cache and Cookies
Cached files and cookies may lead to outdated or incorrect page information. Clear your browser cache and cookies to ensure you’re loading the latest version of your site. This simple step can often resolve 404 errors caused by browsers serving cached content.
Reset WordPress Permalinks
Incorrect permalink settings are a common culprit for 404 errors. In your WordPress dashboard, navigate to “Settings” > “Permalinks” and choose a different permalink structure. Save changes to reset permalinks. If this resolves the issue, you can switch back to your preferred structure.
Restore the .htaccess File
Restoring the .htaccess file in WordPress is crucial to resolving 404 errors caused by misconfigurations. Here are the steps to restore the .htaccess file:
- Access Your Site Files: Use an FTP client (such as FileZilla) or your hosting provider’s file manager to connect to your website’s server.
- Locate the .htaccess File: Navigate to the root directory of your WordPress installation. Look for the .htaccess file. Check your FTP client’s settings to display hidden files if it’s not visible.
- Backup the Current .htaccess File: Before making any changes, backup the existing .htaccess file. Download it to your local computer. This ensures you can revert to the previous state if needed.
- Delete or Rename the Current .htaccess File: Sometimes, the .htaccess file might be corrupted. You can either delete it or rename it to something like “.htaccess_backup”. This prompts WordPress to generate a new .htaccess file.
- Regenerate .htaccess in WordPress Dashboard: Log in to your WordPress admin dashboard. Go to “Settings” and select “Permalinks.” Without making any changes, click on the “Save Changes” button. This action triggers WordPress to regenerate the .htaccess file.
- Verify .htaccess Content: Open the newly generated .htaccess file and confirm that it contains the correct configurations. If you have specific settings needed for your site (such as redirects or custom rules), add them back to the file.
Check different pages on your website to ensure that the 404 errors are resolved. The restoration of the .htaccess file should eliminate issues related to incorrect configurations.
Disable WordPress Plugins and Themes
Deactivate plugins and switch to a default WordPress theme (like Twenty Twenty-One). Reactivate each plugin and theme one by one, checking if the 404 error reoccurs. This helps identify the specific plugin or theme causing the issue. Once identified, update or seek alternatives for problematic plugins or themes.
Change and Update WordPress URL in Database
If you’re experiencing 404 errors due to incorrect URL configurations, then here are the steps to update the WordPress URL in the database:
- Access Database via phpMyAdmin: Log in to your hosting account and find the phpMyAdmin tool. Select your WordPress database from the left sidebar.
- Open wp_options Table: Locate and click on the wp_options table in the database.
- Locate site URL and home Rows: Look for rows with the option_name ‘siteurl’ and ‘home.’ These typically represent your WordPress site’s URL settings.
- Edit Values: Click on the pencil or “Edit” icon next to the ‘siteurl’ and ‘home’ rows. Update the ‘option_value’ field with the correct URL.
- Save Changes: After updating the values, click the “Go” or “Save” button to save the changes.
Lastly, clear your browser’s cache to ensure it loads the updated URL. Next, check your WordPress site to confirm that the 404 errors are resolved.
Fix WordPress 404 Error on Local Servers
If your local server environment differs from your live server, it could lead to 404 errors. Discrepancies in PHP version, MySQL settings, file structures, and database configurations can also contribute to this issue. Here are the steps to resolve this issue:
- Check Local Server Configuration: Ensure your local server environment (e.g., XAMPP, MAMP) matches the configurations of your live server. Verify PHP version, MySQL settings, and other server parameters.
- Confirm File and Folder Structures: Check that your local server’s file and folder structures mirror those on your live server. Inconsistencies can lead to 404 errors.
- Verify Database Settings: Confirm that the local database settings match your live database’s. Pay attention to the database name, username, and password.
- Update Local WordPress URL: Access the local WordPress database using phpMyAdmin or a similar tool. In the wp_options table, locate the ‘siteurl’ and ‘home’ rows and update them with the correct local URL.
- Check .htaccess and Permalinks: Confirm that the .htaccess file on your local server is correctly configured. If it’s missing or corrupted, recreate it or copy it from your live server.
Verify and reset permalinks by going to the WordPress dashboard > Settings > Permalinks and clicking “Save Changes.” Restart your local server to apply the changes. Now, check your local WordPress site to see if the 404 errors are resolved.
Use Code to Redirect 404 Error Pages to the Homepage
Using this method you can create 301 redirects for all 404 pages to your homepage. To do so, log in to your server and navigate to the Public HTML folder or the folder containing your website files. You may also retrieve your website files by an FTP file application such as Filezilla. Logging onto the WordPress dashboard and going to Appearance > Theme Editor is another option.
Regardless of the technique you use, look for a file named 404.php, or build one if 404.php already does not exist, and add the following code to it:
<?php
header("HTTP/1.1 301 Moved Permanently");
header("Location: ".get_bloginfo('url'));
exit();
?>
Save the changes when you’re finished. When a 404 error occurs, website visitors will now be routed to the homepage.
Use Plugins for Redirecting or Fixing 404 Error Pages
This is the most effective technique to redirect or fix a 404 error page as won’t have to create a single line of code for the homepage and there are multiple options to manage redirects. It is recommended that you utilize a plugin to prevent making costly mistakes when developing code.
You may use a variety of plugins, including the following:
Redirection

With over one million active installs, Redirection is by far the most popular 404-page redirection plugin. It’s simple to use and includes several other features that we found to be quite appealing. You may, for example, send visitors who use a specific web browser to a particular page. Login status, Referrer, Cookies, HTTP headers, IP address, Server, and Page type – redirect if the current page is a 404 page – are among the various conditional redirects.
All 404 Redirect to Homepage
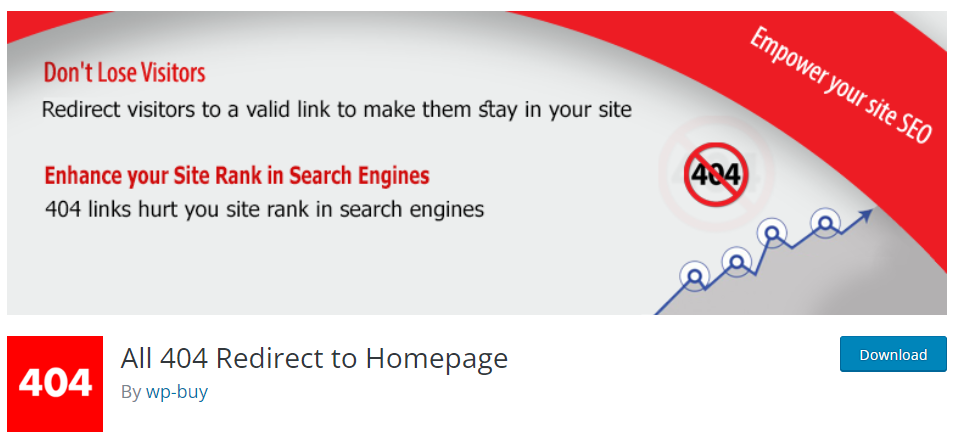
With over 200,000 downloads, All 404 Redirect to Homepage is one of the most famous 404 redirection plugins. It’s also the easiest to use because it automatically redirects all 404 pages to the homepage, unlike most other plugins that need you to set redirects for specific URLs.
301 Redirects – Easy Redirect Manager
Another plugin that makes it simple to generate 404-page redirects. It has a lot of features that make it one of the most incredible plugins to utilize. Install it from here. Installing and activating the Plugin is the first step. Let’s take an example of “All 404 redirect to homepage” plugin here.
Steps to Create Redirects for 404 Error Pages in WordPress
To begin, The All 404 Redirect to Homepage plugin will be installed initially. You may do so either by downloading it from WordPress.org or by going to Plugins > Add New in your WordPress admin panel and searching for the plugin. After you’ve finished installing the plugin, be sure to activate it.
- Adding Customizations to the Plugin: You’ll need to configure the plugin and define the redirection rules now that it’s installed and enabled. To do so, navigate to the Settings area of your WordPress website’s admin panel and click on All 404 Redirect to Homepage.
- This will bring you to the plugin’s Settings page. Here, select 404 Redirection Status from the dropdown menu, and to enable the plugin, choose Enabled.
- After that, you’ll be prompted to input your website’s homepage URL in the “Redirect all 404 pages to” area. Your homepage URL will be stored in the plugin. This area may be used to add any other custom URL.
- Once you’ve finished making your adjustments, click the Update Options button.
In this instance, all 404 pages will now redirect to the homepage. Test the modifications to ensure that everything is working correctly. You may do so by going to your website and typing in a URL that doesn’t exist.
Monitor Your WordPress Site For 404 Error Pages
Monitoring your website for 404 errors is essential for maintaining a positive user experience and ensuring that visitors can access the content they seek. Using the following tools, here’s how to monitor your site for 404 errors.
- Google Search Console: Google Search Console (GSC) provides a comprehensive report on crawl errors, including 404s. Add your site to Google Search Console and regularly check the ‘Coverage’ section for error details.
- Google Analytics: Utilize Google Analytics to monitor user behavior. Check the ‘Behavior’ > ‘Site Content’ > ‘All Pages’ section for pages generating 404 errors.
- Website Monitoring Tools: Use third-party website monitoring tools like Pingdom, UptimeRobot, or GTmetrix. These tools can send alerts when they detect 404 errors during routine site checks.
- Broken Link Checkers: Employ online broken link checkers such as Seahawk’s Broken Link Checker. This tool scans your entire website for broken links, including 404 errors.
- Screaming Frog: Use Screaming Frog – a comprehensive website crawling tool favoured by SEO professionals. Here, you can tailor crawls to focus on 404 error detection and resolution.
- Dead Link Checker: Dead Link Checker is a web-based tool designed to scan entire websites for broken links, including 404 errors. It provides detailed reports for efficient error resolution.
Also Read: 10 Most Common WordPress Errors: How To Fix Them?
404 Redirected Plugin (WordPress Plugin)
Introduction: 404 Redirected Plugin for WordPress automatically redirects visitors from error pages to relevant content, minimizing 404 errors. Key functionalities include:
- Automatic Redirection: Seamless redirection of visitors to relevant pages.
- Custom Redirects: Tailored redirection setup for specific error pages.
- Error Logging: Logging of encountered 404 errors for insights and analysis.
LinkMiner (Chrome Extension)
LinkMiner, a Chrome extension, facilitates on-the-fly link checking for broken links, including 404 errors, on visited webpages. Here’s how it assists:
- On-Page Link Checking: Real-time identification of broken links during browsing.
- Internal and External Link Detection: Detection of both internal and external 404 errors.
- Effortless Integration: Seamless integration into Chrome for instant link checking.
Ahrefs
Ahrefs is a multifaceted SEO tool offering a Site Audit feature for comprehensive website analysis, including 404 error detection. Key functionalities include:
- Site Audit: Thorough analysis to identify crawl issues, including 404 errors.
- Detailed Reporting: In-depth reports on detected errors with actionable insights.
- Competitive Analysis: Benchmarking against competitors to improve error resolution strategies.
Pingdom
Pingdom is a website monitoring service providing real-time alerts for various issues, including 404 errors, to ensure optimal performance. Key functionalities include:
- Real-Time Monitoring: Instant detection and alerts for 404 errors as they occur.
- Performance Reports: Detailed insights into error rates and response times.
- Alerting System: Customizable alerts via email or SMS for prompt error resolution.
How to Create Your Own “Error 404 Not Found” Page?
If you’re looking to personalize your website’s 404 error page, it’s a straightforward process. Here are two methods to accomplish this:
- Using the 404 Page Plugin: The 404 page plugin offers a user-friendly solution for crafting a custom error page. With its intuitive interface, you can quickly create and customize your 404 page to align with your website’s design and tone.
- Manual Setup: Manual setup is also an option for those who prefer a hands-on approach. Simply add a single line of code to your .htaccess file, directing the error to a specific page. Then, create this designated page, ensuring it provides relevant information and helpful navigation options for visitors encountering the 404 error.
Conclusion
In conclusion, resolving WordPress 404 errors demands a systematic approach. By addressing potential causes such as misconfigurations, URL discrepancies, and server issues, you can restore the functionality of their websites. Employing measures like debugging, cache clearing, and database updates ensures a comprehensive troubleshooting process. Regular backups and caution during file modifications are also vital safeguards.
Whether fixing permalinks, restoring the .htaccess file, or updating URLs, attention to detail and adherence to best practices can empower you to overcome 404 errors and maintain a seamlessly functioning WordPress site.
WordPress Website 404 Error FAQs
How do I get rid of 404 error pages?
To eliminate 404 errors in WordPress, start by checking and adjusting your permalinks in the WordPress dashboard under “Settings” > “Permalinks.” Ensure they are correctly configured. Additionally, review recently modified content, inspect server resources for limitations, and restore or regenerate the .htaccess file through the permalinks settings.
How do I change the 404 status in WordPress?
To change the 404 status in WordPress:
- Create a Custom 404 Page: Design a custom 404 error page to enhance user experience. Create a new page in WordPress, add your content, and save it.
- Set Custom 404 Page: Install a plugin like “404page” to assign your custom page as the 404 error page. Configure the plugin settings to designate your created page.
How do I get rid of soft 404 error in WordPress?
To eliminate soft 404 errors in WordPress:
- Check Content Relevance: Ensure that pages flagged as soft 404s contain relevant content. Google may interpret thin or irrelevant content as soft 404s.
- Update Content: Enhance the content on flagged pages, making it more substantial and valuable. Address any issues that might make search engines perceive the content as uninformative.
- Submit Sitemap to Search Engines: Submit an updated sitemap to search engines to facilitate crawling and indexing of your improved content.
Why is my WordPress site admin showing 404?
If your WordPress admin is displaying a 404 error, check the integrity of the .htaccess file in your WordPress root directory. Restore or regenerate it by saving permalinks in “Settings” > “Permalinks.”
Deactivate all plugins on your site and switch to a default theme to identify any conflicts. Verify correct file permissions and ensure the site URL in the WordPress database is accurate using phpMyAdmin. Update it if necessary to match the now correct page URL.
How do I redirect 404 errors in WordPress?
You can redirect 404 errors in WordPress using plugins like Redirection or by editing your site’s .htaccess file. Set up a 301 redirect to send users and search engines to a relevant page instead of displaying the 404 error.
Why are 404 errors bad for SEO?
404 errors can negatively impact SEO because they create a poor user experience and signal to search engines that your site may have outdated or broken content. More 404 errors can lead to higher rankings and increased organic traffic. It’s essential to fix them promptly to maintain a healthy website.
Can plugins cause 404 errors in WordPress?
Yes, plugins can sometimes cause 404 errors in WordPress, especially if they affect URL structure or generate dynamic content incorrectly. To troubleshoot, deactivate plugins one by one to identify the culprit, and then either update, replace, or remove the problematic plugin.


