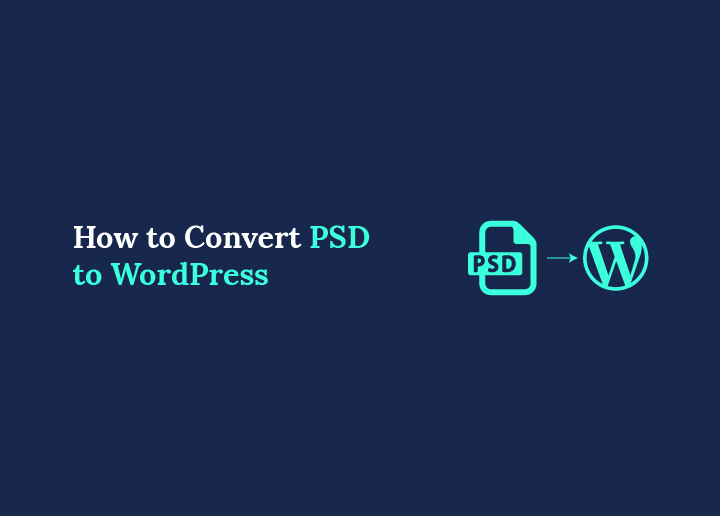
Converting a PSD file to WordPress means rebuilding a static Photoshop design as a fully functional, database-driven website. The process involves slicing the design, exporting assets, writing HTML and CSS that match the layout, and integrating that code into WordPress theme files.
This guide covers three conversion methods, realistic cost and timeframe estimates, the most common challenges, the right tools for each stage, and best practices that prevent the most expensive mistakes.
To convert a PSD to WordPress, export design assets from the PSD file, build the layout using HTML, CSS, and JavaScript, create a custom WordPress theme, integrate dynamic content using WordPress template files and functions, add essential plugins, and test the website across devices before launch. This process transforms a static design into a fully functional, responsive, and manageable WordPress website.
Benefits of PSD to WordPress Conversion
Converting a PSD design to WordPress gives you full ownership of the codebase, complete design control, and access to WordPress’s content management, SEO, and plugin ecosystem from day one.
 79")
Custom Design Implementation
Unlike using off-the-shelf WordPress themes, PSD to WordPress conversion lets you build a completely customized website from the ground up. Every element, from headers and navigation to buttons and icons, is crafted based on your exact design vision.
Pixel-Perfect Accuracy
One of the biggest advantages of this conversion process is achieving pixel-perfect accuracy. Skilled developers slice the PSD file and code it into HTML, CSS, and PHP in a way that mirrors the original design down to the finest detail.
Fonts, spacing, alignment, and visual elements are preserved in the final build, resulting in a close match to the original PSD file.
Responsive and Mobile-Friendly
Modern PSD to WordPress conversion incorporates responsive design techniques by default. This means your website will automatically adjust and perform optimally across different devices and screen sizes, desktops, laptops, tablets, and smartphones.
Responsive builds align with Google’s mobile-first indexing, which directly affects search rankings.
SEO-Friendly Structure
Converting PSD to WordPress gives you the opportunity to structure your website with clean, semantic code that’s favored by search engines. Proper heading tags, image alt attributes, optimized meta tags, and lightweight markup contribute to better crawling, indexing, and ranking.
Scalability and Flexibility
Once your site is live on WordPress, you’re backed by a powerful, scalable content management system. Adding new pages, posts, plugins, or even custom features becomes easy without altering your core code.
Adding new pages, posts, plugins, or custom features requires no changes to your core code once the initial build is complete.
Improved Performance
A properly executed PSD to WordPress conversion allows for performance optimization at every level. Developers can compress images, minify CSS and JavaScript files, and remove unnecessary bloat.
Faster load times directly reduce bounce rates and improve both user experience and search engine rankings.
PSD to WordPress Conversion: Video Tutorial
Watch the video tutorial below to see the full PSD to WordPress conversion process in action before working through the written methods.
Methods to Convert PSD to WordPress
Three methods cover the full range of technical skill levels and project requirements. Choose based on your coding ability, budget, and how closely the final site needs to match the original PSD design.
Method 1: Hire a Professional PSD to WordPress Service Provider
If you are looking for the “best” companies for PSD to WordPress conversion services, it may vary depending on individual needs and preferences. Below is the most reputable PSD to WordPress conversion service provider: Seahawk! Our team of experts can transform your static design into a dynamic WordPress website.
 80")
With our seamless PSD to WordPress conversion services, we aim to elevate your online presence and bring tailored solutions based on your design needs.
Having worked with top brands & getting their dream design transformed into top-notch WordPress websites, our team creates clean & error-free WordPress websites that resonate with our client’s needs.
Transform Static PSD Design to Dynamic WordPress Website at $499
Our WordPress experts will transform your PSD design into a responsive, powerful website that truly stands out.
Method 2: Using Figma and AI-Powered Plugins
If you’re tech-savvy, curious, or simply want more control over the design-to-development process, Figma + AI is one of the most exciting and evolving ways to convert PSD designs into a WordPress website. This semi-automated workflow bridges the gap between design and development, making the process faster, smarter, and more accessible, even without advanced coding skills.
 81")
Why This Method Works?
This method suits designers and developers who want to speed up the design-to-code workflow using AI-assisted tools. It reduces manual HTML and CSS writing, but still requires technical knowledge for the WordPress integration stage.
This method is perfect for designers who want to turn their ideas into reality quickly, developers looking to speed up front-end work, or agencies that want to offer more cost-effective services without compromising quality.
Step 1: Import the PSD File into Figma
Bring your Photoshop design into Figma using conversion tools. This step helps move from static layers to an editable, interactive design space.
Convert your PSD file to a Figma-compatible format using plugins such as PSD to Design, Photoshop Importer, or Codia AI. Before importing, clean up the PSD file by grouping related layers, labeling elements clearly, and removing unused assets. After importing, review the layout to confirm all elements, including typography, buttons, headers, and icons, are accurately translated.
Step 2: Clean, Organize, and Finalize Your Design in Figma
Refine your layout, group elements, and apply responsive rules. A well-organized Figma file ensures better performance when exporting to code.
Inside Figma, begin optimizing your design. Create reusable components for common elements like headers, navigation bars, and buttons. Use Figma’s auto-layout and constraints to make the design responsive. Double-check spacing, padding, alignment, and font sizes to match your original PSD’s pixel-perfect intent.
If your design will include hover effects or animations later, define those states within your file.
Step 3: Install and Launch the FigwebX Plugin
Use the FigwebX plugin to automate the export process. This AI-powered tool converts your design into clean front-end code and generates WordPress-ready structures.
After your design is ready, install FigwebX from the Figma plugin library. FigwebX is a powerful tool that converts your design into HTML, CSS, and optionally, WordPress-compatible code. Once the plugin is installed, select the artboard or frames you want to export. The plugin will analyze the structure and provide export options, such as raw code files or WordPress-friendly layouts. FigwebX is particularly valuable because it supports integration with page builders like Elementor or Gutenberg, offering flexibility depending on your WordPress setup.
Step 4: Export and Review the Code Output
Download the generated files and examine the code. Check for structure, responsiveness, and compatibility before moving forward.
Once you generate the code with FigwebX, export and unzip the package. Open the HTML and CSS files using a code editor like Visual Studio Code. Examine the folder structure, verify that image paths are correctly linked, and confirm that classes and IDs are semantically meaningful.
At this stage, some manual cleanup may be required, such as removing extra wrappers, consolidating classes, or restructuring divs. If you’re working toward integrating this into a WordPress theme, make sure to align the structure with how WordPress handles templates, such as the header, footer, sidebar, and content areas.
Step 5: Integrate the Code into a WordPress Theme
Bring your exported code into WordPress by creating or modifying theme files. This allows you to transform your static layout into a dynamic site.
To integrate your HTML/CSS output into WordPress, create a new theme folder in the /wp-content/themes/ directory of your local WordPress installation. You may also need to register widget areas and enqueue your CSS/JS files in functions.php.
Step 6: Final Cleanup and Launch
Complete final polish before going live. Ensure everything is clean, optimized, and user-ready.
Before deploying to a live server, remove unnecessary files and code fragments. Backup your theme and test it on a staging site first. Ensure that menus, widgets, forms, and page builders (if used) function as expected. Add Google Analytics and submit your sitemap to search engines.
Pros :
- Faster Design-to-Code Workflow: AI automates much of the HTML/CSS generation, speeding up the transition from static PSD to a WordPress-ready layout.
- Reusable, Scalable Components: Figma’s component-based design makes it easier to maintain consistency and reuse elements across pages, resulting in cleaner, more scalable code.
- Cost-Effective for Individuals and Small Teams: Ideal for solo designers or small businesses, no need to hire a full development team. Most plugins are low-cost or free.
Cons:
- Learning Curve for Beginners: New users may struggle with plugin setup, design preparation, and understanding export settings.
- Code Cleanup Often Required: AI-generated code isn’t always production-ready, you may need to clean, optimize, or refactor HTML and CSS manually.
- Limited for Complex WP Features: Advanced functionality like loops, dynamic content, or custom post types still requires manual development.
Method 3: Converting PSD to WordPress Using Page Builder
Page builders like Elementor, Beaver Builder, and Oxygen let you recreate a PSD layout visually without writing code. This is the most accessible method for non-developers and produces a responsive, editable result without manual theme development.
Converting a PSD (Photoshop Document) to WordPress using Elementor involves several steps. Here’s a step-by-step guide for PSD to WordPress conversion using Elementor:
Step 1: Prepare Your PSD and Set Up WordPress Locally
Organize your PSD file with clearly labeled layers and export all image assets. Install a local development environment with LocalWP or XAMPP, then set up a fresh WordPress installation for testing.
Step 2: Install a Starter Theme and Elementor
Install a lightweight starter theme such as Hello Elementor or Underscores as your base. Go to Plugins, Add New, search for Elementor, install, and activate.
Step 3: Create a Child Theme
Create a child theme to store all your customizations separately from the parent theme. This ensures your changes are not overwritten when the parent theme updates.
Step 4: Rebuild the PSD Layout in Elementor
Open the page editor with Elementor and rebuild your PSD design section by section using the drag-and-drop interface. Match fonts, colors, spacing, and layout to your original PSD file. Upload exported assets to the WordPress media library and reference them in the builder.
Step 5: Configure Dynamic Content, Menus, and Plugins
Set up navigation menus, configure dynamic content areas using Elementor’s dynamic content features, and install plugins for SEO, caching, forms, and security.
Step 6: Test, Optimize, and Launch
Test across devices and browsers using Chrome DevTools and BrowserStack. Run Google PageSpeed Insights and address Core Web Vitals issues before pointing your domain to the live server. Submit your sitemap to Google Search Console after launch.
PSD to WordPress: Cost and Timeframe Estimation
Cost and timeframe for a PSD to WordPress conversion depend on design complexity, number of pages, required functionality, and whether you hire a developer or build it yourself. Here are realistic estimates for each scenario.
Key Variables
Here are the key variables that influence cost & timeline:
- Design Complexity: The more intricate your PSD file, such as multiple layouts, animations, or custom graphics, the longer it takes to slice and convert into code.
- Functionality Requirements: Custom forms, animation effects, eCommerce features (e.g., WooCommerce integration), user accounts, or custom post types will add to both cost and timeline.
- Responsiveness: Designing for mobile, tablet, and desktop involves media queries and flexible layouts. The more screens you need optimized, the more development and testing hours are required.
- Cross-Browser Compatibility: Your site must perform consistently across major browsers (Chrome, Firefox, Safari, Edge). Developers use tools like BrowserStack to test and fix inconsistencies.
- Content Population: If the developer is responsible for entering your website content (text, images, blog posts), this will increase both costs and delivery time.
- Third-Party Integrations: CRMs, email marketing tools, chatbots, booking systems, and analytics integrations often require extra configuration.
- Post-Launch Support: Ongoing maintenance, WordPress training, and theme documentation add to the total cost but reduce the risk of post-launch issues on live sites
Typical Cost Ranges
Freelancers may offer lower rates, but agencies provide better scalability, team collaboration, and support.
| Project Type | Estimated Cost Range |
|---|---|
| Basic (few pages, static layout) | $499 to $699 |
| Standard (10–15 pages, basic functionality) | $999 to $2,999 |
| Advanced (eCommerce, custom features) | $3,999 to $15,000+ |
Typical Timeframes
Revisions, client feedback, or scope changes can increase the timeframe.
| Project Type | Estimated Timeline |
|---|---|
| Basic | 1-2 weeks |
| Standard | 3-6 weeks |
| Complex | 6 weeks to 3+ months |
Setting the Right Expectations with Your Developer
Before starting the project, discuss:
- Your goals and technical requirements
- Expected completion date
- Revision process and milestones
- Post-launch support
Add a 15-20% buffer to both cost and timeline estimates for complex projects. Scope changes, client feedback rounds, and unexpected compatibility issues consistently extend both.
Common Challenges in PSD to WordPress Conversion
These are the four challenges that cause the most rework and delays in PSD to WordPress projects. Understanding them before launch prevents most post-launch fixes.
Ensuring Pixel Perfection
Maintaining pixel perfection ensures the final website matches the original PSD design exactly. This requires meticulous attention to detail and thorough testing. Developers need to ensure that every element, from fonts and colors to spacing and layout, is accurately replicated.
Use a browser extension like PerfectPixel to overlay the original PSD design on the built page and check alignment at the pixel level before declaring a section complete.
Managing Responsive Design
Creating a responsive design that looks great on all devices requires careful planning and extensive testing. Ensuring that the website adapts seamlessly to different screen sizes can be challenging.
Developers must use flexible grid layouts, media queries, and responsive images to ensure the site looks good on desktops, tablets, and smartphones. Test on real devices in addition to browser emulation. Chrome DevTools device mode does not catch every mobile-specific rendering issue that appears on physical hardware.
Handling Browser Compatibility
Ensuring the website looks and functions correctly across different browsers involves thorough testing and adjustments. This guarantees a consistent user experience for all visitors. Different browsers can render the same code differently, leading to unexpected issues.
Test on Chrome, Firefox, Safari, and Edge at a minimum. Use BrowserStack for testing on browsers and operating systems you do not have access to locally. Safari on iOS requires particular attention as it renders CSS differently from Chrome-based browsers.
Integrating Custom Features
Adding custom features and functionalities to the website can complicate the conversion process. It requires advanced coding skills and thorough testing to ensure these features work as intended.
Custom post types, widgets, and plugins may need to be developed or integrated, and these should be thoroughly tested for compatibility and performance. Test custom post types, widgets, and third-party plugins in a staging environment before pushing to the live site. Plugin conflicts are significantly easier to resolve in staging than on a live site with active users.
Tools and Plugins for PSD to WordPress Conversion
Using the right tools and plugins can significantly streamline the PSD to WordPress conversion process. Here are some essential tools and plugins to help you achieve a seamless, efficient conversion.
Adobe Photoshop
Adobe Photoshop is essential for creating and slicing PSD files. It offers robust tools for designing web layouts, exporting assets, and ensuring the design elements are ready for the conversion process.
Photoshop enables designers to create detailed mockups that can be meticulously translated into a WordPress theme.
Elementor
Elementor is a powerful page builder plugin for WordPress. It allows for easy integration of PSD designs and provides a drag-and-drop interface for customization. Elementor is widely used for its flexibility and ease of use, enabling developers to create pixel-perfect websites.
Advanced Custom Fields (ACF)
Advanced Custom Fields (ACF) is a popular plugin for adding custom fields to WordPress. It’s useful for creating custom content types and managing dynamic content, allowing for greater flexibility in implementing the design as specified in the PSD file.
WPBakery Page Builder
WPBakery Page Builder is another popular page builder plugin. It offers a user-friendly interface and a wide range of customization options, making it easier to convert PSD designs into functional WordPress pages with minimal coding.
WP All Import
WP All Import is a plugin that helps import data from various sources into WordPress. It’s useful for importing content from PSD files and for efficiently managing large amounts of data, ensuring that the content accurately matches the design specifications.
Best Practices for PSD to WordPress Conversion
Following best practices can ensure a smooth and efficient PSD to WordPress conversion, resulting in a high-quality, functional website. Here are some key practices to keep in mind.
Use a Starter Theme
Using a starter theme like Underscores can simplify the conversion process. It provides a clean slate for customization and helps maintain clean code, making it easier to build a site that matches your PSD design.
Underscores and Hello Elementor are the most commonly used starter themes for PSD conversions. Both include minimal default styling that does not conflict with the custom CSS you will write to match the PSD design
Keep Code Clean and Organized
Organizing your code and keeping it clean is essential for maintainability. Use comments, follow coding standards, and avoid unnecessary complexity to ensure your website is easy to update and debug.
Clean and well-documented code helps other web developers understand and work on the project more efficiently. Adopting a consistent coding style also reduces the chances of errors and improves overall code quality.
Optimize Images and Assets
Optimizing images and other assets is crucial for performance. Use tools to compress images without losing quality and reduce file sizes, which will help improve loading times and overall site speed.
Efficient asset management ensures that your website loads quickly, providing a better user experience and improving SEO rankings. Additionally, consider using modern image formats like WebP for further optimization.
Test Thoroughly
Testing is a critical step in the conversion process. Test the website across different devices and browsers to ensure compatibility, responsiveness, and performance, and address any issues that arise.
Thorough testing helps identify and fix bugs before the website goes live, ensuring a smooth user experience. Use automated testing tools and manual testing methods to cover all aspects of functionality and design.
Conclusion
Converting a PSD to WordPress is a multi-stage process that rewards careful preparation at every step. The quality of your PSD file before you write a single line of code, the cleanliness of your HTML and CSS structure, and the thoroughness of your testing before launch determine the quality of the final result more than any single tool or method.
Choose the conversion method that matches your technical skill and project requirements. Use a professional service for complex builds where accuracy is non-negotiable. Use the Figma and AI method to accelerate front-end development on mid-complexity projects. Use a page builder for straightforward layouts where speed matters more than custom code control.
FAQS About PSD to WordPress Conversion
What is PSD to WordPress conversion?
PSD to WordPress conversion is the process of rebuilding a static Photoshop design as a functional WordPress website. It involves exporting design assets, writing HTML and CSS that replicates the layout, and integrating that code into WordPress theme files using PHP. The result is a responsive, database-driven site that can be managed through the WordPress dashboard.
How long does it take to convert a PSD to WordPress?
A simple single-page conversion takes two to five days. A multi-page site with custom functionality takes two to six weeks. Design complexity, the number of pages, and the number of revision rounds all affect the timeline.
How much does a PSD to WordPress conversion cost?
Basic single-page builds cost $499-$700. Standard multi-page sites cost $1,000 to $3,000. Complex builds with ecommerce or custom integrations cost $4,000 to $15,000 or more.
Do I need coding skills to convert PSD to WordPress?
Yes for manual conversion. HTML, CSS, and PHP are required. If you use Elementor, you can recreate the layout without coding, but basic PHP template files are still needed for the WordPress integration layer.
What is the best method to convert PSD to WordPress?
Manual coding produces the cleanest output. The Figma and AI method speeds up front-end development. A page builder suits non-developers who need a fast visual approach. Choose based on your technical skill and how precisely the final site needs to match the original design.
What file formats should I export from Photoshop before starting?
Export photographs as WebP or PNG, and logos and icons as SVG; avoid JPEG for images containing text or sharp edges. Organize all assets into clearly named folders before starting the HTML and CSS stage.