In our previous blog, we covered how to convert Figma to WordPress. So, taking a step forward, here’s a guide on converting Figma to HTML. While WordPress is great for dynamic content management systems, sometimes you need the simplicity and flexibility of a static HTML site.
Plus, with HTML, you have complete control over your website’s structure and design. In this article, we’ll explore three simple methods to seamlessly transition your Figma designs into fully functional HTML websites.
Contents
ToggleOverview of Figma and HTML
Primarily, Figma is used for designing digital interfaces, while HTML is used for structuring and displaying those designs on the web. Combining the two allows designers to bring their Figma designs to life as functional HTML websites. Here’s a brief overview of both:
- Figma is a popular web-based design tool designers and teams use to create user interfaces, prototypes, and collaborative design projects. It offers various features for creating and editing designs, including layout tools, vector drawing capabilities, and real-time collaboration.
- HTML (HyperText Markup Language), on the other hand, is a standard markup language used for creating web pages. It helps define the structure & content of a web page using a system of tags and attributes. It provides the foundation for displaying content on the web, including text, images, links, and multimedia elements.
Read: How to Convert HTML to WordPress Theme
Importance of Converting Figma Designs to HTML for Web Development Projects
Converting Figma designs to HTML is crucial for web development projects due to several reasons, such as:
- Preservation of Design Integrity: Converting Figma to HTML ensures that the original design vision is accurately translated into the final website, maintaining visual consistency and fidelity.
- Responsive Design Implementation: HTML allows for the integration of responsive design principles, ensuring that the website adapts and displays optimally across various devices and screen sizes.
- Enhanced User Experience: By converting Figma designs to HTML, web developers can implement interactive elements, animations, and user-friendly functionalities that enhance the overall user experience.
- Search Engine Optimization (SEO): HTML websites are easily crawled and indexed by search engines, which makes it easier for users to discover the website through organic search results.
- Performance Optimization: Hand-coding Figma designs into HTML allows developers to optimize website performance by minimizing unnecessary code, optimizing images, and implementing efficient loading techniques.
- Integration with Backend Systems: HTML is the foundation for integrating frontend designs with backend systems and databases, enabling dynamic content generation and user interaction.
- Accessibility Compliance: HTML provides the necessary structure for implementing accessibility features. This ensures that the website is usable by all individuals, even those with disabilities, and compliant with accessibility standards.
Know more: Figma to Gutenberg: Comprehensive WordPress Conversion Guide
Things You Need Before Figma to HTML Conversion
Gathering key resources and preparing adequately before starting the Figma to HTML conversion process is important. This will help you streamline the process and ensure a successful design-to-development transition.
- Figma Design Files: Firstly, ensure you can access the Figma design files containing the layouts, assets, and styles that need to be converted to HTML. These files serve as the blueprint for the website’s design.
- Style Guide and Design Specifications: You also need a comprehensive style guide or design specifications document that outlines the typography, colors, spacing, and other design elements used in the Figma designs. This document will be a reference for maintaining design consistency during the conversion process.
- Development Tools: Set up the necessary development tools, including a code editor and web development frameworks or libraries that you plan to use for building the HTML website.
Related: Essential Web Development Tools Every Website Developer Needs
- HTML and CSS: Familiarize yourself with HTML and CSS (Cascading Style Sheets). Understanding these languages are essential for accurately translating Figma designs into HTML code.
- Responsive Design Considerations: Plan for responsive design implementation to ensure the HTML website looks and functions seamlessly across desktops, tablets, and smartphones.
- Optimization Techniques: Familiarize yourself with optimization techniques for improving website performance. These techniques help enhance the speed and efficiency of the HTML website.
- Accessibility Standards: Consider accessibility standards and guidelines to ensure that the HTML website is accessible to users with disabilities.
Know more: accessiBe Review: Best Solution for Web Accessibility and ADA Compliance
Methods for Figma to HTML Conversion
There are several methods available to seamlessly translate your Figma designs into HTML websites. Let’s explore three popular methods that will help you bring your designs to life.
Method 1: Choose a Service Provider for Figma to HTML Conversion
At Seahawk, we specialize in converting Figma designs into pixel-perfect, responsive HTML websites. Our unique methodology and quality-assured services ensure that your designs are transformed into stunning, secure websites.

Why Choose Us?
Choose Seahawk for top-notch Figma to HTML conversion services as we offer project managers and dedicated quality assurance.
- Our experienced team has handled numerous projects over the years, delivering bug-free, high-quality HTML code.
- We prioritize pixel-perfect conversion, lightweight and fast-loading code, meticulous cross-browser testing, and adherence to industry best practices.
- We offer white-label development solutions and SEO-optimized code for improved search engine rankings.
Figma to HTML Conversion Process
Our Figma to HTML conversion process is quite straightforward:
- Place Your Order: Simply provide us with your Figma design files and project requirements, and we’ll take care of the rest.
- Development: Our skilled developers will meticulously convert your static Figma designs into HTML markup, ensuring a fully functional and responsive web page.
- Testing: We thoroughly test your website across all modern browsers, platforms, and devices to ensure compatibility and optimal performance.
- Delivery: You’ll receive your HTML website within the agreed deadline, which is ready to be deployed on your hosting platform.
- Post-Launch Support: We offer ongoing support to address any questions/issues you may encounter after the delivery.
Transform Figma Designs Into Pixel-perfect HTML Websites
Don’t let your vision remain static – take the next step towards an interactive and engaging website with Seahawk.
Method 2: Manually Convert Figma Designs to HTML Website
Manually converting Figma designs to an HTML website involves a hands-on approach where developers translate the design elements into HTML and CSS code. Here’s a detailed overview of the process:
Study Figma Designs
Begin by thoroughly studying the Figma designs to understand the layout, typography, fonts, colors, images, and other design elements. Take note of any interactive components or animations that need to be implemented.
Create HTML Structure
Use a text editor (Sublime Text) or integrated development environment (IDE) to build the HTML structure based on the Figma designs. Begin with the basic layout elements such as header, navigation, content sections, and footer.
Translate Design Elements
Manually translate each design element from Figma into HTML code. This includes text content, images, buttons, forms, icons, and any other visual components. Pay attention to the positioning, styling, and responsiveness of each element.
Implement CSS Styling
Once the HTML structure is in place, apply CSS styling to make the design visually appealing and consistent with the Figma designs. Use CSS rules to define colors, fonts, margins, padding, borders, and other visual properties.
Responsive Design
To ensure the HTML website is responsive, use CSS media queries to adjust the layout and styling based on different screen sizes and devices. Test the website’s responsiveness by resizing the browser window or using device simulators.
Optimize for Performance
Optimize the HTML and CSS code for performance by minimizing file sizes, reducing HTTP requests, and optimizing images. This helps improve the loading speed and overall performance of the website.
Test Across Browsers and Devices
Test the HTML website across various browsers (such as Chrome, Firefox, Safari, and Edge) and devices to ensure compatibility and consistent rendering.
Debug and Refine
Debug any issues or inconsistencies that arise during testing and refine the HTML and CSS code as needed. Pay attention to details such as browser-specific quirks, cross-browser compatibility, and accessibility considerations.
Finalize and Deploy
Once the HTML website is thoroughly tested and refined, finalize the code and prepare it for deployment. Upload the files to a web hosting server or deploy them using a content management system (CMS) or website builder.
Also read: Ultimate WordPress Coding Standards Guide: Essential for Developers
Method 3: Convert Figma to HTML with Plugins
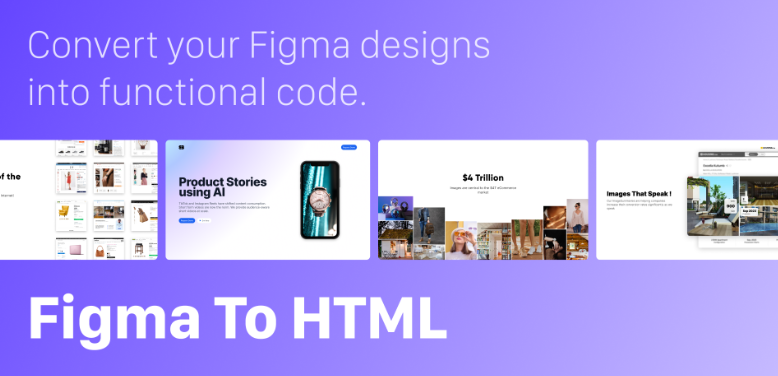
Figma to HTML plugins offer an automated approach to convert Figma designs into HTML code. These tools aim to streamline the conversion process and minimize manual effort. Here’s a detailed overview of how they work:
Select a Plugin
Research and select a suitable Figma to HTML plugin or online conversion tool. Various options are available, each with its own features, pricing, and compatibility. Two popular options are:
- Figma to HTML: This plugin allows you to export your Figma designs directly into HTML code. It offers customizable export settings, including options for responsive design and CSS styling. Figma to HTML streamlines the conversion process and helps maintain design fidelity.
- Figma to HTML by Zeplin: Zeplin offers a Figma plugin that enables you to seamlessly export your Figma designs into HTML code. It provides detailed documentation, support, and customization options for optimizing the output HTML code for responsiveness and compatibility.
Integration with Figma
Install the chosen plugin directly into your Figma account or access the online conversion tool through a web browser. Ensure that the plugin or tool is compatible with your Figma workspace and version.
Exporting Figma Designs
With the plugin or online tool installed, select the Figma designs or specific frames that you want to convert to HTML. Follow the instructions provided by the plugin or tool to export the designs.
Conversion Process
The plugin or online tool will automatically analyze the selected Figma designs and generate the corresponding HTML code. This process may involve parsing the design elements, extracting CSS styles, and generating HTML markup.
Customization Options
Depending on the plugin or tool, you can customize the output HTML code. This could include adjusting settings for responsive design, specifying CSS classes, or configuring export preferences.
Preview and Validation
Once the conversion process is complete, preview the generated HTML code to ensure accuracy and fidelity to the original Figma designs. Validate the HTML markup against web standards and best practices.
Download or Integration
After reviewing the HTML output, download the files directly from the plugin or online tool. Alternatively, integrate the generated HTML code into your existing web development workflow or content management system like WordPress.
Post-Conversion Adjustments
While plugins and online tools aim to automate the conversion process, it’s common to require post-conversion adjustments. This may involve fine-tuning the CSS styling, optimizing the layout for responsiveness, or addressing discrepancies between the Figma designs and the generated HTML code.
Testing and Deployment
Test the converted HTML code across browsers and devices to ensure compatibility and responsiveness. Once satisfied, deploy the HTML code to your web hosting server or content management system for public access.
Note: These tools can be handy for projects with tight deadlines or when manual conversion is impractical. However, it’s important to carefully evaluate each tool’s features and limitations to ensure compatibility with your specific requirements and workflow.
Conclusion
Converting Figma to HTML opens up a world of possibilities for bringing your designs to life on the web. Whether you manually code your designs, utilize plugins, or leverage online conversion tools, each process empowers you to seamlessly transition from design to development.
Just ensure to adhere to best practices, maintain design fidelity, and optimize for responsiveness and performance. This will help you create stunning, functional websites that captivate users and deliver exceptional digital experiences.
Also, while there are various conversion methods available, hiring a professional like Seahawk can ensure seamless execution and optimal results. Whether it’s crafting responsive layouts, optimizing performance, or adhering to industry standards, professionals can bring expertise to every aspect of the conversion journey.
Figma to HTML FAQs
Can I convert my Figma to HTML?
Can you turn Figma into a website?
Absolutely! Figma designs can be transformed into fully functional websites by converting them into HTML code, which forms the backbone of web development.
How do I convert Figma to code?
You can convert Figma designs to code by either manually coding the HTML and CSS based on the design or utilizing plugins and online conversion tools.
Can Figma replace HTML?
Figma is a design tool that creates user interfaces and prototypes, while HTML is a markup language. Figma can complement HTML by providing design mockups but cannot replace HTML in website development.
Can you use HTML in Figma?
Figma primarily focuses on design and prototyping, so you cannot directly use HTML within the Figma interface. However, you can export Figma designs as assets or images and then use HTML to implement those designs into functional websites.


