Editing the WordPress footer is a straightforward task. It lets you personalize your website’s bottom section, adding your own touch to the overall website design and functionality. The footer, which is often overlooked, plays a crucial role in providing essential information, navigation links, and copyright details. It’s also the last thing visitors see before leaving your site, which makes it a prime space to display information that reinforces your brand image.
Whether you want to add custom text, links, or design elements, WordPress makes it easy for users to customize the WordPress footer effortlessly. So, here are the five simple methods to edit the footer in WordPress to match your brand and enhance the professional appearance of your website.
Contents
ToggleUnderstanding the WordPress Footer
The WordPress footer is the bottommost section of a website, appearing on every page. It typically consists of various elements, including copyright information, links to important pages, and sometimes additional widgets or credits.
From a design perspective, the footer offers balance and completeness to the overall layout of a webpage. Functionally, it provides users with quick access to essential information such as contact details, privacy policies, and terms of service. Additionally, it can be a space to showcase social media links, recent posts, or other relevant content.
By understanding the WordPress footer, website owners can leverage this space effectively. They can use this space to convey brand identity, enhance user engagement, and ensure a professional appearance across all site pages.
Read: Benefits Of Custom WordPress Website Design
Don’t Settle For A Generic One-size-fits-all Website Footer
Let our WordPress developers help you customize it with eye-catching design, social media links, and more!
Simple Methods to Edit the Footer in WordPress
Here are some simple methods to make your WordPress website footer’s bottom section uniquely yours. These methods will empower you to effortlessly shape and refine your WordPress footer. So, let’s check out the process of editing the footer in WordPress.
Method 1: Editing the Footer Using WordPress Customizer
By utilizing the WordPress Customizer, you can effortlessly edit the footer content, tailor it to your preferences, and ensure a cohesive & branded appearance throughout your site.
Step 1: Navigate to the WordPress Customizer
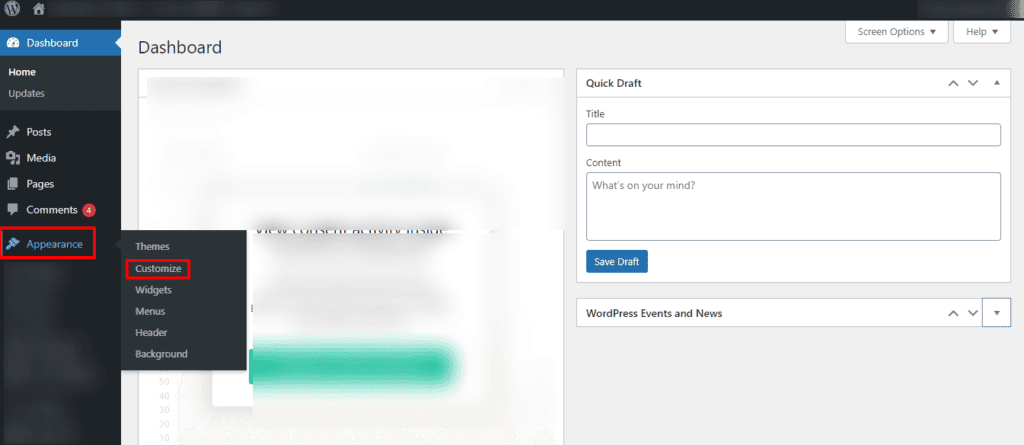
Begin by logging into your WordPress dashboard. From there, locate the “Appearance” tab on the left sidebar and click on “Customize.” This action will open the WordPress Customizer, a powerful tool for modifying various aspects of your site.
Step 2: Access the Footer Section
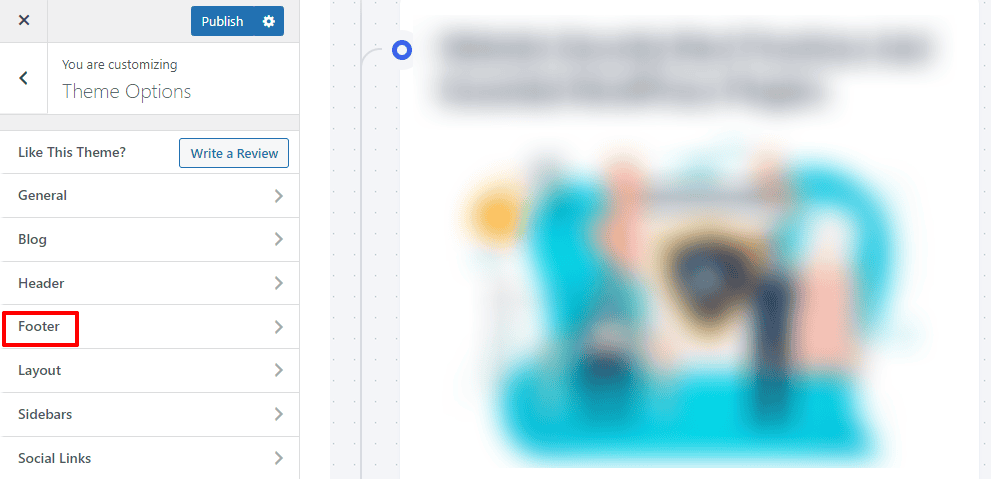
Within the Customizer, look for the “Footer” option. The exact placement may vary depending on your theme. Click on it to reveal a range of customization options, such as footer text, copyright information, and widget areas.
Step 3: Edit Footer Text and Copyright
Here, you can directly modify the text displayed in the bottom footer bar. For example, replace the default copyright text (powered by WordPress) with your own by including essential information like your business name and the current year.
2023 Your Website Name. All Rights Reserved.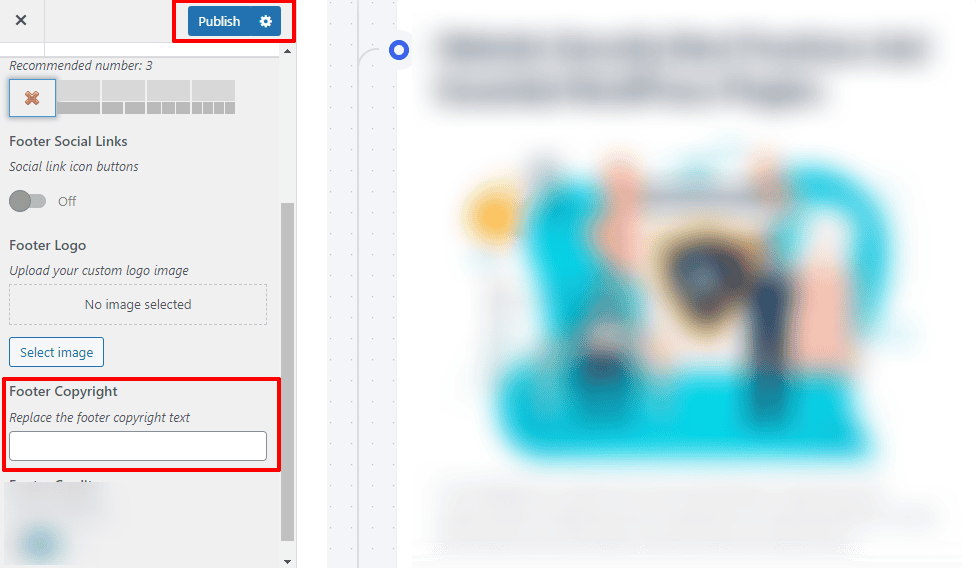
Step 4: Save Changes
After making the desired edits, click the “Publish” button to save your changes. This ensures that the updated footer information is now visible across your entire website.
Method 2: Editing the Footer Using Code
Editing the footer through code provides more granular control over the footer credit, its appearance, and content. It allows for advanced customization beyond what the WordPress Customizer may offer.
Step 1: Access the WordPress Theme Customizer/Editor
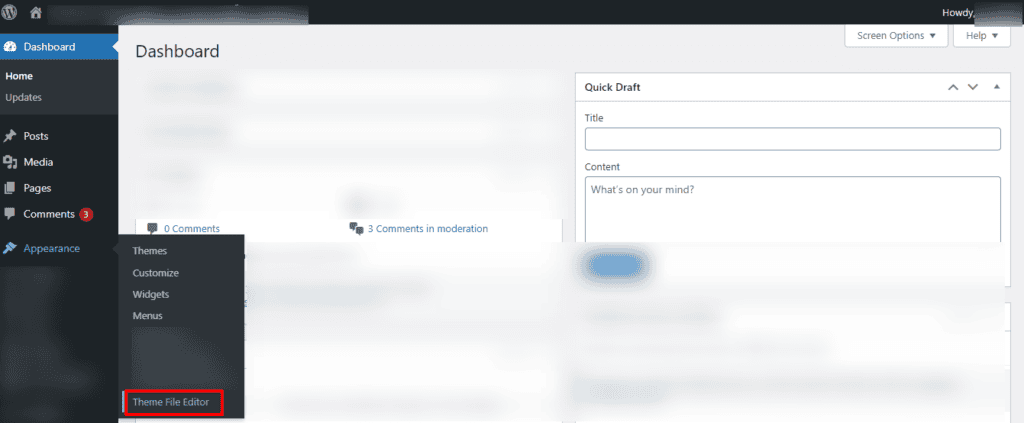
To edit the footer using code, navigate to your WordPress dashboard’s “Appearance” tab. Select “Theme Editor.” Here, you’ll find a list of theme files on the right. Locate the “footer.php” file, which controls the content of your footer.
Step 2: Locate and Modify the Footer Code
Within the “footer.php” file, look for the code section responsible for displaying the footer content. This can vary based on your theme but is often marked with HTML tags.
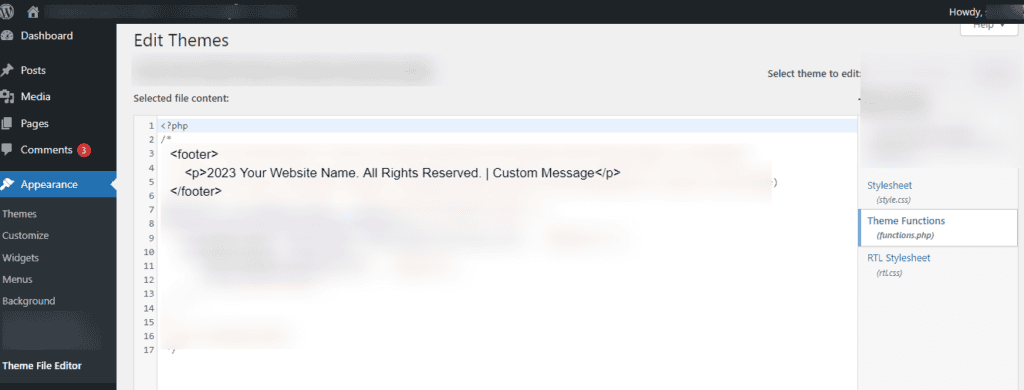
Once you locate it, add a custom message to remove the powered by WordPress footer credit:
<footer> <p>2023 Your Website Name. All Rights Reserved. | Custom Message</p></footer>Step 3: Save Changes
After making modifications, save your changes by clicking the “Update File” button in the Theme Editor. Keep in mind that direct code edits should be approached with caution. It’s also advisable to have a backup of your theme before making any alterations.
Method 3: Editing the Footer Using WordPress Widgets
Using widgets for footer customization is user-friendly and doesn’t require coding skills. It’s a versatile approach, allowing you to add various footer elements and functionalities to the bottom section of your website. Footer blocks can also help enhance your WordPress website’s visual appeal and functionality.
Step 1: Go to the Widgets Section
Begin by navigating to the “Appearance” tab in your WordPress dashboard and selecting “Widgets.” Here, you’ll see a list of available widget areas for your theme; the footer widget is often one of these areas.
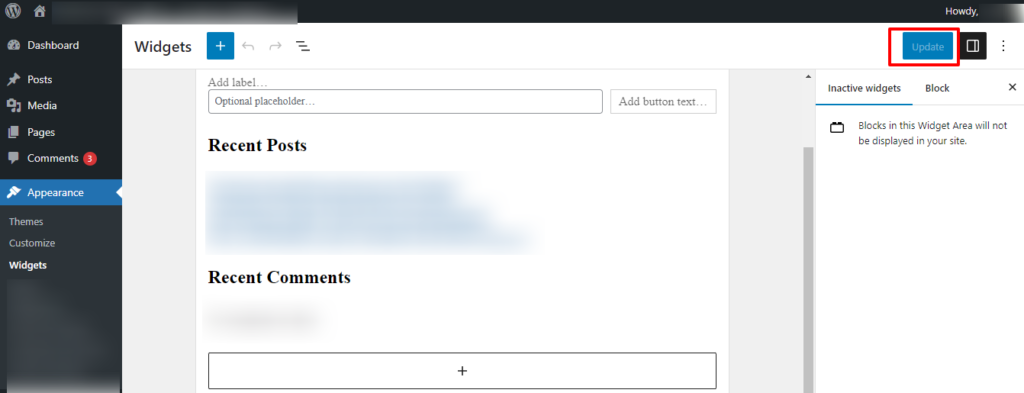
Step 2: Locate the Footer Widget Area
Find the widget area that corresponds to your theme footer. It might be labeled as “Footer,” “Footer 1,” “Footer 2,” etc., depending on your theme. Drag and drop the desired widgets into the footer widget areas.
Step 3: Add and Configure Widgets
Choose widgets that suit your footer area needs. For example, to add a custom text widget with your copyright information:
- Drag the “Text” widget to the footer area.
- Enter your copyright text in the widget’s content field.
2023 Your Website Name. All Rights Reserved.Depending on your site’s goals, you can also add other widgets like a recent posts widget, social media icons, or a newsletter signup form.
Step 4: Save Changes
Once you’ve configured the widgets to your liking, click the “Save” or “Update” button to apply the changes. Your footer will now display the selected widgets with the provided content.
Read: Best WordPress AI Plugins To Improve Your Site
Method 4: Editing the Footer Using WordPress Plugins
Using plugins for footer customization provides a convenient and code-free method to tailor the bottom section of your website. It’s particularly helpful for users who prefer a streamlined approach without delving into theme files or coding. Explore various footer customization plugins to find the one that best suits your needs and enhances your WordPress site’s visual and functional aspects.
Step 1: Install a Footer Customization Plugin
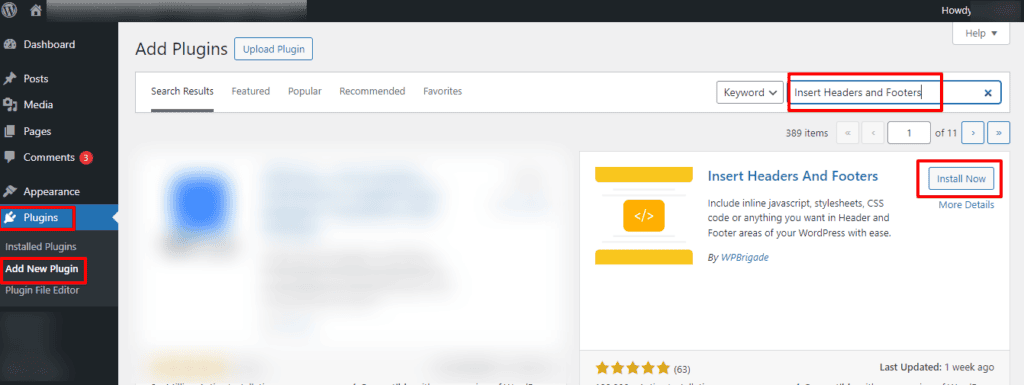
Begin by navigating to the “Plugins” section in your WordPress admin dashboard. Click on “Add New.” Search for a footer customization plugin. One popular footer builder option is Insert Headers and Footers plugin. Click “Install Now” and “Activate” the plugin.
Step 2: Access the Plugin Settings
Once activated, locate the plugin in your WordPress dashboard, often under “Settings” or with its own menu item. In the case of “Insert Headers and Footers,” you’ll find it under “Settings” > “Insert Headers and Footers.”
Step 3: Insert Custom Footer Code
Within the plugin settings, find the section where you can add custom code to the footer. This might be labeled as “Footer” or “Scripts in Footer.” Input your desired custom HTML or JavaScript code.
For example, to add a custom copyright notice instead of powered by WordPress:
<footer>2023 Your Website Name. All Rights Reserved.</footer>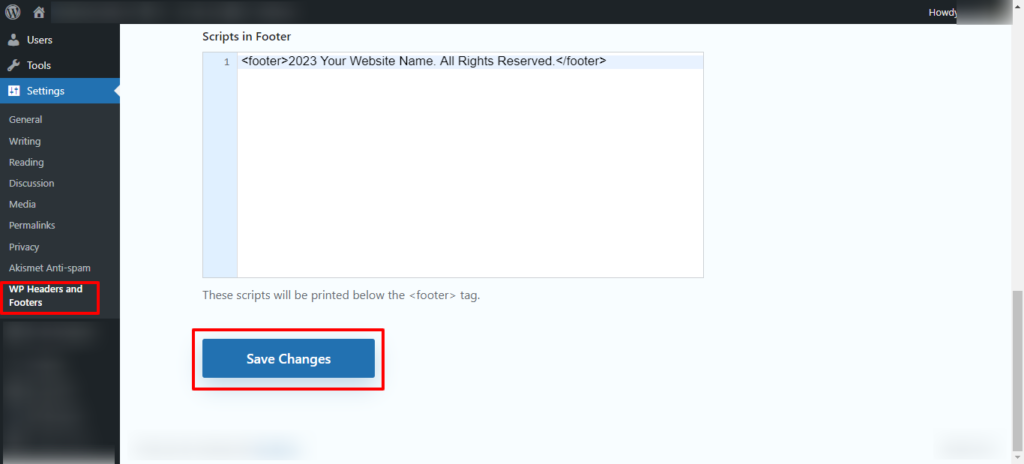
Step 4: Save Changes
After inserting the custom WordPress footer code, save the changes. The plugin will now inject your custom footer code across all WordPress site pages.
Method 5: Editing the WordPress Footer With Elementor
Elementor provides a visual & intuitive interface to edit the footer in WordPress, making it easy for users with varying levels of technical expertise. With a simple drag-and-drop editor, Elementor empowers you to design a personalized and professional-looking footer that seamlessly integrates with the rest of your WordPress website.
Step 1: Install and Activate Elementor
Begin by ensuring you have the Elementor plugin installed and activated on your WordPress site. You can find Elementor in the WordPress repository and install it from the “Plugins” section.
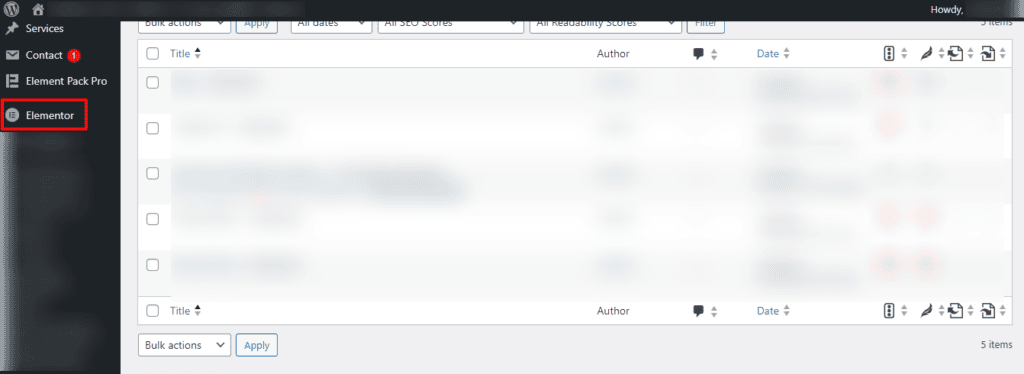
Step 2: Edit Footer With Elementor
After activating Elementor, go to the page where you want to edit the footer. Click the “Edit with Elementor” button to launch the Elementor editor.
Step 3: Add a Footer Section
Within the Elementor editor, look for the “+” icon to add a new section. Choose the structure that suits your footer layout. You can also drag & drop widgets into this section to customize the content.
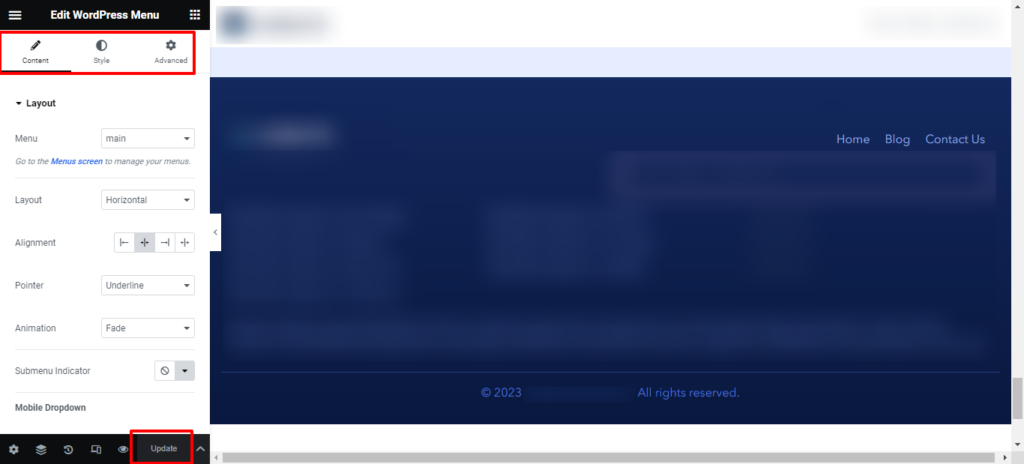
Step 4: Customize Footer Widgets
Drag widgets like “Text Editor” or “HTML” into the footer section to add custom content. For example, to include a copyright notice:
2023 Your Website Name. All Rights Reserved.You can also use other Elementor widgets to add columns, images, buttons, or any other elements you desire.
Step 5: Save Changes
Once you’ve customized the footer to your liking, click “Update” to save your changes. Elementor will apply the edited footer across your site.
Learn: Elementor Vs SeedProd: Detailed Comparison
Remove the WordPress Footer Entirely
Removing the entire footer can impact your site’s usability and may not be recommended, especially if it contains essential information or links. Before making such changes, carefully consider the implications and ensure they align with your website’s design and user experience goals. Always create backups before editing theme files, and be aware that removing certain elements may violate theme licensing or WordPress usage principles.
Method 1: Theme Customization Options
Log in to your WordPress dashboard. Navigate to “Appearance” and then “Customize.” Look for a section related to the footer or copyright information. Some themes offer an option to disable or customize the footer. If available, use this option to hide the footer.
Method 2: Custom CSS
Go to “Appearance” in the WordPress dashboard and then “Customize.” Look for the “Additional CSS” or similar option. Add the following CSS code:
.footer { display: none;}This CSS code targets the element with the class “footer” and hides it.
Method 3: Editing Theme Files
Go to “Appearance” in the WordPress dashboard and then “Theme Editor.” Find and open the “footer.php” file. Remove the entire section that contains the footer content. Save your changes after editing the theme files.
Note: Proceed with caution and create a backup before making changes.
Method 4: Using a Plugin
There are plugins available that allow you to manipulate the footer content. Install the plugin, go to “Settings” > “PHP Inserter,” and add the following code:
remove_action('wp_footer', 'wp_footer');Read: The 3 Vital Footer Links You Need For Your Website
Website Footer Design Best Practices for WordPress Website
Designing an effective and aesthetically pleasing footer is essential for providing a positive user experience on your WordPress website. Here are some best practices to consider when designing your website footer area:
Essential Information and Clear Navigation

Include important information such as contact details, address, and social media links. This ensures users can easily connect with you and find additional resources. You can also implement a concise secondary navigation menu in the side footer menu. This helps users quickly access important pages, especially if they haven’t found what they were looking for in the main menu.
Design Consistency
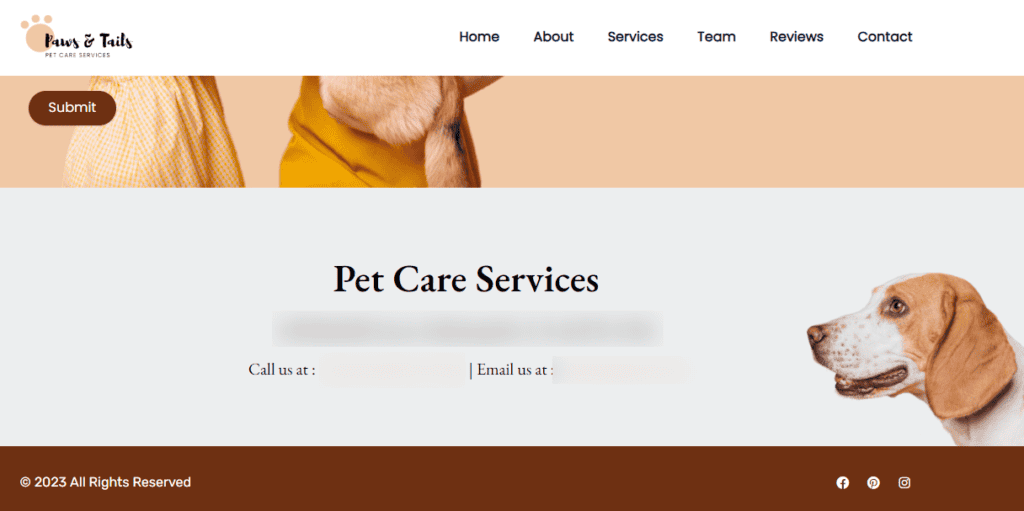
Maintain design consistency with the rest of your website. Use the same color scheme, fonts, and styling to create a cohesive and polished look. Also, ensure your footer area is responsive. Meaning, it adapts well to various screen sizes and devices. Test its appearance on both desktop and mobile devices to guarantee a seamless experience for all users. Moreover, reinforce your brand identity by incorporating elements such as your logo, brand colors, or a tagline in the footer. This helps users remember and recognize your brand.
Minimalism and CTA
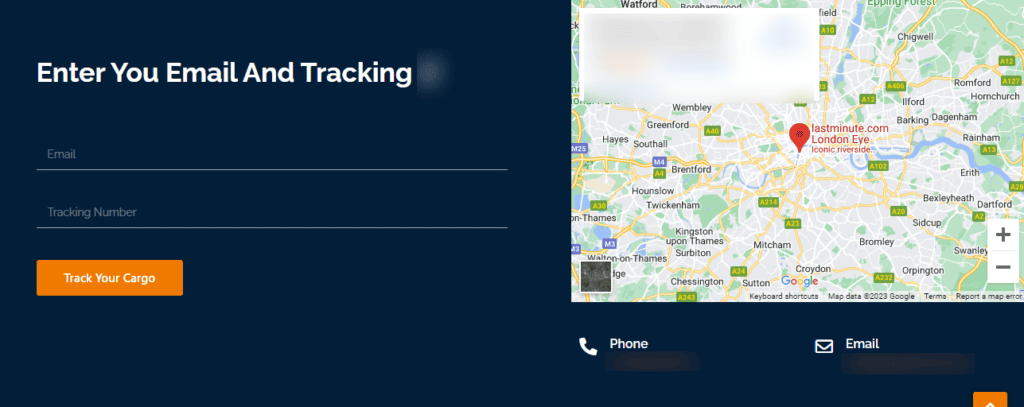
Keep the footer design clean and simple. Avoid clutter by only including essential elements. It will prevent users from feeling overwhelmed or distracted. Additionally, integrate a subtle CTA in the footer, encouraging users to take specific actions. This could include subscribing to a newsletter, downloading a resource, or exploring a product or service.
Widgetized Areas
Many WordPress themes offer widgetized footer areas. Utilize these sections to add widgets for recent posts, popular categories, or social media feeds. This provides dynamic and engaging content.
Accessibility and Scroll-to-Top Button
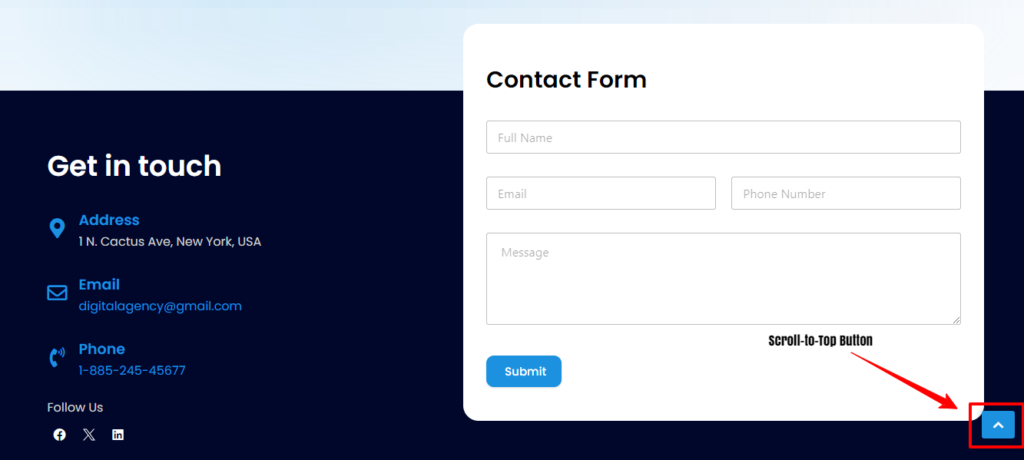
Make your footer area accessible by ensuring proper color contrast, legible font sizes, and easy navigation. This is crucial for users with disabilities who rely on screen readers. Additionally, include a scroll-to-top button in the footer to enhance user experience, especially on lengthy pages. This feature allows users to quickly return to the top of the page without excessive scrolling.
Copyright, FAQs, and Privacy Links
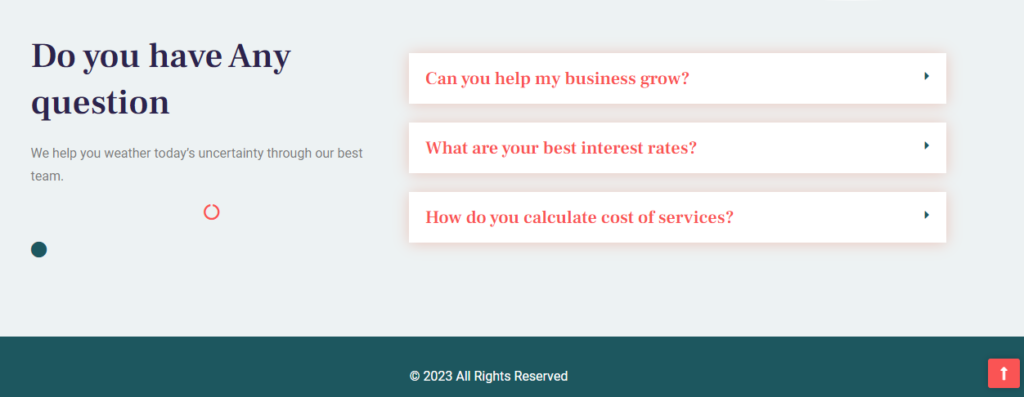
Display the copyright notice and any necessary legal information. This not only protects your content but also adds a professional touch to your website. If applicable, also include links to your privacy policy and terms of service. Additionally, integrate analytics tracking code if you use services like Google Analytics to monitor website performance.
By following these website footer design best practices, you can create a functional, appealing, and user-friendly footer section that complements the overall design of your WordPress website.
Read: Create Custom WordPress Themes from Scratch
Final Thoughts
Customizing the footer of your WordPress website is a simple yet impactful way to enhance its overall appearance and functionality. Whether you’re aiming to add essential information, improve navigation, or align the footer with your brand identity, the process is accessible to both beginners and experienced users. From using the WordPress Customizer to employing code, plugins, or page builders like Elementor, there are diverse approaches to suit various preferences and skill levels.
It’s essential to balance aesthetic appeal and user convenience, ensuring the site footer itself remains informative without overwhelming visitors. Adhering to best practices also contributes to a positive user experience. Additionally, being mindful of legal considerations, especially when modifying default copyright notices, is crucial for ethical website management.
Ultimately, a well-designed footer not only adds professionalism to your WordPress site but also serves as a valuable resource for users seeking additional information or navigation options.
WordPress Footer FAQs
How do I change the content of a footer?
To change the content of a footer in WordPress, you can use the theme customization options. Navigate to “Appearance” > “Customize” in your WordPress dashboard and look for footer-related settings where you can modify content such as copyright text or additional information. Alternatively, you can edit the “footer.php” file in the Theme Editor under “Appearance.”
How do I make different footers on each page in WordPress?
Different footers on each WordPress page can be achieved through widget areas, especially if your WordPress theme supports unique widget configurations for specific pages. Alternatively, page builders like Elementor allow you to design custom footers for individual pages within their interface. For more advanced customization, you can use custom code in the page template to conditionally display different footers based on specific criteria.


