When it comes to online stores, your WooCommerce checkout page plays a crucial role in turning visitors into customers. According to the latest stats, a well-designed and user-friendly checkout process can significantly boost your conversion rate by up to 35.26%. As such, here are some actionable WooCommerce checkout page customization strategies that you can implement on your website today.
We have also highlighted the best practices for customizing your WooCommerce checkout page, which will help you create a frictionless journey for your customers.
Contents
ToggleWhat is a WooCommerce Checkout Page? Why Do You Need to Customize it?
A WooCommerce checkout page is the final step in the online shopping process. It’s where customers review their selected items, enter their shipping address and payment details, and complete their purchases. Simply put, it’s a crucial part of a WooCommerce store where transactions are finalized. Thus, it is essential to customize this page so your customers can have a smooth experience.
Customizing the WooCommerce checkout page is important for several reasons:
- Brand Consistency: It allows you to maintain consistency with your brand identity throughout the entire shopping experience. This, in turn, can reinforce your brand image and build customer trust.
- Improved User Experience: By tailoring the checkout process, you can create an intuitive user experience. This can help reduce friction, increase customer satisfaction, and lead to higher conversion rates.
- Reduced Cart Abandonment: A customized checkout page can also help reduce cart abandonment by streamlining the process and providing clear information to customers
- Data Collection: Customizing the WooCommerce checkout page enables you to collect valuable customer data. This data can be used for marketing purposes, such as email campaigns or personalized recommendations.
- Enhanced Functionality: You can add additional features and functionality to the checkout page through customization. This includes alternative payment methods such as crypto payments, order customization options, or shipping calculators.
Read how to: Customize WooCommerce Templates and Product Pages
3 Simple Methods to Customize Your WooCommerce Checkout Page
Here are three simple methods to customize your WooCommerce checkout page to enhance its appearance and functionality.
Method 1: Create a Custom Checkout Template
To create a custom WooCommerce checkout page, you can use page builders. With page builders like SeedProd, Elementor or Beaver Builder, you can visually design your checkout page via the drag-and-drop editor.
For instance, to create a custom WooCommerce checkout page using SeedProd, follow these steps:
- Install and Activate SeedProd: Start by installing and activating the SeedProd plugin on your WordPress website.
- Navigate to SeedProd Settings: Once activated, go to your WordPress dashboard and navigate to SeedProd settings. In the SeedProd settings, find the option to create a new landing page. Click on it to start building your custom checkout page.
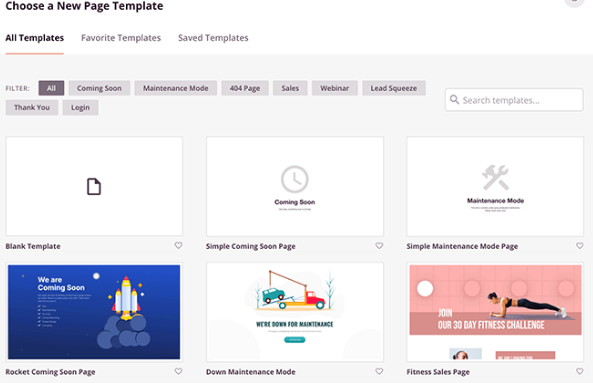
- Choose a Template: SeedProd offers a variety of pre-designed templates. Select a template that suits your checkout page needs or use a blank canvas if you prefer to design from scratch.
- Customize Your Checkout Page: Use SeedProd’s drag-and-drop builder to customize your checkout page’s layout, design, and content. You can add text, images, buttons, and custom checkout form.
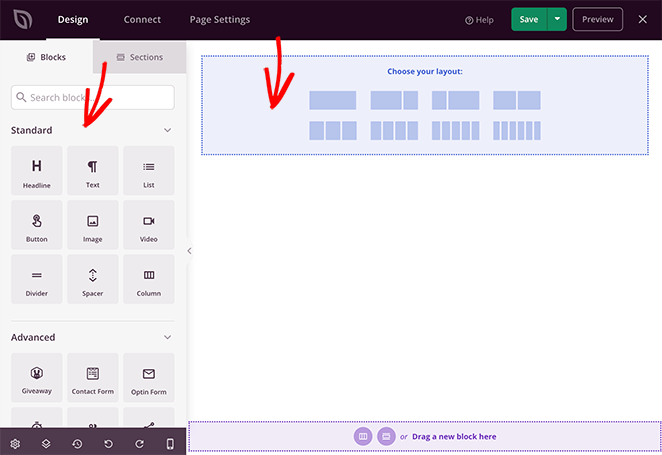
- Integrate WooCommerce: To integrate WooCommerce functionality into your custom checkout page, add WooCommerce elements such as product listings, cart summaries, and checkout forms using SeedProd’s WooCommerce blocks or shortcodes.
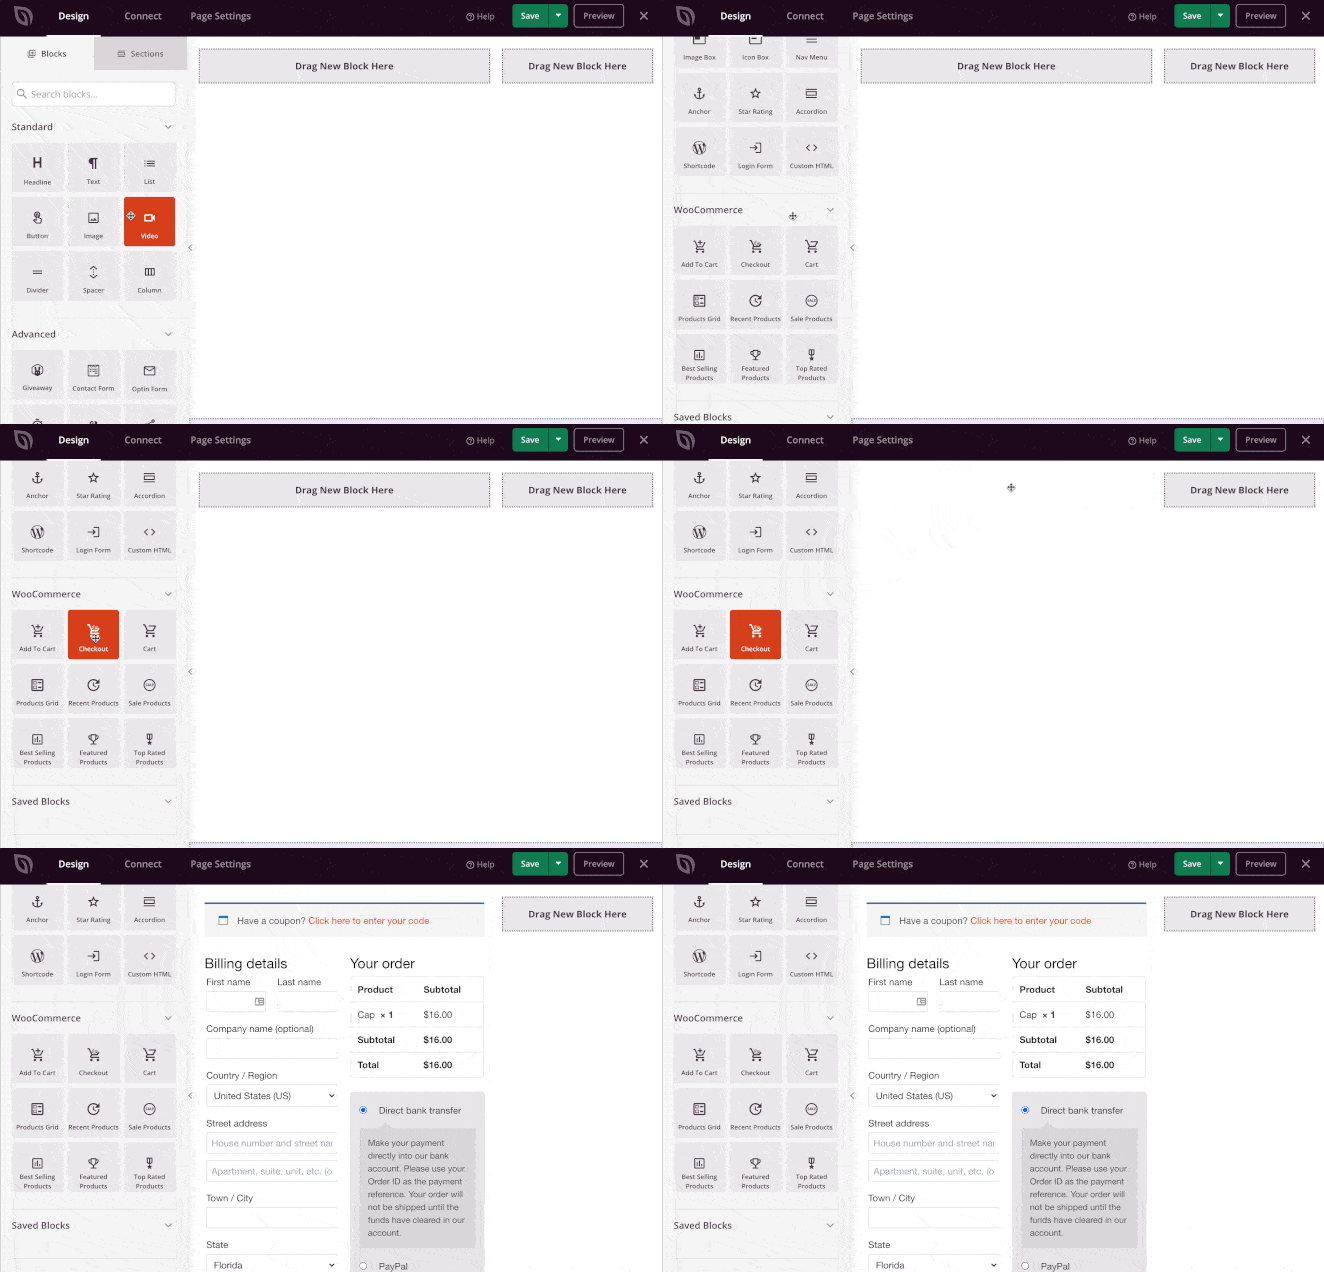
Once you’re satisfied with your custom checkout page design, preview it to ensure everything looks as intended. Then, save your changes and publish the page to make it live on your website.
Finally, go to your WooCommerce settings and designate the newly created custom checkout page as the default checkout page for your online store.
Learn: HIPAA Compliance for eCommerce: All You Need to Know
Need Help Creating a Custom and Conversion-driven WooCommerce Checkout Page Template?
Get in touch with us today to discuss your requirements and transform your checkout process to drive conversions.
Method 2: WooCommerce Checkout Page Customization Using Plugins & Extensions
Another straightforward approach to customize your default WooCommerce checkout page is to use plugins. Here are some WooCommerce checkout page plugins that you can consider for enhancing your online store’s checkout experience.
FunnelKit Checkout: Optimized WooCommerce Checkout
FunnelKit Checkout offers a suite of features designed to optimize your WooCommerce checkout process and drive more sales. With customizable checkout templates, product-specific checkouts, and a flexible form builder, you can tailor the checkout experience to your brand and customer preferences.
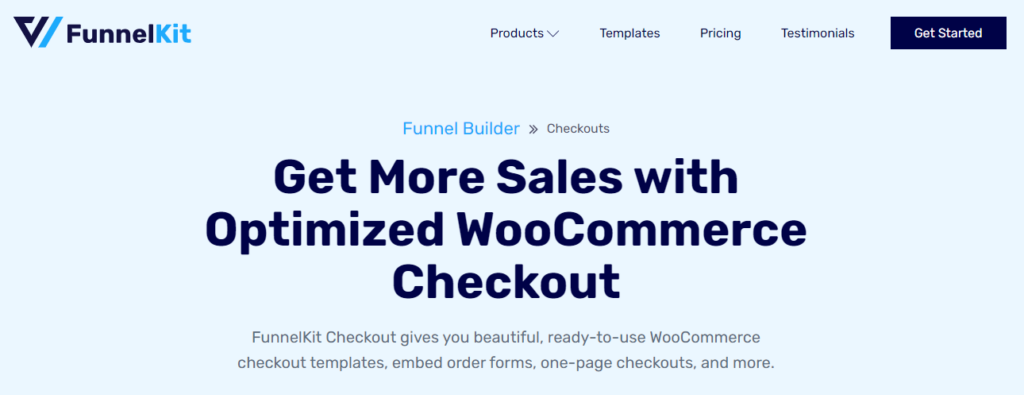
You can also enjoy built-in optimizations, multi-step checkout pages, mobile optimization, and more, all aimed at maximizing conversions. Plus, with features like Google Address Autocomplete and sticky CTA buttons for mobile, FunnelKit Checkout ensures a super smooth checkout experience for your customers.
Pricing: The pricing for this plugin starts at $99.5/year.
Learn about: Top WooCommerce Sales Funnel Plugins to Skyrocket Your Conversions
WooCommerce One Page Checkout
WooCommerce One Page Checkout plugin simplifies the buying process by allowing customers to choose products, checkout, and pay for everything on a single page. It’s ideal for various businesses and facilitates easy and efficient transactions.
With a simple code-free setup, customizable landing pages, curated product displays, and seamless product selection and checkout functionalities, it also streamlines the purchasing journey, ultimately helping merchants increase sales and improve user experience.
Pricing: This plugin is available for $6.59/per month (billed annually at $79).
YITH WooCommerce Checkout Manager
With the YITH WooCommerce Checkout Manager plugin, you can enhance your checkout page with advanced customization. This plugin allows you to add unlimited custom fields and types like text, radio buttons, and checkboxes.
It offers flexibility in arranging fields on the page and improves usability by customizing graphical appearances, adding labels, and adding tooltips. You can also personalize standard fields like Shipping, Billing, and Additional Notes, which can help optimize the checkout experience.
Pricing: This plugin costs $ 69.99/year. Check out the live demo.
WooCommerce Checkout for Digital Goods
WooCommerce Checkout for Digital Goods streamlines the checkout process for digital product purchases by eliminating unnecessary fields. This ensures a faster and more efficient ordering experience. It offers features like one-click customer checkout directly from the shop or product page and quick checkout for specific user roles.
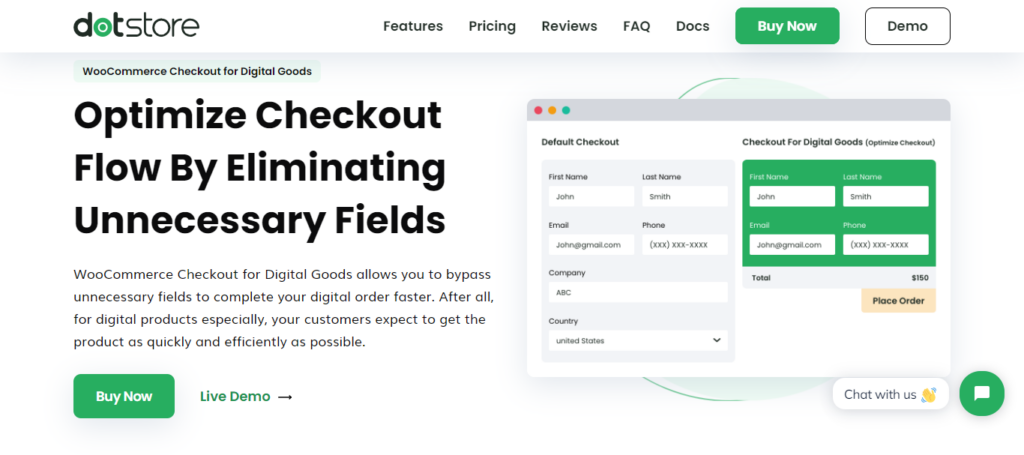
It also enables rapid checkout for products, categories, and tags, thereby optimizing the journey for customers purchasing digital goods.
Pricing: The pricing options for this plugin are as follows:
- PERSONAL: $49/per year for 1 site
- BUSINESS: $249/per year for 5 sites
- AGENCY: $349/per year for 30 sites
Also read: WooCommerce Payment Gateways: Best Payment Gateways for Your Online Store
Method 3: WooCommerce Checkout Page Customization Using Coding
The final method for customizing the WooCommerce checkout page involves manual coding. This approach allows you to modify or add custom code to the checkout page template files directly using HTML, CSS, and PHP.
By accessing and editing these files, you can completely change your checkout page’s layout, design, and functionality. This allows for highly tailored customization to meet your specific requirements and branding preferences.
Also, while coding customization requires technical proficiency, it offers limitless possibilities for creating a distinctive and optimized checkout experience for your customers.
Look Beyond Templates & Plugins and Create a Custom WooCommerce Checkout Page
Our expert team is here to help you craft a fully custom, conversion-driven checkout page tailored to your brand needs.
Common WooCommerce Checkout Page Issues
Resolving these common issues through optimization and customization can help improve the overall checkout experience. This, in turn, can help reduce cart abandonment and boost conversion rates. Some of the common WooCommerce checkout page issues include:
- Complexity: Lengthy or complicated checkout processes with too many form fields can frustrate customers and lead to abandoned carts.
- Lack of Clarity: Unclear or ambiguous instructions, shipping costs, taxes, and fees can confuse and deter customers from completing their purchases.
- Slow Loading Times: Slow-loading checkout pages can lead to impatience and abandonment. This is especially true for customers on mobile devices or with slow internet connections.
- Limited Payment Options: Restricting payment options to only a few methods may inconvenience some customers and lead to lost sales.
- Poor Mobile Optimization: Unoptimized checkout pages for mobile devices can frustrate users, resulting in abandoned carts.
- Security Concerns: Customers may hesitate to provide personal and payment information if they perceive the checkout process as insecure.
Know more: Common WooCommerce Maintenance Mistakes to Avoid at All Costs
Best Practices for Customizing the WooCommerce Checkout Page
By following these best practices, you can create a customized WooCommerce checkout page that enhances user experience, increases conversions, and drives sales for your online store.
- Keep it Simple: As a thumb rule, always minimize the number of form fields and steps required to complete the checkout process. Streamline the experience to reduce friction and make it as easy as possible for customers to complete their purchase.
- Prioritize Important Information: Highlight essential details such as shipping costs, taxes, and order summaries to ensure transparency and prevent surprises at checkout.
- Optimize for Mobile: Design your checkout page to be mobile-responsive. Mobile optimization is crucial as most online shopping occurs on smartphones and tablets, with sales worth $2.5 trillion estimated in 2024.
- Maintain Brand Consistency: Customize the checkout page to reflect your brand’s visual identity and messaging. Consistent branding throughout the checkout process helps build trust and reinforces your brand image.
- Provide Multiple Payment Options: Offer different payment methods to accommodate customer preferences and increase conversion rates. Also, ensure that the checkout page supports popular payment gateways.
- Enable Guest Checkout: It is also important to allow customers to complete their purchase (or buy) without creating an account if they prefer. Offering a guest checkout option reduces barriers to purchase and can lead to higher conversion rates.
Lastly, monitor and analyze your checkout page’s performance continuously. Use A/B testing and analytics to identify improvement areas and make iterative changes to optimize the checkout experience over time.
To Sum Up
Customizing your WooCommerce checkout page is vital for improving user experience, increasing conversions, and driving sales. By using the three simple methods outlined in this blog, you can tailor the checkout experience to align with your brand and meet your customers’ specific needs.
However, for those who may lack the technical expertise or time to implement these changes themselves, seeking professional help from experienced developers or agencies like Seahawk is always an option. With our expertise, you can ensure that your WooCommerce checkout page is optimized for maximum effectiveness, driving success for your online store.
WooCommerce Checkout Page Customization FAQs
How do you customize the checkout page in WooCommerce without a plugin?
To customize the WooCommerce checkout page without using a plugin, you can directly edit the template files in your theme or child theme directory. Access files like checkout.php or form-checkout.php and modify them using HTML, CSS, and PHP to achieve the desired layout, design, and functionality. This method offers complete control over customization without relying on external plugins.
How do I customize my WooCommerce page?
Customizing your WooCommerce page involves various aspects, including product pages, cart pages, checkout pages, and more. To customize these pages, you can utilize theme customization options provided by your WordPress theme or manually edit the template files using HTML, CSS, and PHP.
How do I add a custom field to the WooCommerce checkout page?
To add a custom field to the WooCommerce checkout page, you can use code snippets to insert the field into the checkout form programmatically.
- First, create the custom field using the WooCommerce hooks ‘woocommerce_checkout_fields’ or ‘woocommerce_after_order_notes’.
- Then, retrieve and save the custom field data using ‘woocommerce_checkout_create_order’ or ‘woocommerce_checkout_update_order_meta’.
This allows you to collect additional customer information during the checkout process for order processing.
How to customize the checkout page in WooCommerce programmatically?
To customize the checkout page in WooCommerce programmatically, you can directly edit the checkout template files located in your theme or child theme directory. Access files like checkout.php or form-checkout.php and modify them using HTML, CSS, and PHP code. Additionally, you can use WooCommerce hooks and filters to add or modify elements dynamically.
Can a WooCommerce development agency help me create a custom WooCommerce checkout page?
Absolutely! A WooCommerce development agency like Seahawk can help you create a custom WooCommerce checkout page. Contact us today to discuss your requirements.
How do I change the default checkout page in WooCommerce?
To change the default WooCommerce checkout page, create a new page in WordPress and assign it as the checkout page in WooCommerce settings.
- Go to WooCommerce ⟶ Settings ⟶ Advanced
- Select your newly created page from the dropdown menu next to ‘Checkout Page’.
Save changes, and the new page will replace the default checkout page in your WooCommerce store.
How do I customize my order page in WooCommerce?
Customizing the order page in WooCommerce involves editing the template files responsible for displaying order details. Access files like order-details.php or order.php in your theme or child theme directory and modify them using HTML, CSS, and PHP code. You can also use WooCommerce hooks and filters to dynamically add or modify elements.


