


Whether you’re rebranding, targeting a different audience, or simply want to find a better domain name, moving your WordPress site to a new domain is a significant undertaking. Most website owners also fear losing valuable data or compromising SEO rankings during migration, and rightly so! Thus, if you want to move your WordPress site to a new domain, then this guide is for you.
By following our step-by-step instructions below, you can seamlessly migrate your WordPress site to a new domain while maintaining the integrity of your data and preserving your hard-earned rankings.
Prerequisites for Moving a WordPress Site to a New Domain
When moving your WordPress site to a new domain, there are essential prerequisites to consider. These prerequisites are foundational steps to ensure a seamless transition. So, let’s look into the key requirements you must fulfill before initiating the website migration process.
1. Purchase a Domain Name
Begin by selecting a domain registrar such as Hostinger or DreamHost. Let’s say your current domain is “examplewebsite.com,” but you’ve decided to rebrand as “newbranding.com.”
Head to your chosen registrar’s website and search for the availability of “newbranding.com.” If it’s available, proceed to register it.
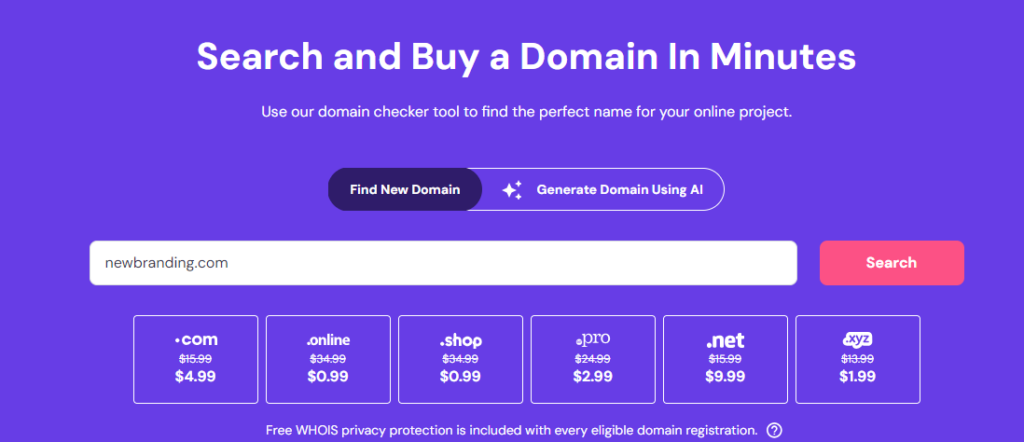
During registration, you’ll be prompted to choose a domain extension, such as .com, .net, or .org. Opt for an extension that suits your website’s purpose and target audience.
Furthermore, consider adding domain privacy protection to shield your personal information from public view. Once registered, you’ll have ownership of the new domain name, setting the stage for the migration process.
2. Web Hosting Requirements
Another thing to consider is ensuring that your chosen web hosting provider supports the new domain. If you’re sticking with the same web host service, confirm that your current hosting plan allows for hosting multiple domains or upgrades to accommodate the new domain.
Alternatively, if you’re switching providers, research and select a hosting plan that meets your site’s needs and includes features like one-click WordPress installation, sufficient storage, and bandwidth. Some of the top hosting providers that offer reliable WordPress hosting services are:
Once you’ve secured compatible web hosting, you’ll be ready to proceed with the migration process.
Seek Professional Help for Website Migration
Seeking professional assistance to migrate your WordPress site to a new domain is highly recommended, especially if you lack technical expertise.

Seahawk specializes in WordPress website migration and can handle the entire process efficiently, minimizing the risk of errors and ensuring a smooth transition. With our expertise, you can trust that your website will be migrated without any complexities.
Website Migration Can be Complex and Stressful
Let our team of experts help you with a smooth transition and hassle-free WordPress site migration to a new domain.
Step-by-Step Guide to Move a WordPress Site to a New Domain
Below is a comprehensive guide that outlines each step of the migration process, accompanied by links to useful plugins to streamline the task.
1. Preparing for the Move
Start by backing up your WordPress site using a plugin like BlogVault or manually via cPanel. With BlogVault, the backup process is streamlined, while through cPanel, you can access the ‘Backup Wizard’ or ‘Backup’ section.
Once the backup is complete, it’s imperative to download the backup website files locally to your computer. This ensures that you have a secure copy of your website’s data and files readily available for the migration process.
2. Setting Up the New Domain
Next, access your hosting control panel and go to the section for managing domains. Here, you’ll find an option to add a new domain. Follow the prompts to enter the new domain name and complete the setup process.
Now, update the DNS settings for the new domain to point it to your hosting server. This typically involves accessing the domain registrar’s website where you purchased the domain and locating the DNS management section. Update the nameservers to those provided by your hosting provider.

After updating the DNS settings, DNS propagation will occur. For the changes to fully propagate, it can take up to 24-48 hours . During this time, some visitors may still be directed to the old website/domain, while others will see the new domain.
3. Moving WordPress Files to a New Domain
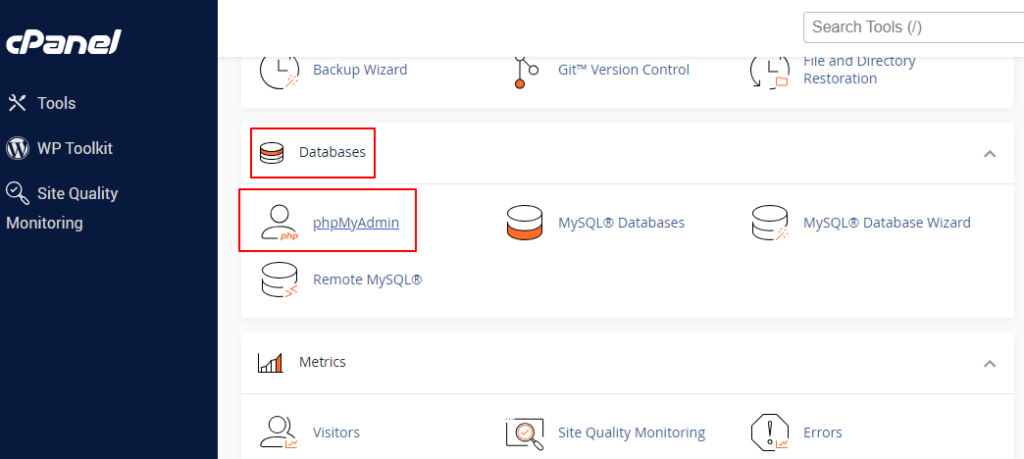
Access phpMyAdmin from your hosting control panel. Select the database corresponding to your WordPress site.
- Click on the “Export” tab, choose the Quick export method, and select SQL as the export format.
- Click “Go” to download the database backup file.
Download WordPress Files
You can access the files of your old domain via FTP client or File Manager in your hosting account.
- Go to the root directory of your WordPress installation.
- Select all files and folders and download them to your local computer.
Upload Files to New Domain
You can access the file manager or FTP for your new domain through your hosting account.
- Go to the root directory of the new domain.
- Upload the files and folders you downloaded from the old domain to the corresponding directory of the new domain.
4. Creating a New Database
To create a new MySQL database and user via cPanel, follow these detailed instructions:
- Access cPanel: Log in to your hosting account and navigate to the cPanel dashboard.
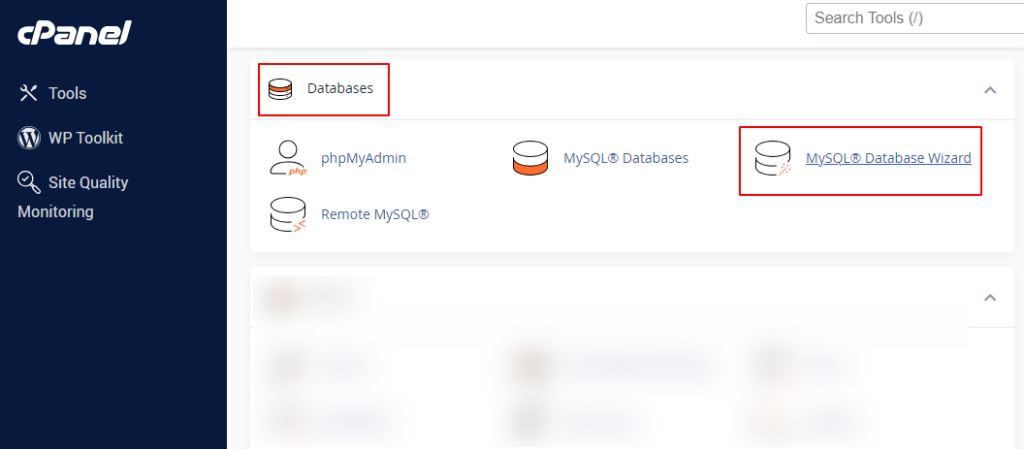
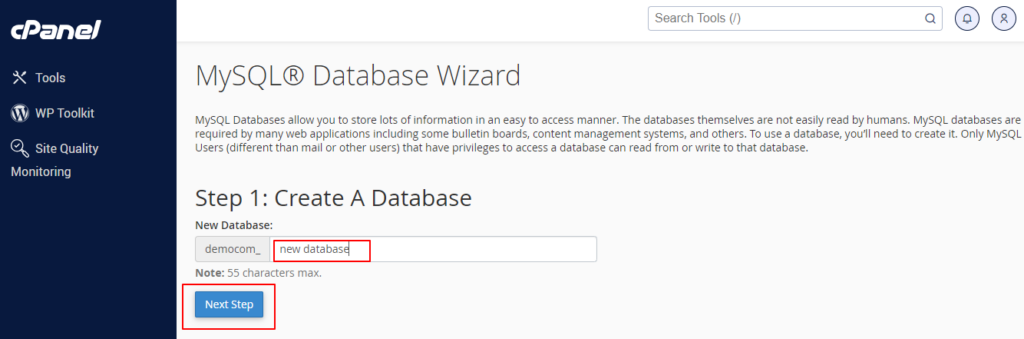
- Locate MySQL Database Wizard: In the cPanel dashboard, locate the Databases section ⟶ select MySQL Database Wizard. Click on it to proceed.
Create a New Database: In the MySQL Database Wizard interface, create a new database. In the provided field (e.g., “new_database”), enter a name for your new database and click “Next Step.”
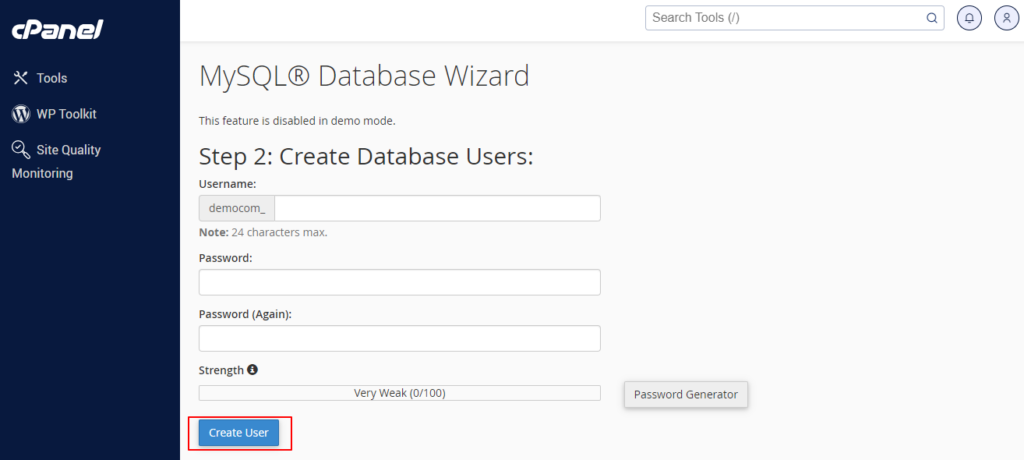
- Create a Database User: Next, create a new database user. Enter a username for the database user in the appropriate field (e.g., “new_user”). You’ll also need to generate a strong password for the user and confirm it. Click “Create User” to proceed.
- Assign User Privileges: After creating the user, assign privileges to the user for the database. Select “All Privileges” to grant the user full access rights to the database. Then, click “Next Step.”
- Confirmation: You should receive a confirmation message indicating that the database and user have been successfully created. Make sure to note down the following details: Database Name, Username, and Password.
Once you’ve noted the database details, click the “Finish” button to complete the process.
You’ve now successfully created a new MySQL database and user via cPanel. Make sure to keep the database details secure, as you’ll need them for the next steps of the WordPress site migration process.
5. Importing the Database
By following these steps, you’ll successfully import your WordPress database into the new domain, setting the stage for a smooth site migration.
Edit wp-config.php
Access the root directory of your new domain via FTP or File Manager in your hosting account.
- Locate the wp-config.php file and open it for editing.
- Update the following lines with your new database credentials:
define('DB_NAME', 'new_database_name');define('DB_USER', 'new_database_user');define('DB_PASSWORD', 'new_user_password');define('DB_HOST', 'localhost'); // Usually 'localhost', but check with your hosting provider.Save and close the file.
Import Database via phpMyAdmin
Log in to cPanel and open phpMyAdmin. Select the new database you created from the list on the left.
- Click on the “Import” tab at the top.
- Click the “Choose File” button and select the SQL file you exported from the old site.
- Ensure the format is set to SQL and click “Go” to start the import process.
Wait for the import to complete. A success message should appear when finished.
If you encounter errors during the import, ensure the SQL file is not too large. If it is, consider splitting the file or increasing the upload limit in php.ini. Also, if you receive a “Database connection error,” double-check that the database name, username, and password in the wp-config.php file are correct.
6. Updating Site URLs
By updating all instances of the old domain to the new domain and adjusting the site URL settings in WordPress, you’ll ensure that your site functions correctly on the new domain without broken links or references to the old domain.
Search and Replace Old Domain
There are two ways to do this: use a plugin or the manual method.
i) Using a Plugin: Install and activate a plugin like Better Search Replace. Then, go to Tools ⟶ Better Search Replace in the WordPress dashboard.
- In the “Search for” field, enter your old domain (e.g., “olddomain.com”).
- In the “Replace with” field, enter your new domain (e.g., “newdomain.com”).
- Select all tables and run a dry run to see the changes.

If everything looks correct, run the live update.
ii) Manual Method via SQL Queries: Access phpMyAdmin from your hosting control panel.
- Select your new database and go to the SQL tab.
- Run the following queries, replacing olddomain.com and newdomain.com with your respective domains:
UPDATE wp_options SET option_value = replace(option_value, 'http://olddomain.com', 'http://newdomain.com') WHERE option_name = 'home' OR option_name = 'siteurl';UPDATE wp_posts SET guid = replace(guid, 'http://olddomain.com','http://newdomain.com');UPDATE wp_posts SET post_content = replace(post_content, 'http://olddomain.com', 'http://newdomain.com');UPDATE wp_postmeta SET meta_value = replace(meta_value,'http://olddomain.com','http://newdomain.com');Update Site URL in WordPress Settings
Log in to your WordPress admin dashboard. Go to Settings ⟶ General.
In the “WordPress Address (URL)” and “Site Address (URL)” fields, update the URLs to your new domain (e.g., “http://newdomain.com“).
Scroll down and click “Save Changes.”
7. Testing the New Domain on Your WordPress Website
Thoroughly review your new WordPress site a.k.a. domain to verify that all links, images, and functionalities are working correctly. Ensure that pages load as expected, contact forms are operational, and media files display correctly.
Also, test various parts of your site, including navigation menus, widgets, and any custom features or plugins. Furthermore, you need to fix your permalinks.
- Log in to your WordPress dashboard
- Go to Settings ⟶ Permalinks
- Make changes (if required), scroll down, and click “Save Changes.”
This action will refresh your permalinks and ensure all URLs are correctly structured and functional on the new site/domain.
8. Redirecting the Old Domain
Setting up 301 redirects ensures a smooth transition for your site’s SEO and maintains search engine rankings. You can either use .htaccess or a WordPress redirect plugin for 301 redirects.
Using .htaccess File
Access the .htaccess file in the root directory of your old domain via FTP or File Manager. Add the following code to the top of the .htaccess file, replacing newdomain.com with your new domain:
RewriteEngine OnRewriteCond %{HTTP_HOST} ^olddomain.com [NC,OR]RewriteCond %{HTTP_HOST} ^www.olddomain.com [NC]RewriteRule ^(.*)$ http://www.newdomain.com/$1 [L,R=301,NC]Save and close the file. This will redirect all traffic from the old domain to the new domain.
Using a Redirect Plugin
Install and activate a WordPress redirection plugin like Redirection. If you are using AIOSEO, it offers the redirect feature as well.
- Navigate to Tools ⟶ Redirection in your WP dashboard
- Set up a new redirect from your old domain to the new domain
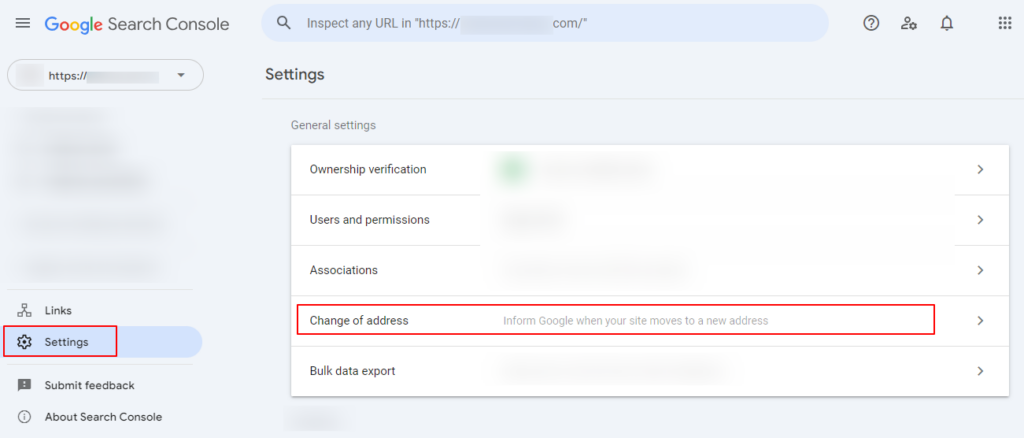
Lastly, you need to submit the change of address to Google.
- Log in to Google Search Console. Select the old domain property.
- Go to the settings icon (⚙️) and select “Change of Address.”
Follow the steps to specify the new domain and validate that you own it. Submit the request to notify Google of the domain change.
In Summary
By following these steps and tips, you can successfully migrate WordPress site to a new domain with minimal disruption. Begin by fully backing up your website, then follow the outlined steps.
To maintain your entire site’s SEO rankings, ensure that all old URLs are correctly 301-redirected to the new domain. Also, submit the change of address to the Google Search Console (GSC) and monitor your site’s performance in GSC for any issues. Moreover, regularly check for broken links and update your sitemap.
Lastly, if the process seems overwhelming, consider seeking professional assistance from Seahawk. Our expertise can ensure a smooth and error-free migration. Contact us now.