Of late, Figma has really stood out with its cool feature for real-time collaboration. It practically makes it possible for you and your team to work on the same project simultaneously, no matter where you are. Like having a virtual design studio, always open! This setup makes feedback faster and lets you tweak designs on the fly, which is awesome for keeping projects moving smoothly. Meanwhile, Figma to Beaver Builder transfers are greatly in demand.
Beaver Builder is a go-to tool for building websites on WordPress. BB is super easy to use and does not require you to be a WordPress development coding whiz. Whether you are just starting out or pride yourself on being a seasoned developer, Beaver Builder makes creating stunning, responsive web design a breeze.
Now comes the challenge:
How do you take those slick designs you’ve crafted in Figma and smoothly bring them over to Beaver Builder?
This article dives into the process step-wise and shares practical tips and tricks to help you nail it. From exporting assets to fine-tuning layouts, we will walk you through each step to ensure your designs shine just as brightly online as they do in your imagination.
Contents
ToggleFigma to Beaver Builder Web Design Workflow in Steps
From organizing your Figma files to perfecting your layouts in Beaver Builder, make sure your designs look just as amazing on the web as they do in your design tool. Follow the steps below to ensure the design transfer to Beaver Builder is as neat as Figma to WordPress conversions:
Step 1: Preparing Your Design in Figma
Before we jump into the conversion process, let’s get your Figma files in tip-top shape. Organization of your design files is key here. A tidy workspace makes for a smooth transition.

- File Structure: arrange your Figma files into a logical structure, separating pages, components, and assets. This will make it easier to navigate and locate the elements you need during the conversion process.
- Resolution and File Types: Ensure your design elements are optimized for web standards. Pay attention to image resolutions and file types to ensure compatibility with Beaver Builder and maintain visual quality.
- Responsiveness: In today’s multi-device scene, responsiveness is non-negotiable. Make sure your Figma designs are optimized for various screen sizes and devices, so your website looks pixel-perfect on desktops, tablets, and smartphones alike.
Lacking Figma to Beaver Builder Transfer Expertise?
We are here for the support! Just for $999 one-time pay, get web layouts custom-designed on Figma, transferred seamlessly to your web builder tool.
Step 2: Exporting Assets from Figma
Now that your Figma house is in order, it’s time to start packing for the big move to Beaver Builder. In this step, we will focus on exporting your design assets (images, icons, SVGs) from Figma.

- Export Process: Figma offers a straightforward way to export your assets. Simply select the elements you want to export, right-click, and choose the appropriate export option.
- File Formats: When exporting, pay close attention to the file formats. Beaver Builder plays nicely with popular web formats like PNG, JPG, and SVG. Choose the format that best suits your asset type while maintaining quality.
- Consistency is Key: As you export your assets, ensure consistency in text styles, colors, and gradients. This will help maintain visual coherence and make the translation to Beaver Builder smoother.
Step 3: Installing and Configuring Beaver Builder
With your Figma assets ready to go, it is time to set the stage for their web debut. In this step, we’ll get Beaver Builder installed and configured on your WordPress site.

- Installation: If you haven’t already, install the Beaver Builder plugin on your WordPress site. It’s a straightforward process, and the plugin is compatible with most WordPress themes.
- Interface Exploration: Once installed, take a moment to familiarize yourself with Beaver Builder’s interface. Explore the layout options, modules, and customization features – this will make the conversion process smoother.
- Workflow Management: Beaver Builder offers handy tools for efficient workflow management and site building. Get acquainted with features like Version Control, Global Settings, and Saved Rows/Modules – they will be your trusty sidekicks during the conversion process.
Keep Reading: How to Convert Figma to Code: React, HTML, Vue, JS, CSS
Step 4: Translating Figma Designs to Beaver Builder
It’s showtime! In this step, we’ll start bringing your Figma designs to life using Beaver Builder’s powerful page-building capabilities.
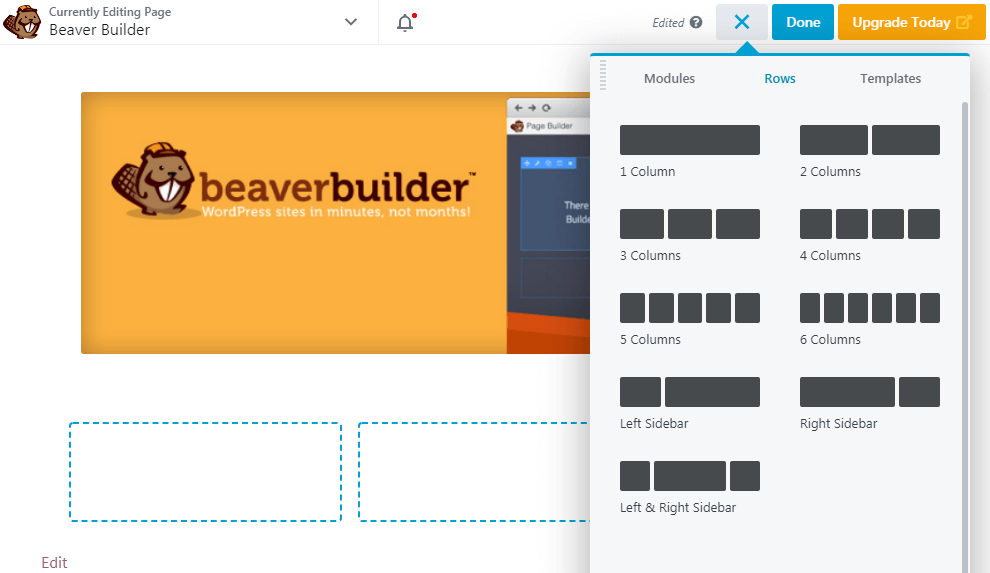
- Asset Integration: Import the assets you exported from Figma to Beaver Builder. Ensure smooth integration and visual fidelity by following best practices for asset optimization and placement.
- Layout Recreation: Recreate the layout structure from your Figma design using Beaver Builder’s row and column system. Maintain the integrity of your design by accurately translating the spacing, alignment, and hierarchy of elements.
- Module Magic: Beaver Builder’s modules are your secret weapons for recreating specific design elements. Use them to build buttons, add images, create text blocks, and more – all while maintaining the look and feel of your original Figma design.
Read More: Accessible Websites for All: ADA-Compliant Website Design Solutions
Step 5: Customizing and Refining with Beaver Builder
Now that the foundation is in place, it’s time to add those finishing touches that will make your website truly shine.
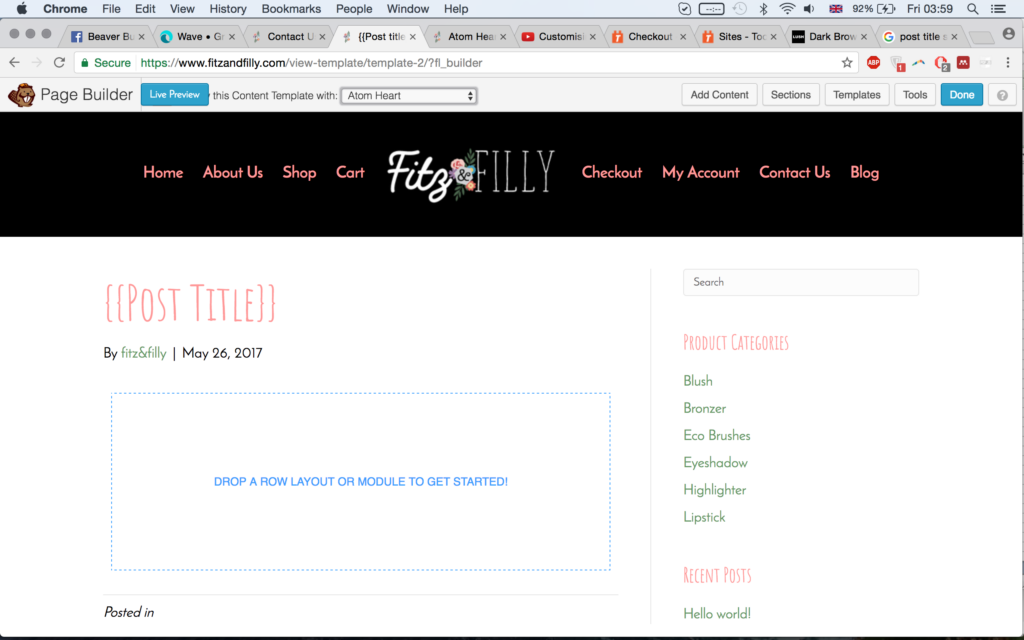
- Styling Finesse: Use Beaver Builder’s styling options to customize design elements further, ensuring consistency with your original Figma design. Tweak typography, colors, and spacing to perfection.
- Interactive Enhancements: Beaver Builder supports a range of interactive features and functionalities. Explore options like hover effects, animations, and scrolling effects to enhance the user experience.
- Performance Optimization: No one likes a sluggish website, right? Utilize Beaver Builder’s optimization tools and techniques to ensure your site loads quickly and performs smoothly, no matter the device or connection speed.
More Web Development Trivia: What is Breadcrumb? Tips & Best Practices for Easy Navigation
Step 6: Testing and Iteration
Before we put on the finishing touches, it is crucial to ensure your website is performing flawlessly across various devices and browsers. In this step, we’ll focus on thorough testing and iteration.

- Cross-Device Testing: Put your website through its paces by testing it on different devices (desktops, tablets, smartphones) and browsers. Ensure responsiveness and functionality are on point, no matter where your visitors are accessing your site.
- User Feedback: Gather feedback from your target audience or colleagues. Fresh perspectives can help identify areas for improvement or potential usability issues you may have overlooked.
- Iterative Refinement: Based on your testing results and user feedback, make necessary refinements to your design elements and usability. Beaver Builder’s preview and revision features make this process a breeze, enabling collaborative review and adjustments.
⚡ Read More: Figma Design Conversion Guides
- How to Convert Figma to WooCommerce
- How to Convert Figma to Code: React, HTML, Vue, JS, CSS
- Figma to Shopify
- How to Export Figma to PDF Easily
- Convert Figma to Divi
- How to Convert Figma to Bricks Builder
- How to Convert Figma to Elementor
- Figma to Gutenberg
Step 7: Finalizing Your Design
Congratulations! You have made it to the final stretch of your Figma-to-Beaver Builder journey. In this step, we’ll ensure your website is ready for its grand debut.
- Comprehensive Review: Conduct a thorough review of your converted design, verifying accuracy, functionality, and adherence to the original Figma specifications. Leave no stone unturned!
- Consistency Check: Double-check that your website maintains visual consistency with the Figma design. Address any discrepancies or issues that may have slipped through the cracks during the conversion process.
- Ready-to-Publish Checklist: Prepare a comprehensive checklist to ensure all aspects of your Beaver Builder website meet quality standards before deployment. This could include items like cross-browser compatibility, accessibility, SEO optimization, and more.
Read a Design Guide: Best Screen Sizes for Web Design: A Guide to Standard Website Sizes
Additional Tips for Figma to Beaver Builder Design Transfers
When you are translating designs from Figma to Beaver Builder, it pays to keep a few key things in mind. First up, do not underestimate the power of communication. Have an open dialogue with your team, whether that is developers, content creators, or project managers. Make sure everyone is on the same page about the design vision, goals, and any potential roadblocks.

Speaking of potential roadblocks, it is always a good idea to do a little recon before diving in. Take a close look at your Figma designs and identify any elements that might be tricky to recreate in Beaver Builder. Complex animations, custom fonts, or intricate layout structures could require some extra finesse (or a creative workaround).
Here is what to do:
- Lean on Figma’s handy comment and annotation tools to flag potential trouble spots.
- Create a shared checklist or style guide to keep everyone aligned on design specs.
Read Our Review: Elementor Vs Beaver Builder: Which Is The Best Page Builder?
Now, let’s talk assets. When you are exporting images, icons, and graphics from Figma, pay close attention to file formats and resolution. Beaver Builder plays nicely with web-friendly formats like PNG, JPG, and SVG, but you will want to optimize those assets for speedy load times.
- Use Figma’s export settings to generate multiple sizes (desktop, mobile, etc.) for responsive design.
- Embrace vector formats (SVG) whenever possible for crisp, scalable graphics.
Once you have got your assets squared away, it is time to start building in Beaver Builder. Use that row and column-based layout system to recreate your Figma designs with pixel-perfect precision.
But do not just focus on the big picture – sweat the details, too.

- Dial in typography details like font weights, line heights, and letter spacing.
- Use Beaver Builder’s color controls to match your brand palette flawlessly.
- Leverage global settings and saved rows to maintain consistency across pages.
Now, let’s talk interactivity. Beaver Builder has some nifty tools for adding slick animations, hover effects, and other engaging UI elements. But before you go wild, keep performance in mind. Too many fancy frills can bog down your site.
- Use Beaver Builder’s preview mode to test animations and effects on various devices.
- Optimize images, leverage caching, and streamline code for speedy load times.
Lastly, don’t forget about the testing phase. Once you have translated your designs, put that website through its paces. Enlist some fresh eyes to evaluate the user experience, identify any bugs or inconsistencies, and provide candid feedback.
- Create a shared testing checklist to cover all your bases (responsiveness, accessibility, etc.).
- Use Beaver Builder’s revision tools for seamless collaboration and iteration.
Do You Know?
How Much Does a Website Design Cost?
Final Thoughts: Get Used to the Iterative Process
The key to a successful Figma to Beaver Builder design transfer lies in embracing an iterative mindset. Do not hesitate to revisit and refine your work as you go through the process. Treat each phase as an opportunity to enhance your designs, streamline your workflow, and deliver a truly exceptional user experience. Remember, great design is an ever-evolving pursuit, so keep pushing boundaries, experimenting with new techniques, and striving for continuous improvement.

