Convert Figma designs to Bricks Builder to turn mockups into fully functional WordPress websites faster and with greater accuracy. As Bricks Builder continues gaining popularity among developers and agencies, many teams are looking for efficient ways to recreate Figma designs while maintaining responsive layouts, design consistency, and performance.
A structured Figma-to-Bricks workflow helps reduce development time, improve design implementation, and create cleaner, more maintainable websites. This guide covers the process, tools, and best practices for converting Figma designs into Bricks Builder pages.
To convert Figma to Bricks Builder, design and organise your layout in Figma using Auto Layout, install the Figma to Bricks Converter plugin, map your Figma layers to Bricks widgets, connect the plugin to your WordPress site, export the design, and customise the output in Bricks Builder before publishing.
Why Figma to Bricks Builder?
Converting Figma designs to Bricks Builder offers three specific advantages over rebuilding your design manually in WordPress.
- Time-Saving: Instead of spending hours recreating designs in a WordPress page builder, the conversion process moves you from design to development significantly faster. Manual rebuilding is repetitive work that the plugin handles automatically.
- Reduced Effort: Time saved on rebuilding website designs can be redirected to performance work, user experience improvements, and new feature development. The conversion handles the structural work so you focus on refinement.
- Design Consistency: This process ensures your design looks exactly the same on the live website as it does in Figma. The final site is professional, cohesive, and responsive across all devices without the visual drift that comes from manual rebuilding.
Steps to Convert Figma to Bricks Builder
Converting Figma to Bricks Builder requires a structured approach to preserve design accuracy and produce a clean, responsive WordPress output. Follow these six steps in order to avoid rework and ensure the final site matches your original Figma design.
Step 1: Design in Figma
Build your complete website layout in Figma before starting the conversion. The quality and organisation of your Figma file directly determines how clean the Bricks Builder output will be.
Use Auto Layout for all flexible components. It keeps spacing and alignment consistent and converts to Bricks Builder more reliably than fixed-position layouts. Lock any layers you do not want moved or changed before exporting to keep your design elements in place throughout the conversion.
Step 2: Install the Figma to Bricks Converter Plugin
The Figma to Bricks Converter plugin handles the translation between Figma layer structure and Bricks Builder elements. Install it before attempting any export.

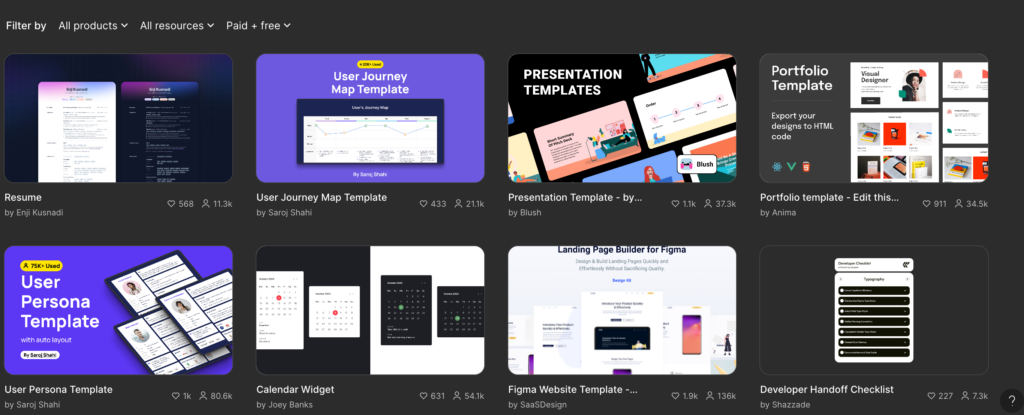
Open Figma and go to the Resources icon in the toolbar. Search for Figma to Bricks Converter in the Community plugins tab and click Install. Return to your design file, go to Plugins in the main menu, and select Figma to Bricks Converter to activate it.
Step 3: Map Figma Layers to Bricks Widgets
Open your Figma design and identify every layer that needs to correspond to a Bricks Builder element. Text layers map to text widgets, image layers map to image elements, and button layers map to button widgets.
Pay particular attention to text formatting, image dimensions, and spacing values. Incorrect mapping at this stage causes visual discrepancies in the Bricks Builder output that require manual correction after export.
Step 4: Connect to WordPress and Export Figma Design
Open the Figma to Bricks Converter plugin and enter your WordPress site URL and authentication details to connect. Once connected, the plugin can communicate directly with your WordPress installation and push the converted design to Bricks Builder.

With the connection confirmed, select the export option, choose your page template and customization settings, and click Export. The plugin automatically converts your Figma design to the Bricks Builder format. The converted design appears as a Bricks Builder template in your WordPress dashboard, ready for customization.
Step 5: Customize in Bricks Builder
Open Bricks Builder on your WordPress site and locate the exported template. Review every section against the original Figma design and adjust spacing, typography, colours, and element sizing where the export did not match exactly.
Enable responsive editing and test the layout at mobile, tablet, and desktop breakpoints. Compress all images before uploading, and confirm the page passes Google PageSpeed Insights with a score above 70 on mobile before moving to launch.
Step 6: Publish and Go Live
Test every page on desktop and mobile using Chrome DevTools before publishing. Click through all navigation links and confirm there are no broken links or missing images. Once all checks pass, publish from the Bricks Builder interface or set the WordPress page status to Published. Submit the page to Google Search Console after launch and monitor Core Web Vitals in the weeks following.
How Bricks Builder Enhances Your Figma Designs?
When it comes to converting Figma designs to WordPress with Bricks Builder, the platform excels at preserving visual integrity while offering powerful customization options. Here’s how Bricks Builder enhances your Figma to Bricks conversion:
Responsive Design Retention
Bricks Builder ensures that the responsive design from your Figma file is retained across all devices. Whether viewed on mobile, tablet, or desktop, your website will look exactly as envisioned during the Figma-to-Bricks Builder process.
Customizable Layouts
Bricks Builder offers deep customization, allowing you to fine-tune your Figma designs. You can easily adjust layouts, spacing, and elements without compromising on the original design, providing a smooth Figma to WordPress transition.
Improved Performance
One of the major benefits of the Figma-to-Bricks conversion is the performance boost Bricks Builder delivers. With its optimized code, your website will load faster, improving both the user experience and search engine ranking.
Dynamic Content Integration
Bricks Builder enables you to integrate dynamic content, turning static Figma elements into interactive web features. Whether you’re working with animations or dynamic forms, you can enhance your Figma designs in Bricks Builder to create a more engaging user experience.
Built-in SEO Optimization
Converting Figma to WordPress with Bricks Builder also offers SEO benefits. Bricks Builder includes features such as clean code and SEO-friendly architecture, making your website more discoverable without compromising the design aesthetics carried over from Figma.
By using Bricks Builder, you can transform your static Figma designs into dynamic, high-performing WordPress websites that are easy to manage, scale, and optimize for search engines.
Common Mistakes When Converting Figma to Bricks Builder
Most conversion problems trace back to the same small set of avoidable mistakes. Identifying them before you start prevents most rework after export.
Not Using Auto Layout in Figma
Designs built with fixed-position elements rather than Auto Layout produce inconsistent spacing and alignment after export. Bricks Builder interprets flexible layout structures far more accurately than fixed pixel positions. Go back and apply Auto Layout to all major sections before starting the conversion if your file does not already use it.
Skipping Layer Organization
Unlabelled or poorly grouped layers in Figma can cause confusion during mapping in Step 3. When the plugin cannot clearly identify what each layer represents, it defaults to generic element types that require significant manual correction in Bricks Builder. Name every layer descriptively before exporting.
Uploading Unoptimized Images
Figma exports images at high resolution by default. Uploading these directly to WordPress without compression produces slow page load times and poor Core Web Vitals scores. Convert all exports to WebP using Squoosh or ShortPixel, and keep each image under 150KB before uploading to the media library.
Skipping Mobile Testing
Testing only on desktop after export is one of the most common causes of post-launch fixes. Responsive behavior in Bricks Builder does not always match Figma’s artboard previews. Test every section on real mobile devices and in Chrome DevTools before publishing.
Treating Export as the Final Step
The Bricks Builder output after export is a starting point, not a finished site. Spacing, typography, and element sizing almost always need manual refinement to match the original Figma design precisely. Build time for a proper customization pass should be included in your project timeline before committing to a launch date.
Why Choose Professional Figma to Bricks Builder Conversion Services?
For complex multi-page designs, client projects, or builds where visual accuracy is non-negotiable, professional conversion services deliver more reliable results than a DIY approach.
- Ongoing Support and Maintenance: Hiring professionals ensures your site stays secure, functional, and up to date with ongoing WordPress support after the conversion is complete.
- Time-Saving: Professionals complete the Figma-to-Bricks conversion faster, reducing time-to-launch without sacrificing the quality of the final website design.
- Pixel-Perfect Conversion: Experts faithfully translate your Figma design into Bricks Builder, maintaining visual integrity across all devices so the final WordPress site matches the original design exactly.
- Enhanced Functionality: Professional services unlock advanced features like animations and dynamic content that are difficult to implement without experience, resulting in a feature-rich, high-performance website.
- Responsive Design: Professionals ensure your Figma design adapts to all screen sizes, guaranteeing a consistent user experience across mobile, tablet, and desktop.
- Troubleshooting and Customization: Experts address conversion challenges and provide tailored solutions to optimize your site for speed, SEO, and performance.
Conclusion
Converting Figma to Bricks Builder is a structured process that rewards preparation at every stage. A well-organized Figma file with Auto Layout, clearly labeled layers, and exported assets results in a cleaner conversion with less manual correction in Bricks Builder.
After export, treat the Bricks Builder customization stage as a refinement pass rather than a rebuild. Address spacing, typography, and responsive breakpoints, then run a full pre-launch test before publishing. For complex projects or client work where pixel accuracy is critical, professional conversion services eliminate trial-and-error from the process entirely.
FAQS – Figma to Brick Builder
What is Bricks Builder, and why convert Figma designs to it?
Bricks Builder is a visual WordPress page builder that generates clean semantic code without shortcodes. Converting Figma designs to Bricks Builder takes a static design and rebuilds it into a fully functional, responsive WordPress website, preserving visual accuracy and enabling dynamic content and SEO features.
How do I prepare my Figma design for Bricks Builder?
Organize your file into clearly named sections, use Auto Layout for all flexible components, label every layer descriptively, and maintain consistent styles throughout. Export all images as WebP or PNG and icons as SVG before starting the conversion. A well-prepared file produces a cleaner export and requires less manual correction.
How do I export assets from Figma for Bricks Builder?
Open the Export panel in the right sidebar. Export photographs as WebP or PNG, logos and icons as SVG, and avoid JPEG for assets containing text or sharp edges. Upload all exported assets to the WordPress media library before starting the Bricks Builder customization stage.
Can I keep my Figma design responsive in Bricks Builder?
Yes. Bricks Builder includes responsive editing controls for desktop, tablet, and mobile breakpoints independently. After export, use Bricks Builder’s responsive mode to review and adjust the layout at each screen size before publishing.
Does converting Figma to Bricks Builder require coding knowledge?
Not for the conversion itself. Bricks Builder’s visual editor handles most layout and styling without code. Custom animations, complex interactions, and advanced functionality may require custom CSS or JavaScript, which is where developer knowledge becomes useful.
How long does it take to convert a Figma design to Bricks Builder?
A single-page conversion with a well-organized Figma file takes two to four hours, including export, customization, and testing. A multi-page site typically takes one to three days. Poorly organized files with unlabelled layers increase the time required significantly.