There are moments when you need to take your WordPress site—or parts of it—offline, whether you’re prepping for a website redesign, refining content, or safeguarding sensitive information from public view.
Unpublishing gives you control without the finality of deletion, allowing you to manage what’s live and what isn’t. For example, if you’re in the middle of a major WordPress development update, unpublishing certain pages can help ensure that only polished, optimized content is visible to visitors.
In this guide, we’ll walk you through several methods to unpublish WordPress site or specific pages, giving you the flexibility to hide content temporarily while keeping it safe for future use or updates.
Contents
ToggleDifferent Methods to Unpublish WordPress Website
There are several ways to unpublish content on your WordPress site, depending on whether you want to hide specific pages, posts, or the entire website. Below, we’ll explore different methods that give you flexibility and control over what your visitors can see, without deleting your content permanently.
Method 1 – The Draft Dodge: Temporarily Hide Content
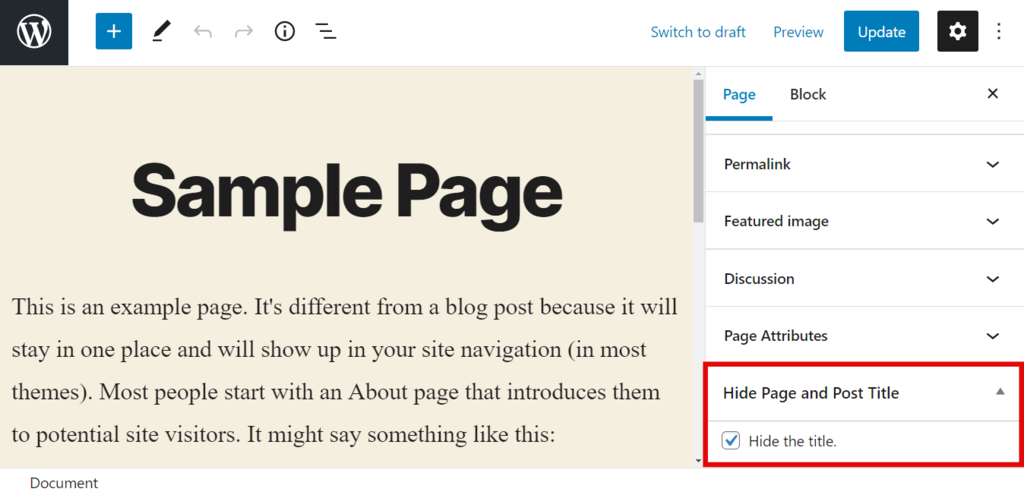
Switching content to draft mode is one of the easiest ways to unpublish a page or post temporarily. This method keeps the content stored safely in your WordPress dashboard, allowing you to edit and republish it whenever you’re ready.
How to Switch a Page or Post to Draft Mode
- Navigate to the WordPress Dashboard: Log in to your WordPress dashboard, then click on either “Pages” or “Posts,” depending on the type of content you wish to unpublish.
- Find the Content: Locate the page or post you want to unpublish. Hover over its title, and you’ll see an “Edit” link. Click on this link to open the content in the editor.
- Switch to Draft: On the editor screen, at the top of the page, click the button labeled “Switch to Draft.”
- Confirm Your Decision: A pop-up will appear asking you to confirm your decision to unpublish. Once confirmed, the page or post will no longer be visible to visitors.
Benefits of Draft Mode
- Easy Access for Editing: The content remains in your dashboard, fully editable and ready for republishing whenever you’re satisfied with the updates.
- Non-Destructive: Drafting a page doesn’t delete any content; it simply hides it from public view.
Pro Tip: Switching a page to draft mode can cause SEO issues like broken links, especially if the page was ranking in search engines. To avoid this, create a 301 redirect from the unpublished page to another relevant page on your sit0e to preserve traffic and SEO value.
Not Ready to Show the World Your WordPress Site?
Unpublishing your WordPress site is just the start. Let us help you with seamless updates, maintenance, and optimization to keep your site in peak condition when live.
Method 2 – Bulk Unpublishing: The Content Cleanup Crew
When you’re redesigning your website or dealing with a large number of outdated posts, unpublishing them one by one can be a hassle. WordPress’s bulk unpublishing tool helps you manage multiple pages or posts efficiently, saving time and effort.
How to Bulk Unpublish Pages or Posts
- Navigate to Pages or Posts: In the WordPress dashboard, go to the “Pages” or “Posts” section, depending on which content type you want to unpublish.
- Select Multiple Pages: Use the checkboxes next to each post or page you want to unpublish. You can select multiple items at once.
- Bulk Actions Menu: Once you’ve selected all the pages or posts, find the “Bulk Actions” dropdown menu at the top of the page. Select “Edit” from the dropdown and click “Apply.”
- Set to Draft: A bulk editing screen will appear. In the “Status” dropdown menu, select “Draft” and then click “Update.”
Read: How to Avoid Multiple Page Redirects
When to Use Bulk Unpublishing
- Website Overhaul: If you’re redesigning or moving your site to a new domain, bulk unpublishing can help you quickly take down multiple pages for later revision.
- Content Cleanup: This is an ideal method for decluttering old or irrelevant posts in large batches.
What to Watch For: Just like with individual draft mode, bulk unpublishing can lead to broken links if the pages were indexed by search engines. Set up 301 redirects to relevant pages or a holding page to avoid losing traffic.
Explore: Best Website Redesign Services
Method 3 – Privacy Matters: Password-Protect Sensitive Content

Sometimes you don’t need to completely unpublish content—you just want to restrict who can access it. Password-protecting a page is the perfect solution for client portals, internal projects, or private content that only a select group of users can view.
How to Password-Protect a WordPress Page or Post
- Edit the Page or Post: Navigate to the page or post you want to protect and click “Edit.”
- Change Visibility Settings: In the editor, locate the “Visibility” section on the right-hand side. By default, this will be set to “Public.”
- Select Password Protection: Click on “Public,” then select “Password Protected” from the dropdown options.
- Set the Password: A text box will appear, prompting you to enter a password. Choose a secure password and click “Update.”
Why Use Password Protection
- Private Client Areas: Perfect for sharing private content with clients, team members, or collaborators without unpublishing it.
- Pre-Launch Content: Allows you to build and prepare content behind the scenes while letting approved users view it.
Bonus Tip: Choose a secure password with a combination of letters, numbers, and symbols to ensure maximum security.
Find: Simple Steps to Implement WordPress Two-Factor Authentication
Method 4 – Make It Members-Only: Hide Exclusive Content with MemberPress

If you’re running a membership-based site, you can use membership plugins like MemberPress to hide pages based on a user’s membership level. This method is perfect for offering exclusive content to paid subscribers or creating a gated community.
How to Use MemberPress for Members-Only Content
- Install and Activate MemberPress: First, you’ll need to install and activate the MemberPress plugin from your WordPress dashboard.
- Create Membership Levels: Go to the MemberPress settings and create different membership levels (e.g., Basic, Premium, VIP) based on your needs.
- Restrict Access to Pages: When editing a page, scroll down to the “MemberPress Unauthorized Access” section and choose which membership levels can view the content.
- Save Changes: After setting the restrictions, click “Update” to save your settings.
Why Use Members-Only Content
- Exclusive Content: Offer premium content like courses, tutorials, or downloadable files to specific user groups.
- Monetize Content: You can charge users for access, making this a great tool for growing your membership base and revenue.
Pro Tip: Use MemberPress to create drip content, where content is gradually released to members over time, keeping them engaged and subscribed.
Find out: How to Restrict Content in WordPress
Method 5 – Maintenance Mode Magic: Keep Visitors in the Loop

If you’re undergoing a major redesign or update and need to hide your entire site, putting your WordPress site into maintenance mode is a better option than unpublishing every page. This method keeps your website technically online, but visitors will see a “Maintenance Mode” page instead of your content.
How to Enable Maintenance Mode Using SeedProd
- Install SeedProd: First, install and activate the SeedProd plugin, which allows you to create beautiful, custom maintenance pages.
- Set Up Maintenance Mode: Once activated, navigate to SeedProd → Landing Pages → Maintenance Mode.
- Customize Your Maintenance Page: Choose from one of SeedProd’s many pre-built templates or design your own using their drag-and-drop page builder.
- Activate Maintenance Mode: After customizing the page, go back to SeedProd’s settings and toggle the switch under “Maintenance Mode” to enable it.
Benefits of Maintenance Mode
- Preserve SEO: Search engines won’t penalize you for having your site in WordPress maintenance mode, unlike if you unpublished all your pages.
- Professional Appearance: SeedProd allows you to create polished “Coming Soon” or “Under Construction” pages that inform users your site will be back soon.
Also try: Best WordPress Maintenance Mode Plugins
Creative Twist: Use a countdown timer or a newsletter sign-up form on your maintenance page to keep users engaged and updated while your site is offline.
Method 6 – Go Ghost Mode: Unpublish Completely with Permanent Deletion
Sometimes, unpublishing isn’t enough, and you want to delete your site altogether. This is a permanent step, so make sure you’ve backed up all your important content before proceeding.
How to Permanently Delete Your WordPress Site
- Backup Your Content: Before deleting anything, ensure you have a backup of your site’s content, either through a plugin or your web hosting provider.
- Go to Your Hosting Account: Log in to your web hosting account and navigate to the management area for the WordPress site you wish to delete.
- Find the Delete Option: Most hosting providers will have a “Delete Site” or “Remove Site” option in the website management area.
- Confirm Deletion: Follow the on-screen instructions to confirm the permanent deletion of your site.
Why Use Permanent Deletion
- Final and Complete: This method ensures that your site is no longer accessible online. Use this when your site is no longer relevant or needed.
Important: Once you delete your site, it’s gone for good—make sure this is what you want before proceeding.
Method 7 – The Archive Alternative: Unpublish Without Losing SEO Juice
If you want to unpublish content but don’t want to lose its SEO value, archiving is a better option than deleting or drafting. Archiving content keeps it off your main site while maintaining its search engine presence.
How to Archive Pages in WordPress
- Install an Archive Plugin: WordPress doesn’t have a built-in archiving feature, so you’ll need to install a plugin like LH Archived Post Status.
- Change Post Status to Archive: Once the plugin is activated, you’ll have the option to change the status of a post or page to “Archived” instead of “Draft” or “Private.”
- Save Your Changes: After archiving a post, it will no longer be visible to the public, but it can still be accessed through direct links.
Why Use Archiving:
- Preserve SEO: Since archived content can still be indexed by search engines, you won’t lose the SEO value of the post.
- Internal Use: Archived pages can still be accessed by logged-in users or through direct URLs, making this method ideal for preserving old content for reference.
Bonus Section: Top Plugins to Streamline Your Unpublishing Process
Unpublishing content is easy with WordPress, but these plugins can make the process even smoother and more efficient, offering additional features and flexibility.
SeedProd: For Maintenance and Coming Soon Pages

SeedProd is the top-rated plugin for creating beautiful maintenance mode and “Coming Soon” pages. Whether you’re unpublishing temporarily for a redesign or putting your site on hold for updates, SeedProd lets you inform your visitors in style with customizable, high-converting templates.
Why It’s Great: It includes a drag-and-drop page builder, over 180 templates, and powerful integrations with email marketing services or tools, helping you maintain engagement even while your site is down.
MemberPress: For Membership-Only Content
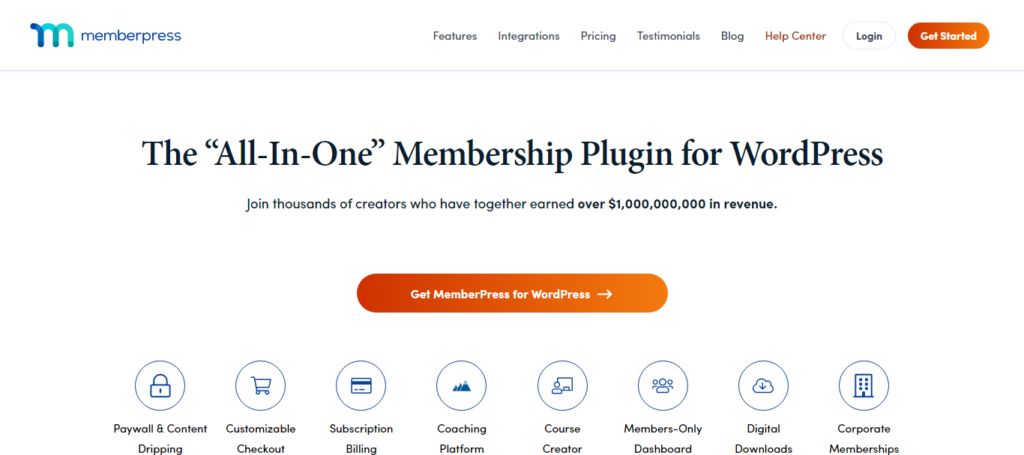
If you want to unpublish specific pages while keeping them accessible to a select audience, MemberPress is your go-to solution. This plugin allows you to create membership tiers, restrict access to exclusive content, and even monetize your site by charging users for access to premium pages.
Why It’s Great: MemberPress is user-friendly, supports drip content, and integrates with payment gateways, making it ideal for sites looking to provide gated content to members.
PublishPress Future: For Scheduled Unpublishing

PublishPress Future allows you to schedule the automatic unpublishing of posts, pages, or custom post types. You can set a specific date and time for a post to revert to draft mode or become private, perfect for time-sensitive content like promotions or event pages.
Why It’s Great: The plugin offers flexibility in scheduling changes to content status without requiring constant manual updates.
LH Archived Post Status: For Archiving Without Deleting

This lightweight plugin adds an “Archived” status to your WordPress posts and pages, allowing you to hide content from public view while keeping it available internally for future use. It’s perfect if you want to unpublish content without losing SEO rankings or internal links.
Why It’s Great: It preserves SEO benefits while keeping the content accessible for future revisions or republishing.
Conclusion: Make Unpublishing Part of Your WordPress Toolbox
Unpublishing isn’t just for emergencies or errors—it’s a strategic tool every WordPress site owner should have in their arsenal. Whether you’re revamping your site, adjusting for SEO, or temporarily hiding content, the ability to manage visibility gives you more control over how your website evolves.
From switching to draft mode for quick fixes to leveraging maintenance mode for large-scale overhauls, unpublishing can help maintain a polished user experience while safeguarding your SEO efforts. By understanding and applying these techniques, you can keep your website agile, responsive, and always ready for the next step.
FAQs – Everything You Need to Know About Unpublishing in WordPress
What Happens When You Unpublish a WordPress Page?
When you unpublish a page, it’s removed from public view but still exists in your WordPress dashboard. Depending on the method used, it can be edited and republished later.
Can I Hide My WordPress Site Without Deleting It?
Yes, using maintenance mode or password protection allows you to hide your WordPress site without deleting any content. This is useful for temporary changes or limited access scenarios.
When Should I Unpublish Content?
You should unpublish content when it’s outdated, irrelevant, or you need to make substantial edits. You can also unpublish pages temporarily while redesigning or reorganizing your site.
How Does Unpublishing Affect SEO?
Unpublishing content can lead to broken links and loss of SEO value if not handled properly. To avoid this, consider using 301 redirects or archiving the content instead of deleting it.


