Installing WordPress on Windows 11 allows you to create a local development environment for building and testing websites before deploying them online. This local setup is beneficial for developers and enthusiasts who want to experiment with WordPress without the need for a live server.
In this guide, we will outline the steps to install WordPress on Windows 11 using different methods. Follow these steps, and you will be able to set up a WordPress environment on your Windows 11 machine in no time.
Contents
ToggleWhy Do You Need to Install WordPress Locally?
Installing WordPress locally is an excellent way for beginners to learn and experiment with the platform without the need for a hosting service. It fosters a risk-free environment for exploring WordPress functionalities and customization options.
Local installations also allow developers to test themes, plugins, and code changes in a controlled environment before deploying them to a live website. This helps in identifying and fixing issues without affecting the online site.
Additionally, working on a local server is faster than relying on a remote server. This speeds up the development process, allowing for quicker iterations and improvements.
A few benefits of installing WordPress locally on your Windows 11 are:
- If you want to handle all of your resources locally, installing the content management systems like WordPress on Windows 11 is a good idea.
- With a local WordPress installation, you can work on your website without needing an internet connection, providing flexibility and convenience.
- Local environments reduce the risk associated with testing on live sites. Developers can experiment without exposing vulnerabilities to potential threats on the internet.
So, how do you install WordPress on Windows locally?
Step-By-Step Guide to Install WordPress Locally on Windows 11
Take Professional WordPress Development Help!
Option 1: Install WordPress on Windows Using WSL
Step 1: Installing WSL
The first step in installing WordPress on Windows 11 is downloading and installing WSL (Windows Subsystem for Linux).
- In the taskbar, tap the magnifier and type cmd. Choose that. This will bring up the console, where you should type the command: install WSL (There is a space following the WSL.)
- Now, wait for WSL to be installed.
- Once the installation process is complete and WSL is safely loaded on your device, you will receive a notification. Post that, restart your computer! This completes the WSL installation procedure.
If you want to update WSL, repeat the instructions above but use the command wsl–update rather than wsl–install.
You’ll also need to download a Linux distribution after WSL is installed.
Run the command wsl–list online to get a list of accessible Distros. Decide which Distro would be ideal for you after reviewing the available options.
Run the following command using the exact instructions as before:
wsl –install –d Distro name to install
Following the installation of the Linux distribution, we will install a web server such as Nginx. The steps below will show you how to set up Nginx in Ubuntu (a Linux Distro).
Step 2: Install NGINX
Because WordPress requires a webserver to run, you’ll need to download one like Nginx.
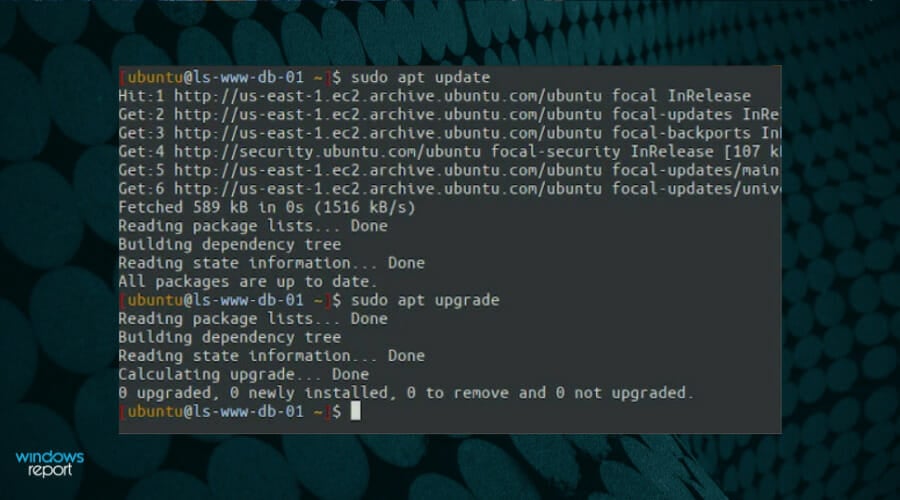
You must run two commands when you boot up your Linux distribution, such as Ubuntu.
- sudo apt update
- sudo apt install nginx
After installing Nginx, you’ll need to run two more instructions to enable the start and stop services.
- sudo service nginx start
- sudo service nginx stop
Now you must determine whether the downloaded Nginx is operational. Enter the following into any browser: http://localhost.com/
Your server is up and running if the website Welcome to Nginx appears.
Step 3: Install a DB Server
WordPress content is saved in a database server, therefore, you’ll need to set one up. We’ll go over how to download the Maria DB server in this part. It is most Linux servers’ default server, and it is fast and easy to use with WordPress.
To begin, run the following command:
sudo apt install mariadb-serverRun the following command to secure the database using a root password:
sudo mysql_secure_installationStep 4: Install PHP
It is mandatory to take this step. Due to the PHP-based nature of WordPress, Windows 11 does require the installation of PHP.
It’s a very simple process. Install PHP by running the following command:
sudo apt install php-fpm php-common php-mysql php-gmp php-curl php-intl php-mbstring php-xmlrpc php-gd php-xml php-cli php-zipThis command will install PHP 7.4 in this case. Run the following command to ensure the version is 7.4:
sudo nano /etc/php/7.4/fpm/PHP.Step 5: Install WordPress
After installing the servers and PHP, it’s a pretty straightforward process to install and start WordPress.
To begin, use the following instructions to install WordPress:
wget cd /tmptar -xvzf latest.tar.gzsudo mv wordpress /var/www/wordpressKeep in mind that you’ll need www-data to own the WordPress directory. Here are the steps to accomplish this:
sudo chown -R www-data:www-data /var/www/WordPress/sudo chmod -R 755 /var/www/wordpress/Customize WordPress work with Nginx VirtualHost. Afterward, enter the server’s hostname into your browser. Follow the on-screen instructions to install WordPress. The site is now yours to customize.
Option 2: Use Xampp to Install WordPress on Windows 11
Step 1: Installing XAMPP on a Windows Computer
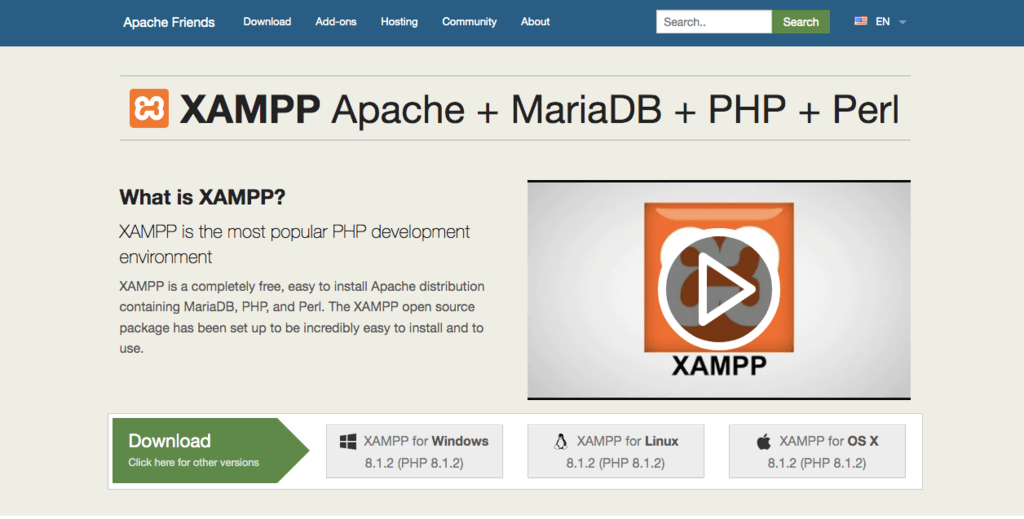
Firstly, you need to download XAMPP and install it on your computer.
- Once the download is finished, it is necessary to run the newly-downloaded file for the XAMPP installer to start.
- If there is an antivirus program running, you may get a pop-up message like this:
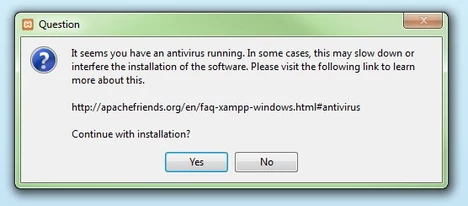
- Just click yes and continue installing it.
- You may also obtain a User Account Control (UAC) prompt. If it does, click OK to continue.
After you have read all the pre-install messages and warnings, you should see the following message to start the installation process. Click next.
The next screen will request you to choose which components to install. To use WordPress with XAMPP, and the required components, you will have to choose:
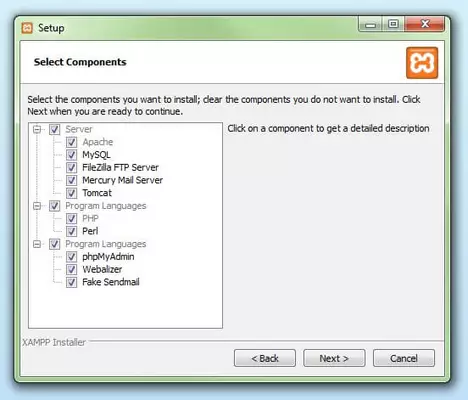
Any other component is optional. Once you choose the desired components, click on the Next button.
Now, you need to select the folder where you want to install XAMPP. You can either create or use an existing folder inside the C: directory. We’ll leave the default route, which we recommend you do.
XAMPP is now ready to install all the files you have indicated above.
Step 2: Starting the Installation Process
Click ‘Next’ to start the installation process. It might take a few minutes to finish depending on the number of packages you choose to install.
Once the installation process is done, start the XAMPP Control Panel right away by selecting the “Do you want to start Control Panel now?” checkbox and clicking on Finish.
If you want/need to start XAMPP differently for any reason, go to the XAMPP folder inside your chosen installation directory and open the “XAMPP Control Panel” file.
When Control Panel first opens, choose your preferred language. Once you’ve chosen your preference, click on the Save button. You should now see the XAMPP Control Panel screen.
To review if everything is functioning correctly, you can click on the start buttons of Apache and MySQL. If everything is configured correctly, both components should run without any issues.
However, if they don’t start, there might be a problem with a program like Skype or something similar that is using the same ports as the XAMPP modules. In this case, you should close the conflicting applications and restart XAMPP.
Tip: Modify your PHP resources in XAMPP and free up more power on your local server. This is especially necessary when installing a premium theme on your local installation.
First, turn on XAMPP, click the Config button for the apache server and choose to open the php.ini file from the dropdown menu.
After that, you’ll see all the relevant settings for the PHP resources in that file in your default text editor. All you need to do is change the following resources to the indicated values:
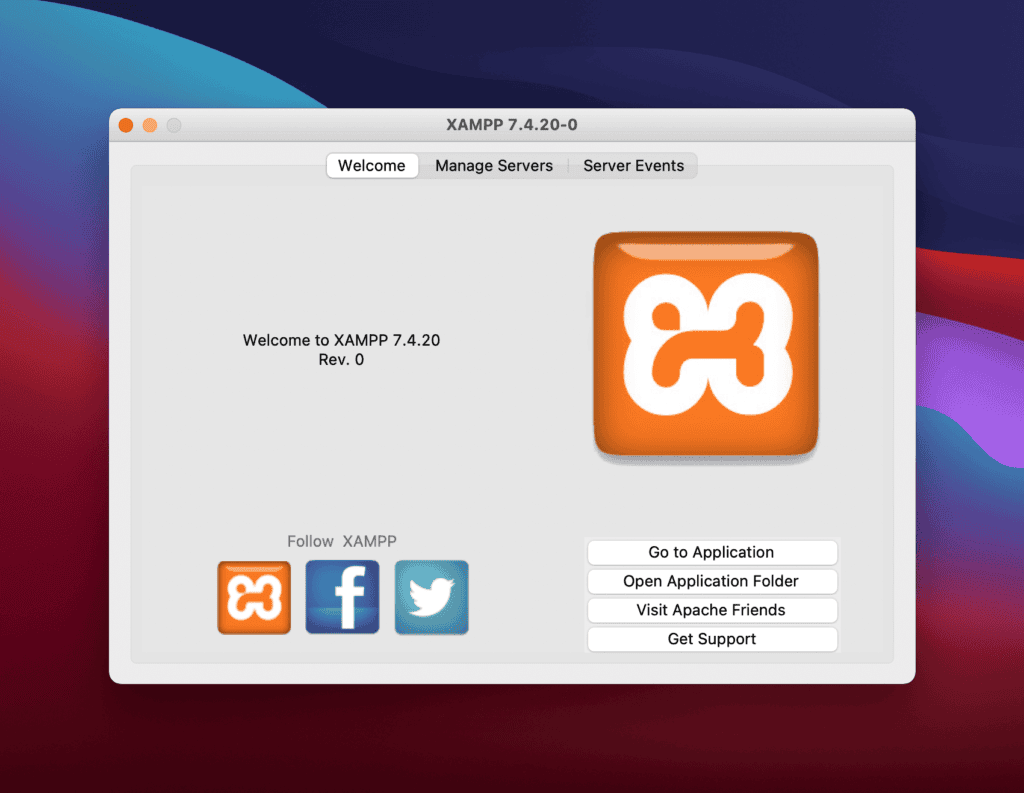
When the new values are added, just save the changes and restart your XAMPP by stopping Apache and MySQL and restarting them.
Once all components are working correctly, open your preferred browser and visit http://localhost/.
Step 3: Downloading the WordPress files
Now, it’s time for you to add WordPress to the localhost site we just created. To do so, you must first download the latest version of WordPress from the official website.
- Once you finish the download, navigate to the folder where you installed XAMPP (in our case, that was the default installation path, C:xampp). From there, find and open the htdocs folder:
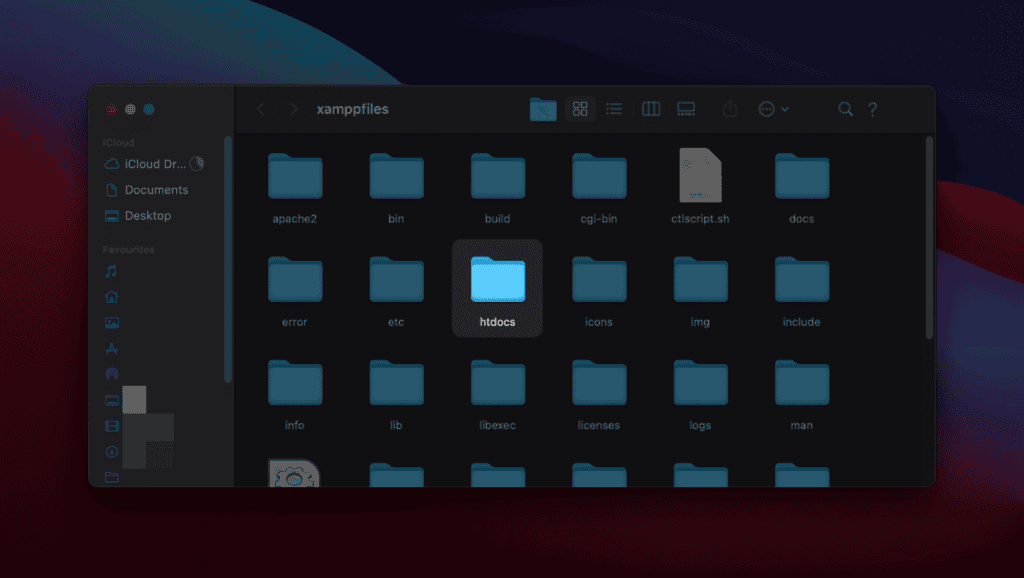
- Create a WordPress folder for your website in htdocs. The name of this folder will become the subname used to access your WordPress site.
For example, if you name the folder as the new site, you will access your site by visiting http://localhost/newsite within your desired browser.
Once you create the folder, you need to open it, and inside it, extract the WordPress.zip file that you downloaded earlier.
Step 4: Creating a Database for WordPress
Now, create a MySQL database for your local WordPress site.
- To do this, launch phpMyAdmin from your XAMPP control panel by clicking the Administration button for the MySQL component:
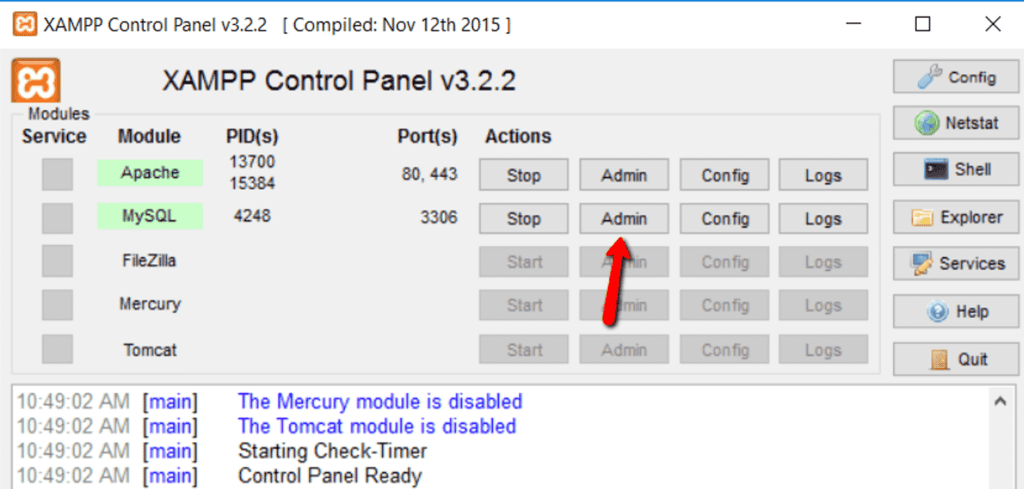
- The phpMyAdmin browser page will open in your default browser. Simply click on the New link to create a database for your WordPress site.
- Enter a name for your database.
- In the second field, select the Collation option. Now click Create. You can name your database as per your choice; just remember your name as you will need it in future steps.
Once all this is done, now restart the simulated web server. Navigate to the XAMPP Control Panel and click on the Stop button for Apache and MySQL. Then press Start again to make the changes visible.
Step 5: Installing WordPress Locally
Now that you have installed XAMPP, copied the WordPress files, and created a database, navigating to http://localhost/newsite within your preferred browser should bring up the WordPress installation wizard.
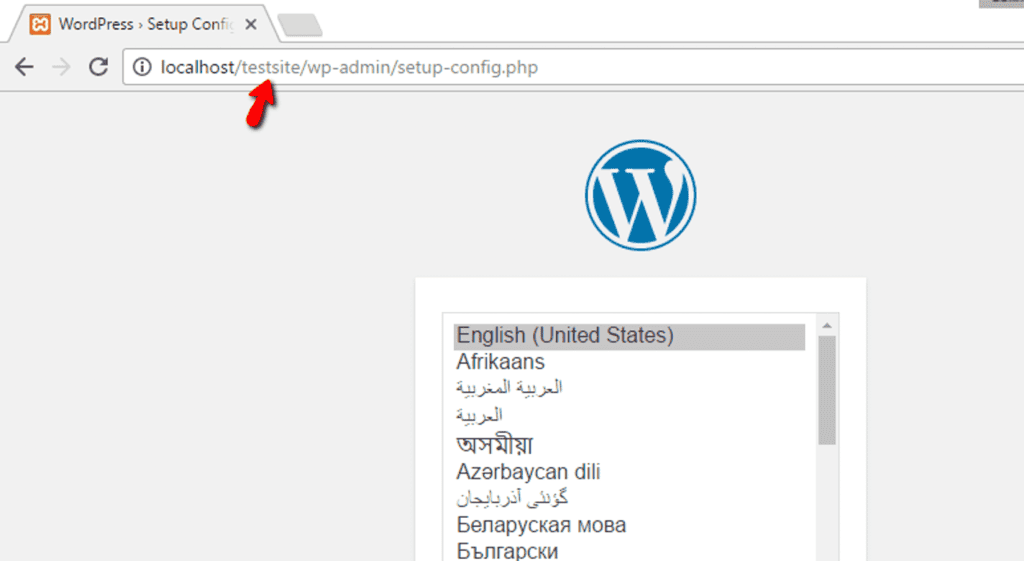
- Choose the preferred language and click Continue.
- The next screen will ask you to remember the database information you created earlier. Continue to the following setup by clicking on the ‘Let’s go’ button.
Below you need to enter the following information accurately and then click Submit:
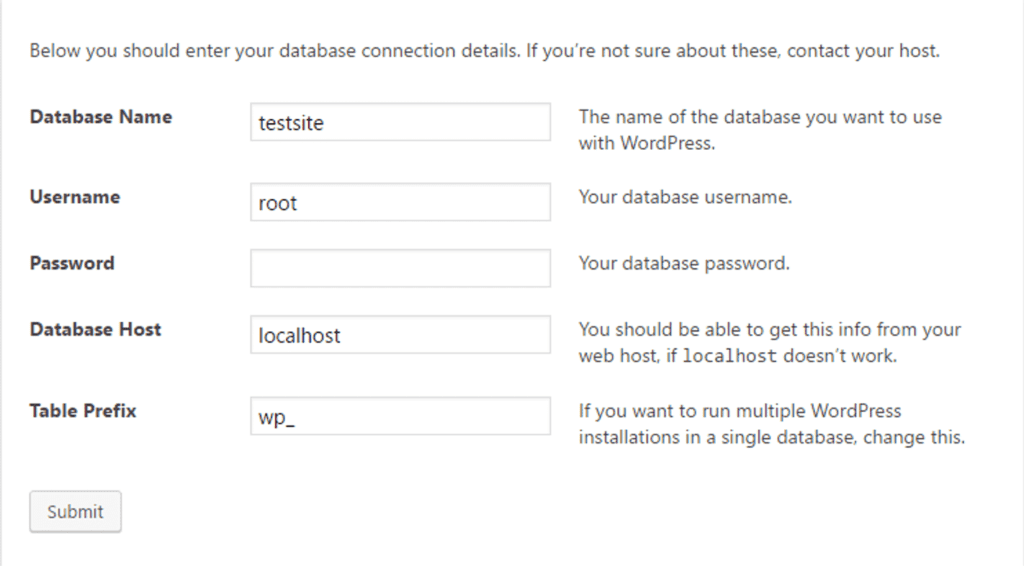
Fill in the fields with your site details, such as your site title, email address, etc. When you’re done, click “Install WordPress.”
Wonderful! Now, you are ready to work with XAMPP and WordPress locally to develop your site. We hope you will find this tutorial helpful if you also need to install WordPress on XAMPP in the future.
Option 3: Use a Dedicated App like InstantWP
It’s a lot easier to install WordPress locally with a dedicated app. We are going to use – InstantWP here, follow these steps:
- Download the InstantWP software and run the downloaded InstantWp.exe file on your Windows.
- Create a folder on your PC to store the server files and Instant WordPress.
- Click on the Next button to start the installation process.
- Once the installation has been completed, click the InstantWP icon inside the folder to open your control panel.
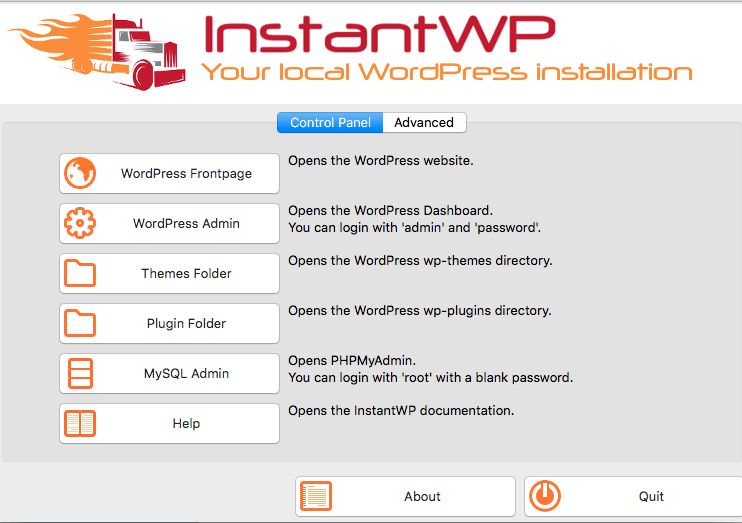
In the end, click on the WordPress Admin button to start the InstantWP. Now, you will see a browser window where you log in to your WordPress server.
Option 4: Use InstaWP WordPress Sandbox
Sandbox method has to be one of the fastest options to test a WordPress site online if you have less time. Folks at InstaWP will help you Launch a WordPress site in seconds. They provide WordPress Sandbox functionality and with a free account it gives you the ability test a site for 48 hours.
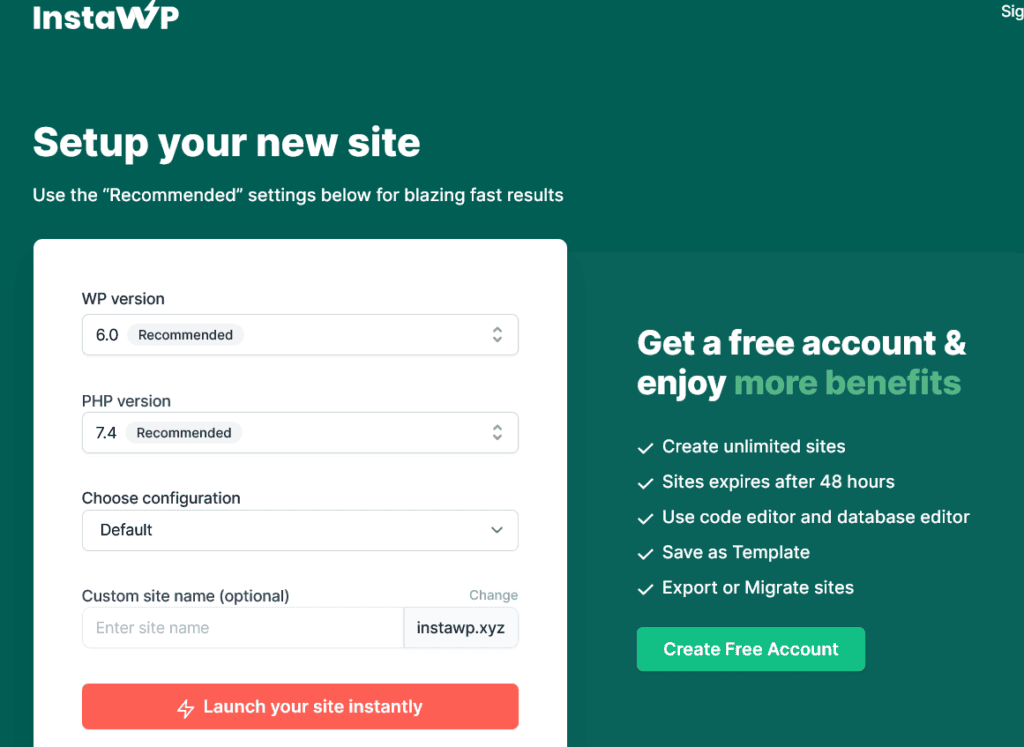
After that you have the options to migrate it to another hosting provider or on your local machine or get their paid plans. It also has built-in editors for the databases and code, and you can monitor logs on the same platform. You can give it a try.
Option 5: Install WordPress on Windows 11 with LocalWP
LocalWP is a user-friendly tool for installing WordPress on your Windows computer. It simplifies the process and allows you to manage multiple WordPress sites easily on your Windows machine.
- Download and Install LocalWP: Go to the LocalWP website and download the installer. Follow the on-screen instructions to install the software.
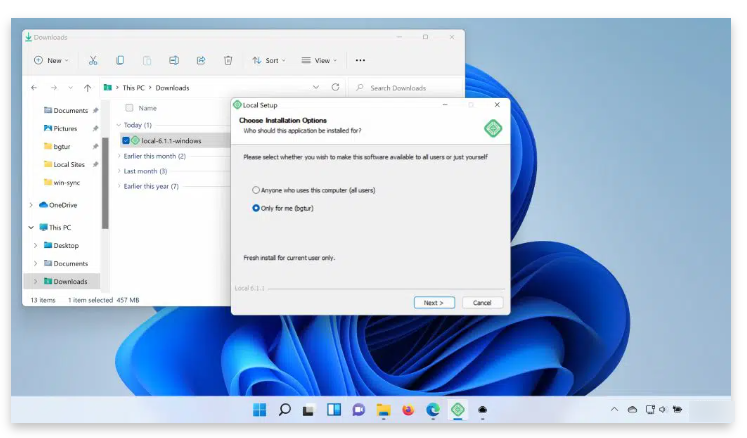
- Create a New Site: Open LocalWP and click the “Create a new site” button. Fill in the site name, choose the environment (e.g., Preferred, Custom), and click “Continue.”
- Set Up WordPress: Choose the version of WordPress you want to install or leave it as default. Set your admin username and password. Click “Add Site” to complete the setup.
- Access Your Site: Once the installation is complete, click “View Site” to access your newly installed WordPress site.
How to Optimize Your Local WordPress Installation?
Making your local WordPress site run faster involves a few simple steps to clean things up and streamline operations. By implementing these optimizations, you’ll notice snappier page loads and improved overall performance. Here are the key things to do:
- Remove any plugins you don’t need or use, as they can slow things down. Also, go through your installed plugins and disable unnecessary ones.
- Increase the amount of memory allocated to WordPress by adding a line of code to your wp-config.php file: define(‘WP_MEMORY_LIMIT’, ‘256M’)
- Use a simple, lightweight theme designed for performance rather than fancy visuals. By choosing an efficient theme, you can minimize bloat.
- Install and configure a caching plugin like WP Super Cache, W3 Total Cache, or WP Rocket. Caching allows WordPress to store and quickly serve commonly accessed content.
- Optimize your images by compressing them through tools like TinyPNG, ShortPixel or Imagify before uploading. This reduces image file sizes without quality loss.
Following these tips will go a long way towards optimizing your local WordPress installation for maximum performance potential.
Troubleshooting Common Errors of Local Installation
Overlooking prerequisites or making incorrect configurations can lead to errors during the local WordPress installation on Windows 11. To avoid such issues, it’s essential to pay attention to the following:
- Not meeting system requirements: Ensure your Windows 11 machine meets the minimum system requirements for running WordPress and its associated software (web server, database, etc.).
- Incorrect web server configuration: Failing to properly configure the web server (e.g., Apache, Nginx) or not enabling the required modules can prevent WordPress from functioning correctly.
- Database setup errors: Issues with creating or connecting to the MySQL/MariaDB database, such as incorrect credentials or permissions, can halt the installation process.
- File permissions issues: Not setting the correct file permissions for the WordPress files and directories can result in errors when attempting to install or update WordPress.
- URL and path misconfigurations: Entering incorrect URLs or file paths during installation can lead to WordPress not being accessible or functioning correctly.
- Conflicts with existing software: Having conflicting software installations or versions on your Windows 11 machine can interfere with the WordPress installation or cause compatibility issues.
Here is a troubleshooting guide to help you resolve five most common errors more efficiently –
- 404 Page not found error:
This error occurs when a visitor tries to access a page or resource that doesn’t exist on your WordPress site.
Troubleshooting:
- Check your permalink settings and ensure they are set to “Post name” or a custom structure that matches your site’s URL structure.
- Verify that the URLs of your pages and posts are correct and do not contain any typos or unnecessary characters.
- You can flush your WordPress permalink settings by visiting the “Permalink” settings page and clicking the “Save Changes” button without making any modifications.
- Error establishing a database connection:
This error prevents WordPress from connecting to the MySQL/MariaDB database, making accessing or managing your site’s content impossible.
Troubleshooting:
- Open the wp-config.php file and double-check your database credentials (name, username, and password) to ensure they match the database you created.
- Verify that the database exists and that the user has the correct permissions to access it.
- If you’re using a hosting service, contact their support team to verify your database credentials.
- Failed to connect to the FTP server:
This error occurs when WordPress cannot connect with the File Transfer Protocol (FTP) server during specific processes, such as plugin or theme installations or updates.
Troubleshooting:
- Verify that your FTP credentials (hostname, username, and password) are correct by trying to connect to the FTP server using an FTP client.
- Check if your hosting provider has specific FTP connection requirements or settings.
- If you’re using a hosting service, contact their support team for assistance in troubleshooting the FTP connection issue.
- HTTP Error when uploading images:
This error can occur when uploading images or other media files to your WordPress site, often due to file size or PHP memory limitations.
Troubleshooting:
- Increase the PHP memory limit by adding the following line to your wp-config.php file: define(‘WP_MEMORY_LIMIT’, ‘256M’);
- Increase the maximum file size limit in your php.ini file by modifying the following settings: upload_max_filesize and post_max_size.
- If you’re using a hosting service, contact their support team for assistance in increasing these limits on the server.
- White screen of death:
This issue appears as a blank white screen when accessing your WordPress site or the admin area, often caused by a plugin, theme conflict, or a PHP error.
Troubleshooting:
- Try disabling all plugins by renaming the /wp-content/plugins/ directory to something like /wp-content/plugins-disabled/.
- Switch to a default WordPress theme (e.g., Twenty Twenty-Three) by selecting it from the Appearance > Themes section in the admin area.
- If the issue persists, check your WordPress error logs or enable WordPress debugging to identify the cause of the error.
To Sum Up
Hopefully, this post has helped you understand how to install WordPress on Windows 11 locally.
One of the most impressive aspects of WordPress is the ability to create the same website on your computer using the same plugins. This opportunity gives you greater room to develop and maintain your website.
Installing WordPress locally on Windows is beneficial! You can replicate the live site to make modifications until you’re happy with it. A WordPress localhost website also comes in handy when you’re having site problems, need to discover bugs, alter your site, etc.
Refer to our blogs if you are eager to know more related articles on WordPress best practices, troubleshooting techniques, and other tips.
Install WordPress on Windows FAQs
How do I download and install WordPress locally?
To download and install WordPress locally on your Windows machine, you can use XAMPP or a similar local server environment.
Is WordPress compatible with Windows 11?
Yes, WordPress is compatible with Windows 11. WordPress is a web-based platform, and it can be installed on various web servers, including those running on Windows operating systems. You can set up WordPress on a Windows 11 environment using server software like XAMPP or WampServer.
What are the system requirements for running WordPress locally on Windows 11?
The system requirements for running WordPress locally on Windows 11 are generally the same as those for the web server software you choose to use. For example, if you’re using XAMPP, you’ll need to meet the minimum requirements for Apache, MySQL, and PHP, which are components included in XAMPP. Additionally, you’ll need sufficient disk space and RAM to run the local server and WordPress smoothly.
Can I use a different database management system instead of MySQL/MariaDB?
While MySQL or MariaDB are the recommended database management systems for WordPress, you can also use other database systems like PostgreSQL or SQLite. However, you may need to install additional plugins or make configuration changes to ensure WordPress works correctly with the alternative database system.
How do I migrate my locally developed WordPress site to a live server?
To migrate your locally developed WordPress site to a live server, you can use various methods, such as:
- Manually transferring the WordPress files and database via FTP or SSH.
- Using a plugin like All-in-One WP Migration or Duplicator to create a backup of your local site and restore it on the live server.
- Utilizing version control systems like Git to track changes and deploy your site to the live server.

