


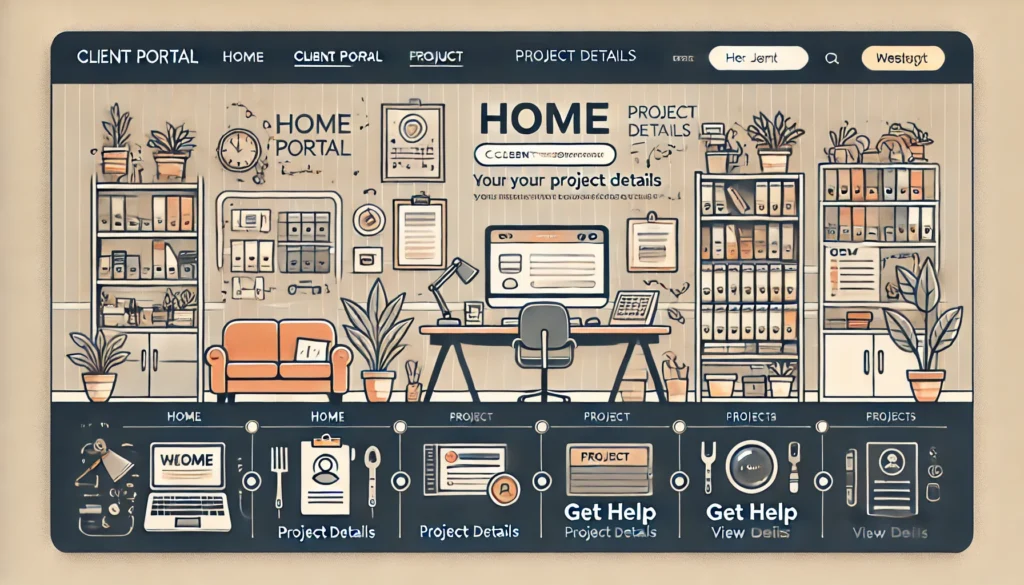
As an agency owner, it is probable that you have tried maneuvering several ways to keep your clients happy and in the loop. If so, a WordPress client portal might be your answer. It takes special WordPress development to make a website where you and your clients can work together easily. Think of it as a digital meeting room.
A secure website with a client portal is dedicated to enhancing communication and collaboration with your clients. It’s designed to streamline your workflows and improve client satisfaction by providing a central hub for all interactions.
Here’s what a client portal can do for you:
- Show project progress
- Share files
- Send invoices
- Store contracts
It’s all in one place. No more lost emails or bad UX resulting in confused clients. WordPress makes setting up a portal simple. It’s safe and easy to use. Your clients will love it. You’ll save time. Win-win.
What Does a Client Portal Do?
Did you know that companies using client portals report a significant drop in support-related emails and calls? This translates to significant time savings and improved efficiency.

Benefits of a WordPress Client Portal for Your Agency
Here’s a detailed look at how a client portal can transform your agency:
- Reduce Email Communication: Imagine significantly cutting down the hours spent sifting through emails, searching for attachments, and responding to client queries. With a client portal, all communications are centralized, making it easy to find what you need without the back-and-forth of email threads.
- Streamline Information Collection: Instead of gathering scattered pieces of information from various sources, a client portal allows for a more organized and efficient process. Clients can upload documents directly to the portal, ensuring everything is in one place and easily accessible.
- Reallocate Time to Strategic Tasks: The time saved from reduced email communication can be redirected towards more strategic activities. Your team can focus on high-value tasks like developing creative strategies, enhancing client services, and driving business growth.
Read for Relevant Information: Best WordPress Email Plugins
- Enhanced Security: WordPress client portals are equipped with robust security features, including password protection, encryption, and user authentication. This extra layer of security ensures that sensitive client information and project details are well-protected against unauthorized access.
- Convenient Collaboration: Clients will find it easier to collaborate on projects through a dedicated portal. They can access updates, share feedback, and review documents at their convenience, making the entire process smoother and more efficient.
Looking for a WordPress Client Portal to Simplify Project Management?
Get our skilled WP developers to take a look! At just $59/hr development hours, get all the development and support you need for a WordPress site ensuring smooth client communication.
What to Include in Your Agency’s WordPress Client Portal
A well-designed client portal is like a Swiss Army knife for your agency. It should have everything your clients might need, right at their fingertips. Here are some essentials you must showcase:
| Category | Items to Include |
| Project Documentation | • Creative briefs• Project timelines• Contracts |
| Brand Assets | • Logo files (various formats)• Style guides• Color palettes• Font files |
| Marketing Materials | • Social media graphics• Email templates• Brochures and flyers• Press releases |
| Business Information | • Company profiles• Team member bios• Mission statements• Target audience information |
| Financial Documents | • Invoices• Payment history• Budget breakdowns• Expense reports |
| Creative Work | • Design mockups• Photography• Video content• Copywriting samples |
| Templates and Tools | • Content calendars• SEO checklists• Analytics report templates• Social media post templates |
| Questionnaires and Feedback | • Client onboarding questionnaires• Project feedback forms• Satisfaction surveys |
| Reference Information | • FAQs• Tutorial videos• Best practice guides• Industry trend reports |
Methods to Create a WordPress Client Portal
We have listed four methods for different use cases and different set of benefits:
Method 1: WordPress Password-Protected Pages
Using password-protected pages is an easy way to create a client portal in WordPress. It’s great for a quick setup but has limitations, especially if you need to share sensitive information or have many clients.

Step 1: Create Your Client Page
- Log In to Your Dashboard: Go to your WordPress admin dashboard.
- Create a New Page: Click on Pages and then Add New.
- Design Your Page: Use the Gutenberg editor or any other page builder to design your client page. Add images, galleries, paragraphs, your logo, buttons, and any necessary files. These builders are easy to use, so you can simply drag and drop content blocks to set up your page.
Step 2: Attach Files
You have two options for attaching files:
- Using the WordPress Media Library: Upload your files directly into the media library and attach them to your page.
- Using Hyperlinks: Link to files stored in external services like DropBox, One Drive, or Google Drive.
Step 3: Password Protect Your Page
- Go to Pages: In your dashboard, click Pages and then All Pages.
- Edit Your Page: Find the page you created and click Edit.
- Set Password Protection: In the top right corner, under Status and Visibility, click the Public link. Choose Password Protected and enter a password.
- Publish Your Page: Click Publish or Update to make your page live. Share the password with your client so they can access it.
Read More: WordPress Salts: Enhancing Security & Encryption
Managing Multiple Clients

If you have several clients, here’s how you can manage their pages:
Option A: Repeat the Steps for Each Client
- Create a new page for each client.
- Protect each page with a unique password.
- Share each password individually with your clients.
Option B: Duplicate Existing Pages Manually
- Select a client page you’ve already created.
- Duplicate it and save it with a different name.
- Update the content and password for the new client.
Option C: Use a Plugin
- Install the Duplicate Page plugin.
- Use the plugin to duplicate pages quickly.
- Customize each page as needed.
Disadvantages of Password-Protected Pages
- No Encryption: Your content isn’t encrypted, so avoid sharing sensitive information like billing details.
- Tedious for Multiple Clients: If you have many clients, updating each page manually can become a chore. For instance, updating a single document across all client pages means doing it one by one.
- Limited Customization: The default login page is plain. Without customization options, it’s hard to brand your portal with logos or images to make it look professional and engaging.
Also Read: Ultimate WordPress Security Guide
Method 2: WordPress Page Templates / Theme Builders
Using WordPress page templates and theme builders is a smart way to create and manage client portals. It simplifies the process, saves time, and ensures all pages stay consistent and up-to-date. By leveraging custom post types, custom fields, and powerful page builders, you can create a professional and efficient client portal that keeps your clients happy and informed.
Set it up:
Step 1: Create a Custom Post Type
Start by creating a custom post type called Client Page. This lets you manage all client pages in one place.
Next, you can code this yourself or use a plugin like Custom Post Type UI to make it easier.
Step 2: Add Custom Fields

Add custom fields to your Client Page post type. These fields can include links, files, content, and anything else you need.
Use tools like Advanced Custom Fields (ACF), Pods, or Toolset to add and manage these fields.
Read More: Top 10 WordPress Custom Fields Plugins
Step 3: Design Your Template
Choose a page builder that supports custom layouts, such as Beaver Themer, Elementor Theme Builder, or Divi Theme Builder.
Use the page builder to design your client portal page template. Create a layout that includes all the custom fields and design elements you need.
Benefits of Using Templates
- Time-Saving: Once you create your template, you can use it for all client pages. This means you only need to design the page once.
- Consistent Updates: When you make changes to the template, all client pages update automatically. This keeps everything consistent without manual work.
How to Implement for Multiple Clients
- Duplicate Pages: After setting up your client portal template, duplicate the page for each client. This way, you can quickly create new client pages without starting from scratch.
- Password Protection: Add password protection to each client page to ensure only the intended client can access it. Share the passwords with your clients.
Also Read: Best Websites to Get WordPress Themes & Templates
Method 3: WordPress Membership Plugins
Using membership plugins like MemberPress to create a WordPress client portal offers a majorly polished and professional approach. It allows you to restrict access to certain pages, customize the login experience, and provide better aesthetics than simple password-protected pages.
This method is especially useful if you want to give clients access to premium content in a way that looks good and is easy to manage.
Do it this way:
Step 1: Choose a Membership Plugin

MemberPress is the most popular choice for effectively creating membership sites since it allows you to control access to specific pages and content.
Step 2: Set Up Memberships
Instead of using password-protected pages, your clients will log into WordPress to access the client portal.
Add your clients as members within the plugin.
Read More: Best WordPress Membership Plugins
Step 3: Restrict Access to Pages
Use the plugin to restrict access to certain pages. Only logged-in members (your clients) can view these pages.
This is similar to how gyms or online courses manage memberships.
Step 4: Customize the Login Page
One of the big advantages of using membership plugins is the ability to customize the login page.
This means you can add your branding, logos, and images to make it look more professional and attractive than the default WordPress password-protected pages.
Benefits of Using Membership Plugins
- Customizable Login Pages: Unlike basic password protection, membership plugins let you create a customized login experience. This enhances your brand image and provides a smoother user experience.
- Better Aesthetics: With more design options, your client portal will look polished and professional.
- Ease of Use: Clients have a single login to access all the content they need, making the process straightforward and user-friendly.
Read More: Outsource WordPress Website Design: Ultimate Guide
Method 4: Dedicated Client Portal Plugin
A dedicated client portal plugin offers a comprehensive solution for creating client portals with a user-friendly interface and robust features. One popular choice is the Client Portal plugin. Here’s how to set it up and the benefits it brings.
Steps to Create a Client Portal Using the Plugin
To set up a client portal using a dedicated plugin, follow these steps:
- Install and Activate the Plugin: Download and install the Client Portal plugin, then activate it through the WordPress dashboard.
- Configure Basic Settings: Use the setup wizard to configure essential settings like client information, access controls, and design preferences.
- Design Your Client Portal: Customize the portal using built-in tools. Add branding elements and create pages like project dashboards and file sharing areas.
- Integrate Additional Tools: Enhance functionality by combining the Client Portal plugin with tools like Content Snare for adding questionnaires and gathering client feedback.
- Automate Client Communication: Set up automatic email reminders to keep clients informed about updates, deadlines, and events.
Keep Reading: Transform Your Brand with These Top White Label Agencies
Benefits of Using a Dedicated Client Portal Plugin
A dedicated client portal plugin provides several advantages too:
- User-Friendly Interface: Easy navigation and quick setup with guided processes and pre-built templates.
- Customizable: Tailor the portal to align with your branding and specific needs, ensuring a professional look.
- Suitable for Agency Needs: Scalable for agencies of all sizes, with features like file sharing, project tracking, and secure messaging.
- Enhanced Functionality with Additional Tools: Integrate tools like Content Snare for added features such as questionnaires and automated communication.
Also Check: Best Branding Ideas for Your Business
Parting Words: Take Action Now to Transform Your Client Relationships
Setting up a WordPress client portal can really spruce up how your agency operates. Start small if you need to—choose what suits you best, be it password-protected pages or a cool dedicated plugin. Set up your first client space, add those important docs, and see what your clients think.
Our advice – tweak it as you go along. Even a simple portal can make a big difference in keeping everyone in the loop. The key is to dive in and keep making it better. Your future self—and your happy clients—will appreciate the effort!