


The header is the first section of a website that visitors see. Customizing the text in the header tag is very important for WordPress site builders who want creative, unique designs. However, to edit and customize headers in WordPress can be challenging. It requires understanding how to properly use the WordPress theme customizer, code editors, and other tools.
A personalized header helps strengthen your brand, improves site navigation with menus, and attracts more visitors with visuals like logos. From designing custom logo layouts to coding advanced dropdown menus, mastering WordPress header customization unlocks total control over how your site’s front door looks and functions for your specific needs. We will find out more about that in this article.
A Brief Overview of WordPress Header
A WordPress header appears on top and is the first component of the website that grabs visitors’ attention. It’s important to especially focus on headers during WordPress maintenance because it contains key elements like:
- Navigation Menu – This lets visitors easily click to different pages on your site.
- Logo – Your company’s logo that helps people recognize your brand.
- Other Useful Items – Things like social media icons, buttons to take an action (like “Buy Now”), search bars, contact info, etc.
The header needs to make a good first impression and provide everything a visitor might need access to right away.
Thankfully, with WordPress’s new Full Site Editing feature, you can now design and customize your header however you want. There are many different types of WordPress headers:
- Global Header – A consistent header shown on every page
- Sticky Header – The header stays visible at the top when scrolling down
- Full Screen Header – Takes up the entire screen with big images/videos
- Slide-In Menu – On mobile, the menu slides in from the side
- Slide Down Header – Slides down as you scroll to show more options
- Vertical Menu – Menu is vertical on the side instead of horizontal
- Transparent Header – See-through header over the page content
- Rotated Header – Header is turned 90 degrees for a unique look
- Mega Menu – Expandable categories great for e-commerce sites
The header type you choose depends on your site’s design, content, and ideal user experience. Some are better for creative portfolios, others for content sites, online stores, etc. The right header can enhance your visitor’s experience.
How to Edit the Appearance of the Header
Want to transform the look of your header effortlessly by adjusting its font style, size, and color to match your website’s aesthetic? We will show you three methods for doing it right —-
Method 1: By Using Theme Customizer
The theme customizer is a built-in tool within WordPress that allows users to modify various aspects of their website’s theme in real time. It provides a user-friendly interface where you can make changes to elements like colors, fonts, layouts, widgets, and more, without needing to know any code. This intuitive feature lets website owners personalize their site’s appearance and see the changes instantly before applying them live.
Follow the steps below to refine the visual allure of your WordPress website by using the theme customizer and fine-tuning your header’s appearance to perfection.
Step 1: Access WP Website
Sign in to your WordPress dashboard using your admin details to get started. You can also reach the login page by adding wp-admin at the end of your website’s address. If the login page differs, there are several ways to find your WordPress login URL.
Step 2: Navigate to Theme Customizer
To change the look of your website, go to the left side of your WordPress Admin Dashboard and click on Appearance. Then, choose Customize from the options that appear. This will open the Theme Customizer, where you can make all sorts of design adjustments.
Read More: WordPress Changes Not Showing? Fix Easily!
Step 3: Locate Header Setting
Finding where to edit your header can differ based on your theme. Usually, you’ll see options for the header in sections labeled Header, Header & Navigation, or Header Options. Click on the section that mentions the header to open it up and see the settings you can change.
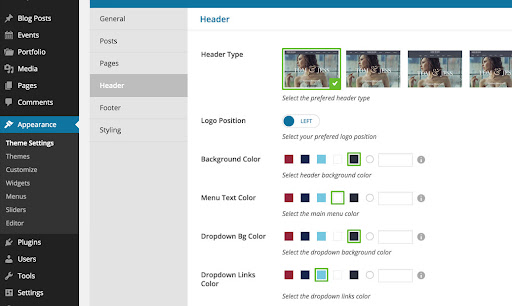
Step 4: Customize Header Elements
Based on your theme and what you can customize, you can usually change these parts of the header:
- Site Title/Logo: You can adjust the title of your site or put in a custom logo.
- Site Tagline: Change or hide the tagline of your site.
- Header Image/Gradient: Some themes let you add a picture or a gradient color to the header background.
- Navigation Menu: You can pick which menu shows up at the top of the website, where it goes, and how it looks.
- Header Layout: Change how wide, tall, and where the header sits.
- Header Text and Colors: Adjust the color of the text, links, and other style stuff in the header.
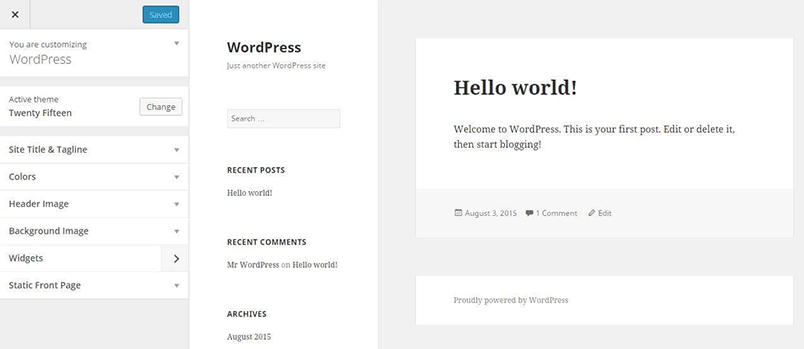
Step 5: Preview Your Changes
When you are tweaking things in the WordPress Customizer, you’ll see a live preview of how your header will appear. Take your time to check if you like the changes before you decide to publish them. This way, you can ensure everything looks right before it goes live on your site.
Step 6: Save Your Changes
Once you’ve adjusted the header to your preference, click the Publish or Save & Publish button. This will save your changes and show them immediately on your website.
Read More: Fix WordPress “Publishing Failed. The Response Is Not A Valid JSON Response.” Issue
Step 7: Check on Website
To see how your header looks with the changes, open your website’s URL in a new web browser tab. Remember, you might need to go back and forth a few times to get everything just right. While you are working on it, it’s a good idea to clear your WordPress site’s cache. This helps ensure you’re seeing the most recent updates accurately.
Pro Tip: Different themes offer different ways to customize your header. If your current theme doesn’t give you enough options for the header, think about switching to a new theme.
Alternatively, you can contact our custom design services for extra help tailoring the header to your liking.
Enthused to Customize WordPress Headers?
Adopt bespoke web design services starting at a bafflingly low $999 one-time payment price!
Method 2: Edit Header Using Full Site Editor
If you want more advanced and flexible ways to customize your header in WordPress, try using a full site editor instead of the default customizer. You can access the Full Site Editor through the new WordPress features or within the modern WordPress block editor, Gutenberg.
Here’s how to edit the header using the Full Site Editor:
Step 1: Access the WordPress Website
Access your WordPress admin dashboard by logging in.
Step 2: Navigate to the Full Site Editor
Navigate to Appearance on the WordPress dashboard menu. From there, select Site Editor from the dropdown menu. This action will launch the Full Site Editor interface.
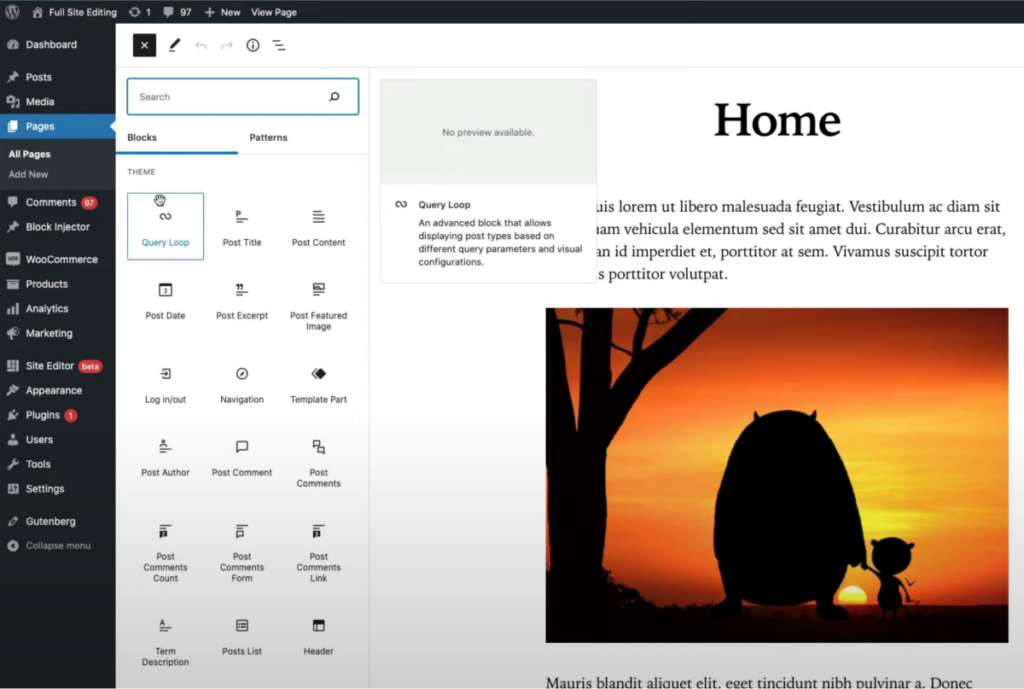
Step 3: Select the Header Block
The website’s live preview is now displayed, and you will find all the editing choices listed on the left side. Search for the header part, typically positioned at the top of the site. It is likely to be identified as either Header or Site Header. Proceed by clicking on the header section.
Step 4: Edit the Header
Once you’ve chosen the header section, you’ll see various editing options in the sidebar. Depending on the theme and the features of the block editor, you can customize the header in the following ways:
- Change Logo: Upload a custom logo or switch out the current one.
- Add Blocks: Utilize this advanced tool to incorporate and organize text, images, buttons, or other content within the header.
- Adjust Header Height: Control how prominently the site appears on the page by making the header taller or shorter to match your web design needs.
- Header Blocks: Utilize blocks to integrate different content elements within the header. Text blocks, image blocks, buttons, social media icons, and search bars are commonly used.
- Header Elements Alignment: Align each block to the left, center, or right. You can also manage the alignment and placement of header elements like the logo, site title, and navigation menu.
- Sticky Header: Activate or deactivate the sticky header feature, which keeps the header visible at the top of the page as users scroll down.
Get Design Insights: The Importance Of Kerning In Web Design
Step 5: Preview and Publish Your Changes
The WordPress Full Site Editor lets you view a live preview of your website’s header. Review the changes to ensure they align with your design preferences and meet your requirements.
Step 6: Check Your Website
Head over to your site and explore the freshly updated header.
Overall, the WP Full Site Editor provides a more visual and adaptable approach to tailoring your distinctive header compared to the Theme Customizer. Nevertheless, the available features and customization choices could vary based on the theme and installed plugins.
Method 3: Edit Header Using Header Plugin
For the most effective way to enhance your WordPress website’s header, consider utilizing a plugin. Plugins offer an array of customization possibilities, empowering you to tailor your header to perfection.
What’s more, they often receive regular updates, ensuring compatibility with the latest WordPress versions and providing you with new features to explore. So, why not take advantage of these dynamic tools to create a header that truly stands out and evolves with your site’s needs?
Keep Reading: Best One-Page WordPress Website Builders for Businesses
Follow these steps:
Step 1: Install Elementor Header and Footer Builder
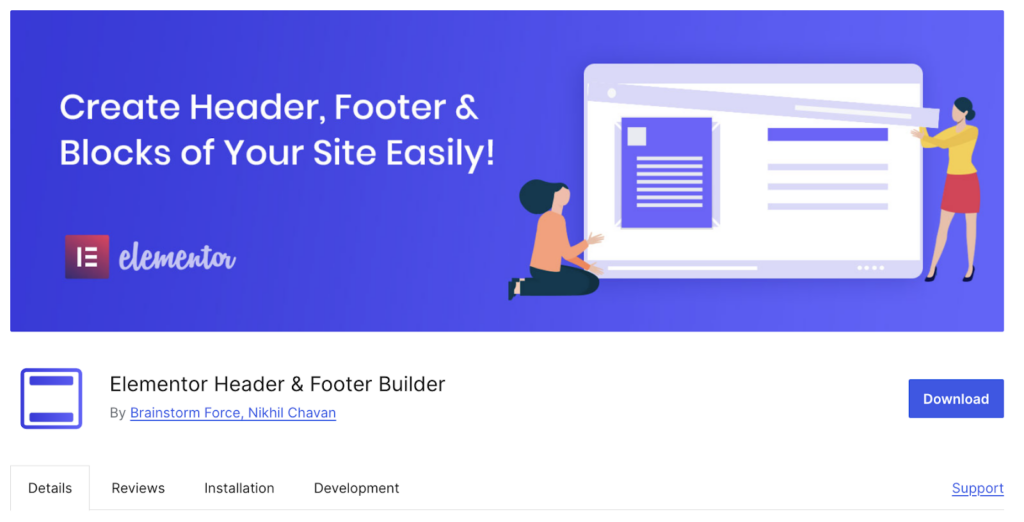
To begin enhancing your WordPress site, access your WordPress Admin Dashboard. From there, head to the Plugins section. Next, click on Add New and search for the Elementor Header & Footer Builder plugin.
Once you find it, hit the Install button. After the installation, click on Activate to activate the plugin. Following these steps will ensure that the Elementor Header & Footer Builder plugin is active and ready for you to start using.
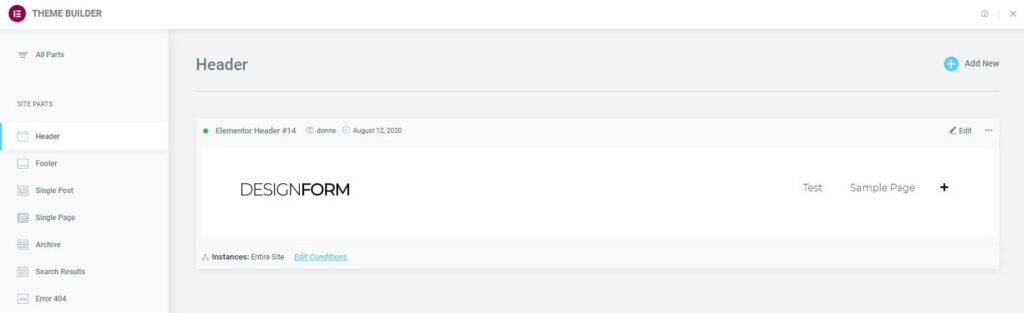
Step 2: Create a Header Template
Once you’ve arrived at your WordPress Dashboard, head over to the Templates section. From there, opt for the Theme Builder feature. To craft a fresh header template, simply click on the Add New button. Then, select the Header template type to get started.
Step 3: Choose a Header Structure
Elementor offers ready-made header designs. However, if you prefer, you can also craft a completely customized header from the ground up. Once you’ve made your selection, the Elementor editor will open, allowing you to start refining your chosen design.
Step 4: Design Your Header
Utilize the Elementor editor to craft your header design to perfection. With its intuitive interface, you can effortlessly incorporate and personalize elements such as logos, navigation menus, text, buttons, images, and even shortcodes by dragging and dropping them from the selection on the left-hand side panel.
Additionally, Elementor provides extensive customization options for styling, colors, typography, and spacing, allowing you to fine-tune each element to align with your design vision. Don’t hesitate to explore Elementor’s widgets and features to infuse your header with dynamism and interactivity, making it truly stand out.
Keep Reading: How to Edit WordPress Footer in 5 Simple Methods (Step-by-Step Guide)
Step 5: Preview Your Header
Using Elementor, you can get a sneak peek of the header you’ve crafted by simply clicking on the eye icon located beside the Publish button. This allows you to review your design and make any necessary adjustments without affecting your live web pages.
Step 6: Save Header Template
When you click on the Publish button, a dialog box will appear, prompting you to choose where to display the header you’ve created. If you miss selecting an option from this pop-up, simply proceed to the next step.
Step 7: Assign the Header to Your Website
To showcase your personalized header on your website, you must assign it to particular pages or conditions. Start by heading to your WordPress admin dashboard, then navigate to Templates. You will find several options under the name you’ve assigned to the Header section. Click on Edit within that panel. Scroll down and select Display Conditions, where you can configure the display rules to insert the header.
More Reading: WordPress Accessibility Guide: Compliance with WCAG Standards
Step 8: Publish Your Header Template
After setting up the display conditions, activate your customized header on your website by clicking on the Publish button.
Your new header is now Live! Elementor’s Header Footer plugin is versatile and visually appealing for header design and personalization. With this plugin, you can craft headers that are static, sticky, or even transparent in style.
Read More: Elementor Stuck on Loading Screen? Here’s 25+ Actionable Methods to Fix it!
Customizing WordPress Header Using Full-site Editing
Full Site Editing in WordPress offers a fresh approach to customization, moving beyond the limitations of the old Theme Customizer. While you can still use the Customizer, the Site Editor is the new frontier – a canvas for creative freedom (though still in beta). For instance, when working with the Twenty Twenty-Three Theme, the Site Editor proves invaluable for tailoring your header’s fonts, colors, button styles, and more.
Check This: 25 Best Elementor SaaS WordPress Themes
Accessing the WordPress Header in the Site Editor
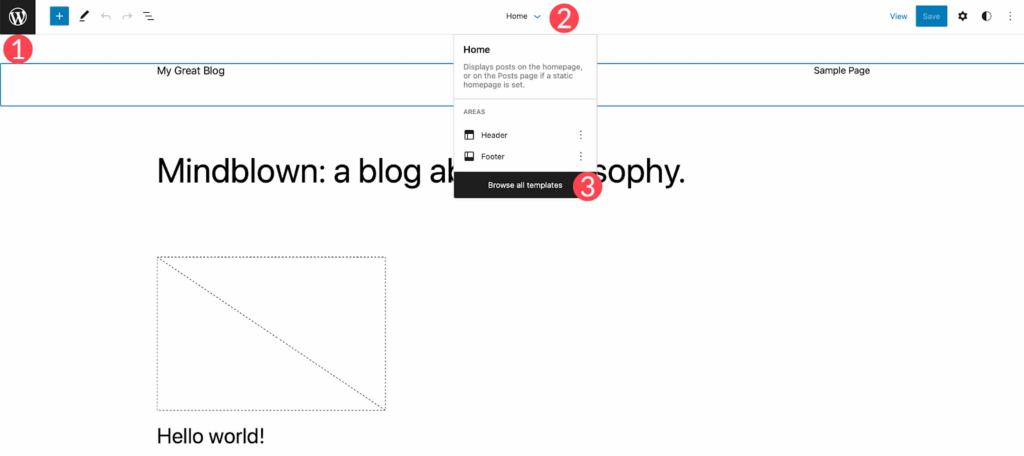
- Navigate to Appearance > Site Editor in your WordPress admin
- Upon loading the editor, you’ll land on the home settings
- To access header settings, click the WordPress logo (top-left) or the dropdown arrow, then choose Browse All Templates
- Next, select Template Parts from the WordPress menu
- Finally, click Header to edit your site’s header
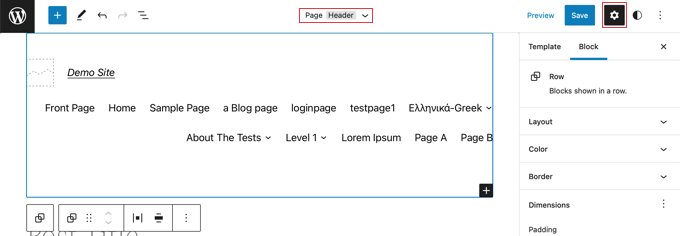
Styling the Header
The Twenty Twenty-Three theme ships with a basic header structure. However, you can add or remove WordPress blocks as desired. Let’s walk through editing this template part to create a simple, custom header:
- Click the List View icon to see the header’s structure
- You will find a Group block containing a Row with two child blocks: Page Title and Navigation
- The Row is already centered vertically and set to full-width
Customizing the Header
- Delete the Site Title block by expanding its ellipsis menu and selecting Remove Site Title
- Add the Social Icons block by clicking the plus icon next to Navigation and searching for social icons
- Add your desired social platform icons (Facebook, Instagram, etc.) via the modal box
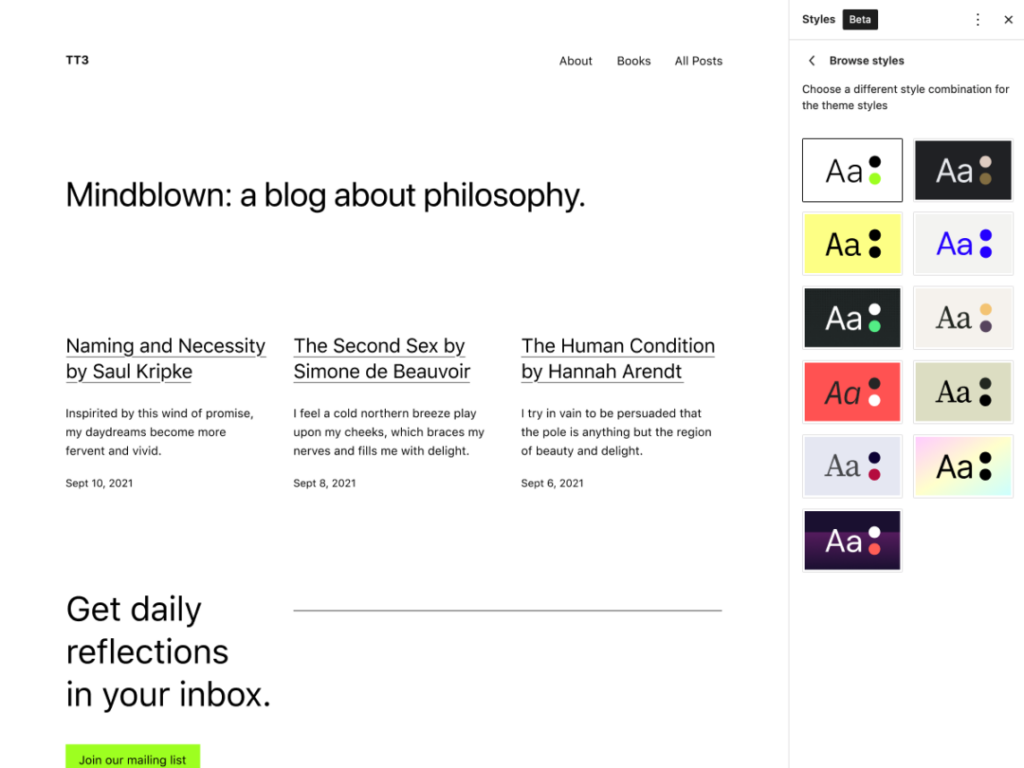
- Style the Social Icons block by adjusting layout, justification, orientation, link behavior, colors, and spacing
- Add a background color to the Row block via Additional Settings > Background
- Insert a new Row block for additional header elements
- Move the Navigation block to the new Row by dragging it
- Add a Button block to the first Row and style it (text, color, border-radius)
- Add the Site Logo block to the second Row, upload your logo, and configure settings
- Ensure the second Row is set to full width and justification is “space between items”
- Set the Row alignment to align middle.
By thoughtfully arranging blocks and adjusting their styles, you can have granular control over every aspect of your WordPress header and craft a custom header that perfectly aligns to your branding while providing an optimal user experience.
Need Customization for Your WordPress Header?
We cover full-site WordPress designing with optimum style, at revolutionarily low costs! Grab this offer at $999 one-time payment.
Conclusion
Remember, customizing WordPress headers lets you make a lasting impression on visitors, reflecting your brand’s unique identity. Whether you leverage the Theme Customizer, Full Site Editor, or specialized plugins, take advantage of the powerful tools at your disposal. Experiment with different layouts, colors, and elements to create a visually captivating, user-friendly header that drives engagement and conversions. Embrace creativity, prioritize functionality, and continuously refine your header to stay ahead of the curve.