Embark on a journey of limitless creativity with full site editing for your WordPress site. Gone are the days of being confined by rigid templates and limited customization options. Now, imagine having the power to sculpt every inch of your website with full site editing— from the sleek headers for a site title that welcomes visitors to intricate footers or styles sidebar that leave a lasting impression.
With WordPress full-site editing, the traditional boundaries of web design fade away, paving the way for a new era of innovation with site editing. This revolutionary approach introduces a range of design blocks, allowing you to effortlessly mold your site’s block theme layout to match your unique vision. No longer are you constrained by pre-defined structures; instead, you have the freedom to explore, experiment, and truly express yourself.
Contents
ToggleBreaking Down Full Site Editing on WordPress
Full site editing in WordPress allows you to customize every aspect of your website with ease. Unlike the traditional approach, where you could only edit posts and pages, you can now create custom headers and footers and build intricate content areas using blocks.
Popular plugins catering to the entire site, like Divi and Elementor have embraced this paradigm shift, equipping you with a block editor toolkit brimming with advanced features and intuitive controls. Whether you are a seasoned developer or a novice user of block themes & templates, full site editing empowers you to bring your ideas to life with unparalleled precision and finesse.
Also Read: 25 Best Elementor SaaS WordPress Themes
Are You Finding Site Editing Options on WordPress Too Limited?
Our expert custom web designers will bring your idea to life! Get started with a one-time payment of just $999.
Top Benefits of Full Site Editing
In a nutshell, full-site editing empowers you to unleash your creativity, streamline your workflow, and future-proof your website—all without the hassle of complicated tools or technical jargon.
The top benefits are:
- Complete Design Control: With full-site editing, you are the boss. Sculpt every corner of your website, from site icon to featured image slots, to site logo area to post tile block – everything exactly how you envision it, from headers to footers, with ease.
- Unified Editing Experience: Say farewell to hopping between different page templates, template files and editors. WordPress full site editing brings everything under one roof, simplifying work on the WordPress dashboard and makre it more efficient to tweak your site’s appearance.
- Increased Customization Options: Tired of cookie-cutter designs as found in most theme frames? Full site WordPress editing offers a treasure trove of customization options for the WordPress platform, allowing you to personalize every aspect of your webpage as you use full site editing to reflect your unique style.
- Streamlined Workflow: No more juggling multiple tools and plugins. Full-site editing streamlines the design process, saving you time and effort so you can focus on what matters most—creating great content.
- Reduced Dependence on Plugins: Say goodbye to plugin overload. Use full site editing because, many of the functionalities that once required plugins are now built right into the WordPress blog post as it shows in the new site editor. This minimizes the need for additional software cluttering your page layouts.
- Future-Proofing Your Site: Stay ahead of the curve with full site WordPress editing. By embracing this innovative site editing makes your site future-proof, ensuring it remains adaptable and relevant with new features as technology continues to evolve.
Is Full Site Editing Only Available on Block Themes?
Full site WordPress editing is not limited to block themes, but site blocks are designed to take full advantage of the feature.
Here is how WordPress websites run on all the blocks integrated in their theme:
- Block themes feature columns block with header template, footers, sidebars, and other template parts, in addition to post content block.
- They use a theme.json file as full site editing theme to control global styles and settings, replacing the traditional theme customizer.
- While not mandatory, block settings are optimized for full site editing, allowing users to add blocks throughout the theme templates.
- Currently, there are over 160 block settings available, but it is a relatively small number compared to the thousands of traditional themes already popular in the WordPress community.
Regarding blocks themselves, there are two types:
- Static blocks contain content known at the time of publishing, such as paragraphs, headings, images, and buttons.
- Dynamic (Theme) blocks are designed for template building and can pull content dynamically from the site’s backend, such as post feeds, titles, featured images, and more.
Keep Reading: Learn How to Create Custom Post Type in WordPress Easily
Steps to Full Site Editing on WordPress
Ready to take your WordPress website to the next level? Follow these simple steps to unlock the full potential of full-site editing, empowering you to customize every aspect of your site with ease and precision.
Step 1: Choosing a Compatible Theme
Right now, there are over 150 full-site editing themes you can use on WordPress. You can get one for free from WordPress or buy a premium one. Let’s pick a free one from WordPress. First, log in to your WordPress dashboard and go to Appearance > Themes. Then, click Add New.
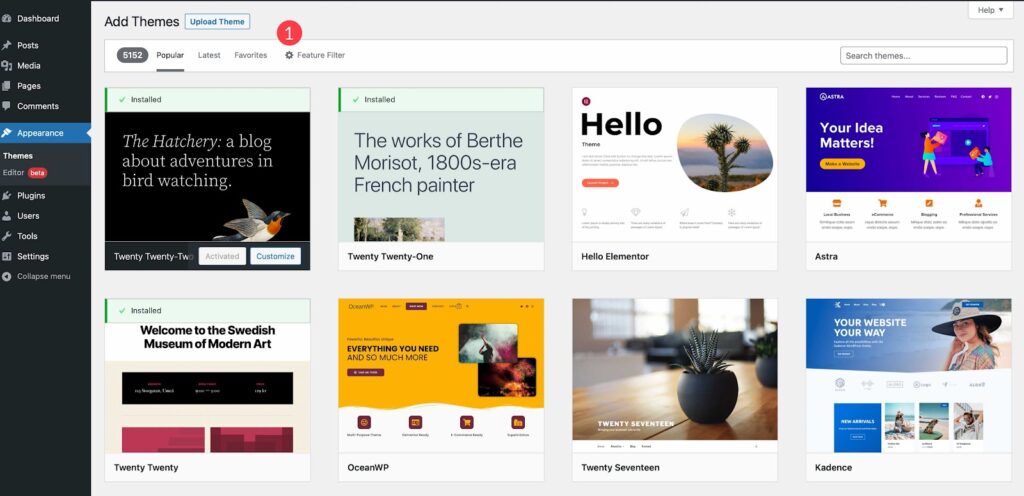
Next, click Feature Filter to set filters. You can sort by subject, features, or layout. Just check the Site Editor box and click Apply Filters.
You will see your options. Pick a theme you like or choose the Twenty Twenty-Two theme for this guide. Once chosen, activate your theme, and you are ready to go!
Also Read: Exploring The Best WordPress Block Themes
Step 2: Customizing a Template
Let’s begin customizing your new theme, focusing on Twenty Twenty Two theme for simplicity:
1. Activate your theme: After selecting your theme, activate it to start customizing.
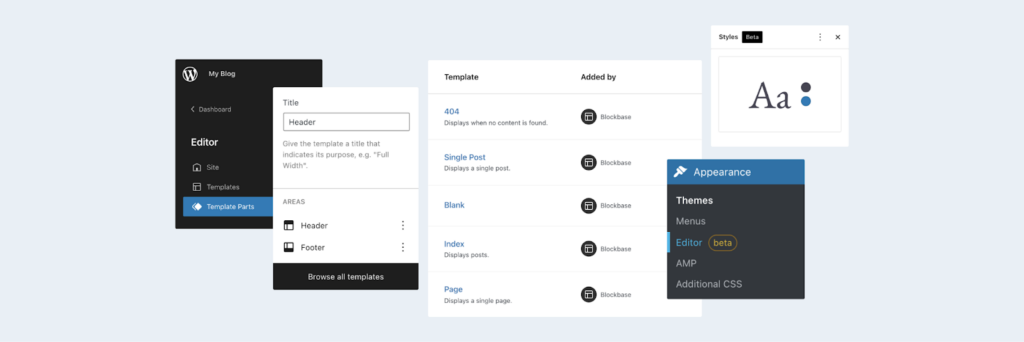
2. Access the editor: Navigate to Appearance > Editor to access the editing tools.
3. Explore templates: Upon entering the editor, begin with the home page template. To explore other templates, click the WordPress logo, then Templates.
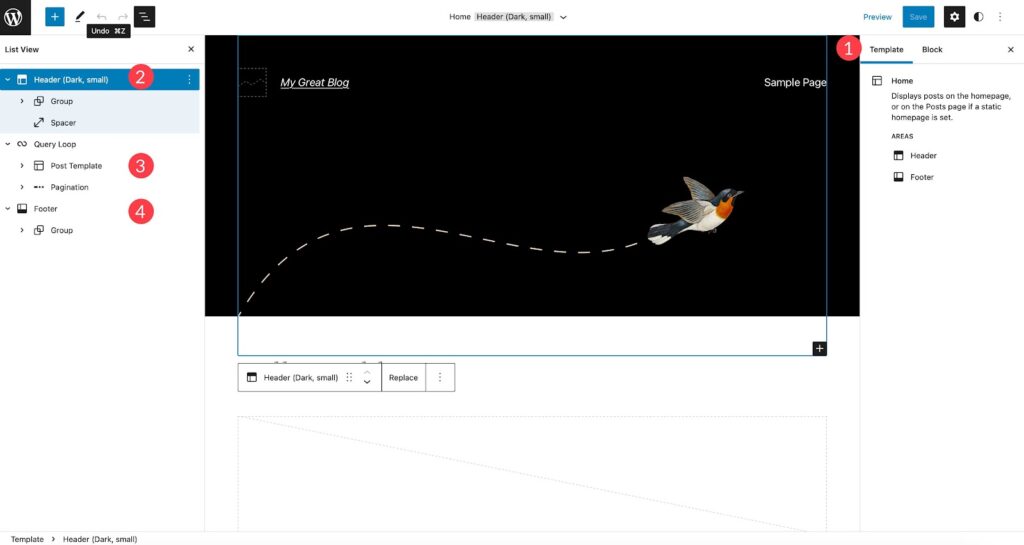
4. Create new templates: Utilize the Add New button to craft unique templates tailored to your site’s needs.
5. Customize template parts: Modify various template parts such as headers and footers to refine your site’s appearance.
6. Add blocks: Enhance your site’s functionality by incorporating blocks. Click the blue + button to add and customize blocks.7. Edit existing blocks: Make necessary adjustments to existing blocks by clicking on them and modifying their content or settings.
Read More: 16 Tips to Fix WordPress Updating and Publishing Failed Errors: Ultimate List
Step 3: Getting Global Styles
One standout feature of full-site editing themes is their ability to set global styles, allowing you to customize fonts, colors, and spacing across your entire site with ease. Whether you want a cohesive look or specific styles for certain blocks, this feature saves you significant time compared to older themes. Here is how to access and customize global styles in the Twenty Twenty Two theme:
1. Accessing Global Styles: Click the styles icon at the top right of the site editor to access global styles for your site.
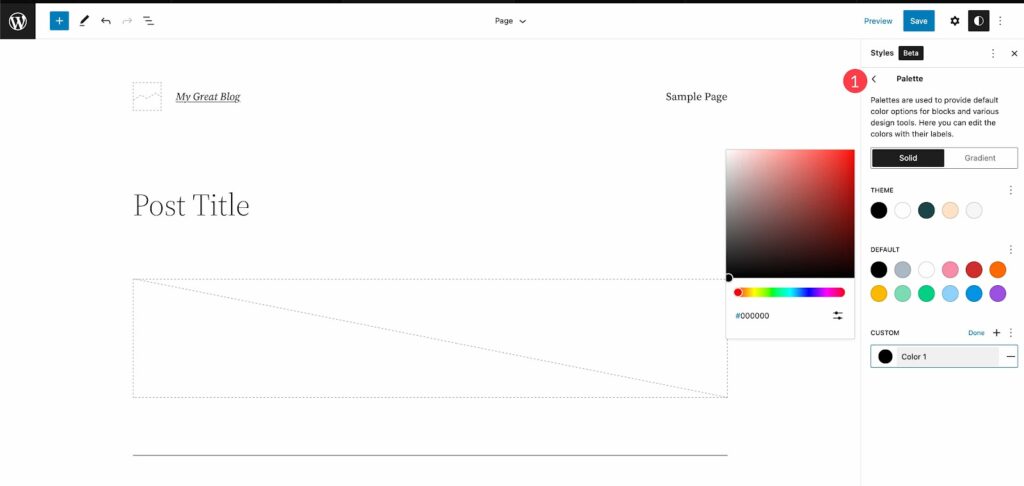
2. Browse Available Styles: Once activated, explore the available styles in the Twenty Twenty Two theme by clicking the browse styles link. Here, you can choose a color scheme that suits your site.
3. Typography Settings: Under the typography section, customize font options for your text and links. Adjust font family, size, line height, and font weight to achieve the desired appearance.
4. Color Customization: In the colors section, edit the colors used in your global color palette. Choose colors for backgrounds, text, and links from a range of options. Twenty Twenty Two theme offers 17 solid colors and 20 gradients, with the option to add custom colors and gradients for branding purposes.
5. Adjust Padding: Finally, fine-tune the padding of your layout. Set padding for the top, left, right, and bottom collectively or individually to ensure your site’s content is well-spaced and visually appealing.
Read More: WordPress Changes Not Showing? Fix Easily!
Not Sure What’s Weighing Down Your Site Speed?
Let our WordPress speed experts resolve deep-rooted issues for a one-time fee of $499, and boost your site’s performance!
Step 4: Using Theme Blocks
In the block editor, you have access to over 90 blocks to create page templates in the site editor. Some of these are dynamic theme blocks, meaning they will display dynamic content on your site’s front end. For instance, when you are in the single post template, you will see blocks like post title, post featured image, and post content. These are handy for building dynamic templates to display your blog posts.
1. Using Theme Blocks for Headers, Footers, and More: Among these blocks, there are 27 theme blocks. Let’s focus on how to use a few of them to build a new header template part for your site. First, go to the Templates menu and select Blank template to start.
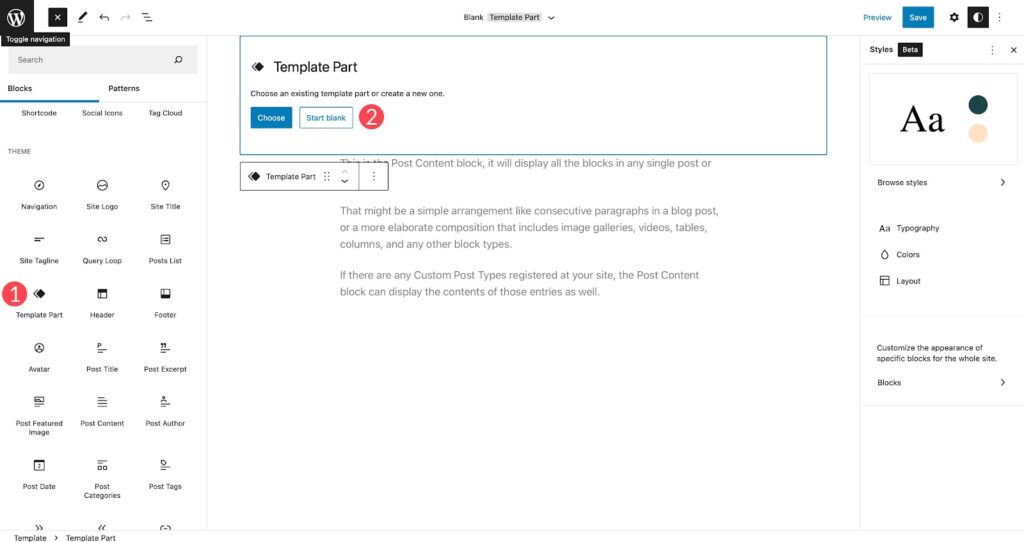
2. Navigating the Layers View: If you want to see which blocks are used on your page, click the layers icon in the top left of your site editor screen.
3. Adding Blocks for the Header: Click the blue + icon and scroll down to the theme block options. Select the template part block and drag it onto your blank page. Give it a name and click create. Then, add a spacer block for 20px of space at the top, and a columns block with a 33/33/33 column variation.
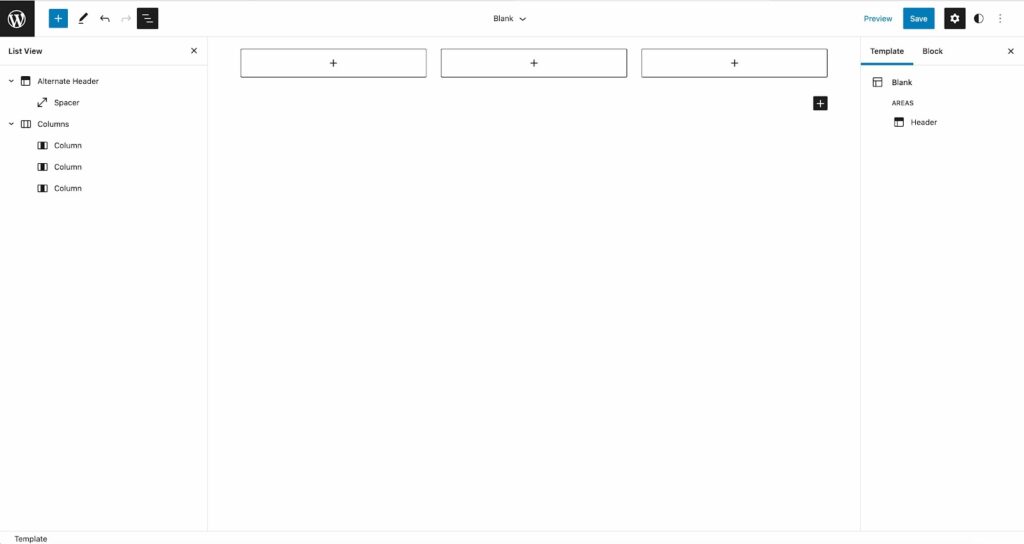
4. Customizing the Header: Add the site logo block, navigation block, and social links block to the columns. You can upload images, add menu items, or social media icons accordingly.
5. Adjusting Layout: In the layers view, adjust the width of each column to 20%, 60%, and 20% respectively under Column Settings > Width. This ensures proper spacing for your header.
6. Saving Your Template: Once satisfied with your header design, click Publish to save your template.
Keep Looking: 25 Best Elementor SaaS WordPress Themes
Step 5: Block Patterns for Starting Designs
When you are designing templates, block patterns are a quick way to add sets of blocks for easier design. WordPress offers standard block patterns, or you can create your own. Here’s how to access and use them:
1. Access Block Patterns: Click the blue + icon in the site editor, then go to the patterns tab. You’ll find various categories like footers, headers, buttons, galleries, and more.
2. Edit Patterns: Each pattern can be customized to fit your design. Adjust colors, fonts, and padding styles within individual blocks.
3. Save Patterns: To save a pattern you have customized, click the ellipsis menu in the list view, then choose Add to Reusable Blocks. You can also save it as a Template Part for later use.
Using block patterns streamlines your design process, helping you create professional-looking templates with ease.
More Reading: Best Site Reputation Management Tools to Monitor Social Mentions
Conclusion
WordPress full site editing empowers you to unleash your creativity and take complete control over your website’s design. Explore compatible block themes, master the block editor, leverage community resources, implement best practices, and embrace continuous learning. By following these actionable steps, you can unlock a world of possibilities, streamline your workflow, and future-proof your online presence with this innovative WordPress feature.


