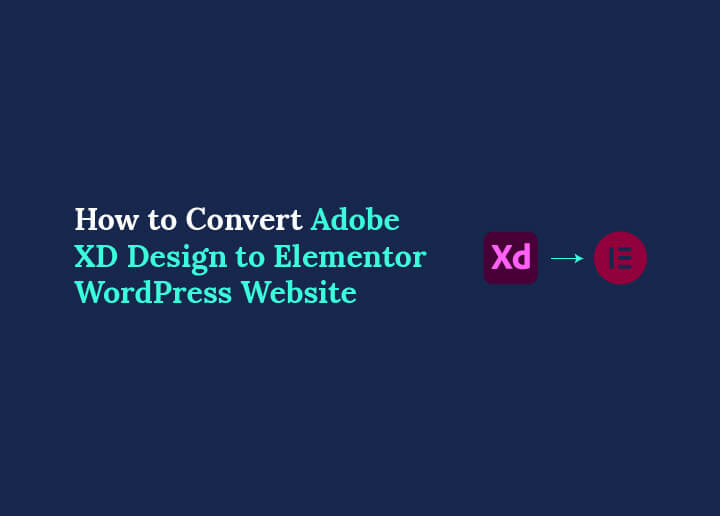
In this guide, you’ll learn how to seamlessly convert an Adobe XD design to Elementor websites while ensuring speed, scalability, and conversion-focused performance.
Turning a static design into a fully functional website is where real digital impact begins. If you’ve created a stunning layout in Adobe XD, the next logical step is transforming it into a dynamic, responsive WordPress site using Elementor.
However, this process isn’t just about copying visuals; it requires precision, performance optimization, and UX alignment. Whether you’re a business owner ready to launch or a designer aiming for pixel-perfect execution, understanding this conversion process is crucial. So, let’s get started!
TL;DR: Adobe XD to Elementor Conversion in a Nutshell
- Start by organizing your Adobe XD design and exporting assets for a smooth workflow.
- Set up WordPress, install Elementor, and use a lightweight theme for flexibility.
- Recreate layouts first, then apply branding, typography, and visuals consistently.
- Ensure mobile responsiveness and strategically add interactive elements.
- Optimize for speed and SEO before launch.
- Finally, test thoroughly. For faster, scalable results, professional services often deliver better long-term ROI.
Why Convert Adobe XD Design to Elementor?
Before diving into the steps, it’s important to understand the value behind this workflow.
Adobe XD allows designers to create intuitive UI/UX layouts. However, it lacks backend functionality. On the other hand, WordPress paired with Elementor provides:
- Drag-and-drop flexibility
- Real-time design editing
- SEO-friendly structure
- Scalability for business growth
As a result, converting XD to Elementor bridges the gap between design and functionality.
DIY vs Professional Conversion: Which Should You Choose?
Choosing between DIY and professional conversion depends on your budget, timeline, and technical expertise. While DIY offers control, professional services ensure efficiency, scalability, and performance-driven results.
DIY Approach for XD to Elementor Conversion
DIY conversion minimizes initial investment, making it suitable for startups or individuals working with tight budgets and flexible timelines.
- Full Control: You retain complete authority over design, customization, and updates, allowing for iterative experimentation and creative flexibility.
- Time-Intensive: The process demands significant time for learning, building, testing, and optimizing, especially without prior WordPress or Elementor experience.
- Requires Technical Knowledge: A solid understanding of design systems, responsiveness, plugins, and performance optimization is essential to achieve a professional outcome.
Professional Services Adobe XD Design to Elementor Conversion
Professional teams ensure pixel-perfect design, clean code, and seamless functionality aligned with industry standards.
- Faster Turnaround: Experts streamline the entire workflow, delivering fully functional websites quickly without compromising quality.
- Scalable Architecture: Your website is built with future growth in mind, supporting integrations, performance upgrades, and business expansion.
- Better Long-Term ROI: Although the upfront cost is higher, the return on investment improves through better performance, conversions, and reduced maintenance issues.
If your website directly impacts revenue, professional conversion is often the smarter investment.
Professional WordPress Conversion Services by Seahawk Media
If you’re aiming for flawless execution without technical headaches, professional conversion services can make all the difference. This is where Seahawk Media stands out.

We specialize in converting Adobe XD designs into high-performance WordPress websites built with Elementor. Our approach focuses on both visual accuracy and backend efficiency, ensuring your site not only looks great but also performs exceptionally well.
Here’s what we offer:
- Pixel-Perfect Conversion: Every element, from typography to spacing, is meticulously replicated to match your original XD design.
- Clean and Optimized Code: Unlike DIY approaches, professional services ensure lightweight code, faster load times, and improved SEO performance.
- Mobile-First Responsiveness: Your website will function seamlessly across devices, which is critical for conversions.
- SEO and Performance Optimization: We implement technical SEO best practices to help your site rank better from day one.
- Dedicated Support and Maintenance: Beyond launch, we provide ongoing support to keep your website up to date and secure.
If your goal is to launch faster while maintaining premium quality, outsourcing this process can deliver a significantly higher ROI.
Turn Your Adobe XD Design Into a High-Performing WordPress Website
Get a pixel-perfect, fast, and conversion-optimized Elementor WordPress site built by experts who understand design precision, performance, and business growth.
Step-by-Step Process to Convert Adobe XD to Elementor
Transforming an Adobe XD design into a fully functional Elementor WordPress website requires a structured approach. By following a systematic workflow, you ensure design accuracy, responsiveness, performance optimization, and a seamless user experience from start to finish.
Step 1: Analyze and Prepare Your Adobe XD Design
To begin with, carefully review your Adobe XD file. This foundational step ensures a smooth transition from design to development.
- Audit Design Elements: Identify fonts, color palettes, spacing, and UI components. This helps maintain consistency throughout the build.
- Organize Layers and Artboards: Group elements logically so you can replicate sections efficiently in Elementor.
- Export Assets: Export images, icons, and illustrations in appropriate formats, such as SVG or PNG, for optimal quality.
- Create a Style Guide: Define reusable styles for typography, colors, and buttons to streamline web development.
Step 2: Set Up Your WordPress Environment
Next, establish a solid foundation by setting up WordPress correctly.
- Choose Hosting and Domain: Opt for reliable hosting to ensure speed, uptime, and scalability.
- Install WordPress: Use one-click installation to get started quickly.
- Install Elementor Plugin: Add Elementor (and Elementor Pro if needed) for advanced design capabilities.

- Add Essential Plugins: Include SEO, caching, and security plugins to enhance performance and visibility.
Step 3: Install and Configure a Lightweight Theme
After that, select a theme that complements Elementor without adding unnecessary bloat.
- Choose Minimal Themes: Themes like Hello Elementor or Astra provide a clean slate for custom designs.

- Configure Global Settings: Set up colors, typography, and layout defaults within the theme and Elementor.
- Disable Unused Features: Remove unnecessary theme elements to improve loading speed and flexibility.
Step 4: Recreate Layout Structure in Elementor
Now, start building the framework of your website.
- Create Page Templates: Begin with key pages such as Home, About, and Services.
- Use Sections and Columns: Break down the layout into sections and columns to match the XD design.

- Focus on Structure First: Prioritize layout alignment before adding detailed styling.
- Maintain Grid Consistency: Ensure spacing and alignment reflect the original design accurately.
Step 5: Add Typography and Branding
Once the structure is ready, move on to visual identity elements.
- Set Global Fonts: Apply consistent typography across headings, paragraphs, and buttons.

- Apply Brand Colors: Use your predefined color palette for consistency and recognition.
- Style UI Components: Customize buttons, links, and icons to match the design system.
- Ensure Readability: Maintain proper contrast and hierarchy for a better user experience.
Step 6: Import Images and Visual Elements
At this stage, bring your design to life with visuals.
- Upload Optimized Images: Use compressed formats like WebP to enhance performance.
- Maintain Aspect Ratios: Ensure images scale correctly across devices.
- Use SVGs for Icons: SVGs provide scalability without loss of quality.
- Organize Media Library: Keep assets structured for easier management and updates.
Step 7: Build a Responsive Design
Equally important, ensure your website performs seamlessly across all devices.
- Adjust for Tablet and Mobile: Customize layouts specifically for different screen sizes.
- Optimize Typography: Scale fonts appropriately for readability on smaller screens.
- Modify Spacing and Alignment: Fine-tune margins and padding for a balanced layout.
- Test Across Devices: Validate responsiveness on multiple screen resolutions.
Step 8: Add Interactive Elements
Then, enhance functionality by incorporating dynamic features.

- Integrate Forms: Add contact or lead generation forms to capture user data.
- Use Sliders and Carousels: Showcase content in an engaging format.
- Implement Animations: Add subtle animations to improve user engagement.
- Avoid Overloading: Keep interactions minimal to maintain speed and usability.
Step 9: Optimize for Speed and SEO
After building the design, shift focus to performance and discoverability.
- Enable Caching and Minification: Reduce load times by optimizing CSS, JavaScript, and HTML.
- Use Lazy Loading: Load images only when they appear on the screen.
- Optimize On-Page SEO: Add meta titles, descriptions, and proper heading structures.
- Improve Core Web Vitals: Ensure fast loading, interactivity, and visual stability.
Step 10: Test and Launch Your New WordPress Site
Finally, validate everything before going live.
- Check Functionality: Ensure all links, forms, and features work correctly.
- Test Cross-Browser Compatibility: Verify performance across Chrome, Safari, Firefox, and Edge.
- Run Speed Tests: Use tools like Google PageSpeed Insights to identify opportunities for improvement.
- Launch Your Website: Once everything is optimized, publish your site and monitor performance.
By following this structured process, you not only achieve a pixel-perfect conversion but also ensure your Elementor website is fast, responsive, and optimized for long-term success.
Common Challenges in XD Design Conversion and How to Overcome Them
Even with a structured workflow, Adobe XD to Elementor conversion can present technical and design-related challenges. Identifying these early and applying the right fixes ensures a smooth, high-performing website build.
Design Inconsistency
Solution: Use Global Styles
Inconsistencies often arise when styles are applied manually across sections. To address this, define global fonts, colors, and button styles within Elementor.
This ensures visual uniformity and reduces repetitive work. Additionally, using reusable templates helps maintain consistency across pages while speeding up development.
Slow Loading Speed
Solution: Optimize Assets and Performance
Heavy images and unoptimized scripts can significantly slow down your website. Therefore, compress images using modern formats like WebP and enable lazy loading.
Moreover, install caching and performance plugins to minimize the size of CSS and JavaScript files. This not only improves speed but also enhances SEO rankings and user experience.
Responsive Issues
Solution: Customize for Each Device
Designs that look perfect on a desktop may break on a mobile or tablet. To overcome this, use Elementor’s responsive editing tools to adjust layouts, font sizes, and spacing for each device. Testing across multiple screen sizes ensures a seamless experience for all users.
Plugin Conflicts
Solution: Use Reliable Plugins Only
Too many or poorly coded plugins can cause functionality issues. Instead, choose lightweight, well-supported plugins and keep them up to date. This minimizes conflicts and ensures stable website performance.
Final Thoughts
Converting Adobe XD designs into Elementor WordPress websites is more than a technical task; it’s a strategic process that blends design precision with performance optimization.
While the DIY route is viable for small projects, businesses aiming for high conversions and scalability should prioritize quality execution.
By following the steps outlined above or partnering with experts like Seahawk Media, you can ensure your website is not only visually impressive but also fast, responsive, and conversion-driven.
FAQs About Adobe XD Design to Elementor
Can Adobe XD designs be directly imported into Elementor?
No, Adobe XD designs cannot be directly imported into Elementor. They must be manually recreated using Elementor’s drag-and-drop builder and exported design assets.
How long does it take to convert Adobe XD to Elementor?
The timeline depends on the project’s complexity, but a standard website typically takes anywhere from a few days to a couple of weeks.
Do I need Elementor Pro for XD to WordPress conversion?
While the free version works for basic layouts, Elementor Pro is highly recommended for advanced features like forms, templates, and dynamic content.
Is coding required for converting Adobe XD to Elementor?
No extensive coding is required. However, basic knowledge of WordPress and design principles helps achieve better accuracy and performance.