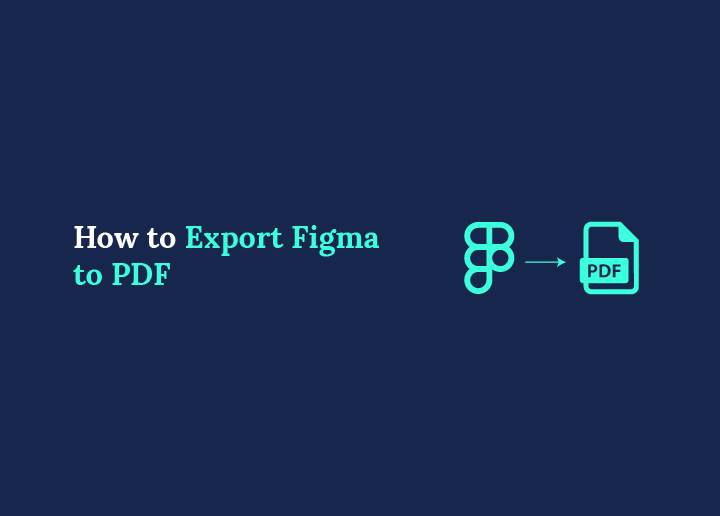
Figma to PDF conversion is one of the most common tasks for designers, developers, and teams who need to share designs, presentations, wireframes, or prototypes in a universally accessible format. Exporting designs as PDFs makes it easier to review, print, present, and collaborate with stakeholders who may not use Figma.
Whether you’re exporting a single frame, an entire design system, or a client presentation, choosing the right export method helps preserve quality, formatting, and usability. This guide covers the best ways to export Figma files to PDF, common issues, and troubleshooting tips for smoother exports in 2026.
To export Figma to PDF, select the frame or frames you want to export, open the Design panel in the right sidebar, scroll to the Export section, click the plus icon, set the format to PDF, and click Export. For multi-page PDFs, select multiple frames before exporting. Figma exports each selected frame as a separate page in the PDF by default.
When to Export Figma to PDF?
PDF export is the right choice when sharing designs with stakeholders who do not have Figma access, preparing print-ready artwork, archiving a design version at a specific project stage, or delivering final approved designs as a non-editable document.
Use a Figma share link instead when the recipient needs to inspect the design, leave comments, or view the prototype. A shareable link provides more interactivity and always reflects the latest version of the file, unlike a PDF.
Figma to PDF Export Methods: How to Convert Your Designs
Figma supports three PDF export methods depending on your output needs. Layer export works for individual components, frame export handles complete page designs, and plugins cover multi-frame documents and print-ready output. Choose the method that best matches your use case before you start.
Method 1: Using Figma’s Built-in Export Feature
Use this method when you need to export specific layers or design elements rather than a full frame. It produces focused, lightweight PDFs and works directly from Figma without additional tools.
? 79")
How to do it:
- Open your Figma file and select the layers you want to export
- Open the Design panel in the right sidebar
- Scroll to the Export section at the bottom of the panel
- Click the plus icon to add an export setting
- Set the format to PDF
- Adjust resolution if needed, 1x for screen and 2x for higher quality output
- Click Export and choose a save location
- Open the exported file to verify the output before sharing
Eager to Take Your Pixel-perfect Figma Designs Onto Your Website?
Leave the transferring hurdles to the pros! Get Figma designs flawlessly spread across your website.
Key Advantages:
- Precise Control: Export only the layers you need, giving you full control over the output. This is especially useful for large, complex designs where you want to focus on specific elements.
- Manageable File Sizes: By selecting specific layers, you create smaller, more shareable PDFs. This is crucial when sending files via email or uploading them to project management tools with file-size limits.
- Focused Presentation: Ideal for showcasing particular design components or sections. It allows you to create PDFs that get straight to the point, perfect for client presentations or team reviews.
- Customization Options: Adjust export settings for each layer based on specific requirements. This flexibility lets you tailor the output for different purposes or recipients.
- Efficient Updates: Easily export modified layers without redoing the entire design. This is a time-saver when you’re making iterative changes to specific elements.
Potential Drawbacks:
- Time Intensive: Exporting multiple individual layers can be time-consuming, especially for designs with many components.
- Context Loss: Exported layers may lack the context of the full design, which could be an issue if the overall layout is important.
- Learning Curve: Requires practice to master the selection and export process, particularly for complex, multi-layered designs.
Suitable Users:
- Designers: For exporting specific UI components or design elements, useful in creating design systems or component libraries.
- Project Managers: To review and provide feedback on particular design aspects without getting overwhelmed by the entire project.
- Developers: For obtaining detailed exports of specific layers for implementation, ensuring they have exactly what they need for coding.
- Freelancers: To showcase individual elements of their work to clients, allowing for focused discussions on specific design choices.
- Marketing Teams: For extracting specific assets for promotional materials, ensuring brand consistency across different platforms.
Not Impressed with Run-of-the-Mill Templates?
Break out of the mould with custom-designed websites from our creative developers! Get thoughtfully designed custom homepages and subpages in no time.
Method 2: Export Full Frames to PDF
Use this method when you need to export a complete design view, including all elements within a frame. This is the standard approach for client presentations, stakeholder reviews, and full-page design documentation.
How to do it:
- Open your Figma file and click the frame you want to export
- To export multiple frames, hold Shift and click each one
- Open the Design panel in the right sidebar
- Scroll to the Export section and click the plus icon
- Set the format to PDF
- Adjust compression settings if needed
- Click Export and save the file
- Open the PDF and confirm layout, fonts, and images are exported correctly
Key Advantages:
- Complete Design Capture: Exports the entire frame, ensuring all elements and layouts are included in the PDF. This provides a full view of the design, maintaining its integrity and structure.
- Consistency in Presentation: Preserves the design’s layout and relationships among elements, which are crucial for understanding the overall user interface or experience flow.
- High-Quality Output: Produces professional-grade PDFs suitable for presentations, client reviews, or detailed documentation of the entire design.
- Simplified Export Process: Streamlines the export by treating the frame as a single unit, eliminating the need to select individual layers.
- Context Preservation: Offers a comprehensive overview of the project, making it easier to understand the design’s context and flow.
Potential Drawbacks:
- Large File Sizes: Exporting entire frames can result in larger PDF files, especially for complex designs with many elements.
- Less Flexibility: Doesn’t allow selective export of specific elements within the frame, which might be necessary in certain situations.
- Potential for Overwhelming Detail: The comprehensive nature of frame exports might provide more information than needed for some audiences.
Suitable Users:
- UI/UX Designers: For presenting complete user interfaces or experience flows to stakeholders or clients.
- Clients and Stakeholders: To review and approve entire design projects with a comprehensive view.
- Design Teams: For collaborative work, ensure all team members have a consistent and complete view of the design frames.
- Educators and Students: In teaching design principles or submitting complete design projects and portfolios.
- Product Managers: To understand and communicate the full scope of a design to development teams and other departments.
Method 3: Export to PDF Using a Figma Plugin
Figma plugins extend the native export functionality for specific use cases, including multi-frame PDFs, custom page sizes, and batch exports that the built-in feature does not support natively.
? 80")
Recommended plugins:
- Figma to PDF by Able: Handles batch frame exports and supports custom paper sizes for print-ready output
- PDF Export: Exports multiple frames as a single multi-page PDF with consistent page sizing
- Pitchdeck Presentation Studio: Converts Figma frames into presentation-ready PDFs with slide formatting
How to do it:
- Open the Figma Community panel from the Resources icon in the toolbar
- Search for your chosen PDF export plugin and click Install
- Return to your design file and select the frames to include
- Open the plugin from Plugins in the main menu
- Configure page size, orientation, and export quality
- Click Export and save the PDF
Best suited for designers exporting multi-frame documents, print-ready files, or presentations where the native export does not produce the required page format or ordering
Figma to PDF Export Method Comparison
Each method suits a different use case. Use this comparison to identify the right approach before starting the export.
The three methods differ in setup time, output control, and the types of designs they handle best. Choosing the right method upfront avoids re-exporting after discovering a format limitation.
| Method | Best For | Skill Required | Plugin Needed | File Size |
|---|---|---|---|---|
| Layer export | Individual components and elements | Basic | No | Small |
| Frame export | Full page designs and presentations | Basic | No | Medium |
| Plugin export | Multi-frame documents and print output | Intermediate | Yes | Variable |
Tips and Best Practices for Seamless Figma to PDF Transfers
Apply these practices before exporting to avoid the most common Figma-to-PDF quality and compatibility issues.
- Organize Your Figma File: Before exporting, ensure it is well-structured. Group related elements, name layers clearly, and use a logical frame hierarchy. Group related elements, name layers clearly, and use a logical frame hierarchy. Disorganized files result in inconsistent, unpredictable PDF output.
- Check Your Typography: Fonts can sometimes behave unexpectedly when exported to PDF. Double-check that all text elements use the correct fonts and are properly sized. For custom fonts, outline the text before exporting by selecting it and choosing Object, then Outline Stroke. This converts letterforms to vector shapes and prevents font substitution in any PDF viewer.
- Color Settings: Ensure your Figma color settings match your intended output. Screen colors in RGB will look different when printed in CMYK. If your PDF is for print, convert color values to CMYK before exporting. For digital PDFs, stick with RGB, but note that colors may appear slightly different across screens and devices.
- Optimize Images: Large image files can significantly increase your PDF size. Before exporting, compress images where possible without sacrificing quality. This will result in more manageable PDF files that are easier to share and open.
- Use Vector Shapes When Possible: Vector shapes scale infinitely without losing quality. Whenever feasible, use vector shapes instead of raster images. This practice ensures your PDF looks crisp at any zoom level and keeps file sizes smaller.
- Set Appropriate Export Settings: Adjust your export settings based on the PDF’s intended use. For web viewing, a lower resolution might suffice, while print-ready PDFs require higher resolution.
- Test Different Frame Sizes: Experiment with different frame sizes to find what works best for your design when exported to PDF. Some layouts might benefit from a specific aspect ratio or page size to look their best in PDF format.
- Create PDF-Specific Artboards: For designs intended primarily for PDF export, consider creating dedicated artboards that are optimized for PDF viewing. This might include adjusting layouts, font sizes, or color schemes to ensure they translate well to the PDF format.
- Use Constraints Wisely: Properly set constraints on your Figma elements to ensure they behave as expected when exported to different PDF page sizes. This is particularly important if your PDF might be viewed on various devices or printed in different formats.
- Include Relevant Metadata: When exporting, don’t forget to include the project name, version, and any necessary copyright information. This helps you organize and identify your PDFs after export.
Troubleshooting Common Issues
Even with careful preparation, you may encounter issues when exporting from Figma to PDF. Here are some common problems and their potential solutions:
- Blurry or Pixelated Images in the Exported PDF: This often occurs when raster images are scaled up or when export resolution is set too low. Ensure your images are high quality and appropriately sized in Figma. Increase the export resolution in the PDF settings if needed. For vector graphics, check that they remain in vector format during export.
- Unexpectedly Large PDF File Size: Large PDFs can be difficult to share and slow to open. This issue usually stems from high-resolution images or unnecessary hidden layers. Compress images before importing them into Figma, delete unused layers, and consider lowering the export resolution if the PDF is for screen viewing only.
- Text Appearing Different in the PDF Compared to Figma: Font inconsistencies can occur if the PDF viewer doesn’t have the necessary fonts installed. To avoid this, consider outlining text in Figma before export, or embed fonts in the PDF if your export settings allow it. Be aware that some fonts may not support embedding due to licensing restrictions.
- Colors Looking Different in the Exported PDF: Color discrepancies often result from RGB-to-CMYK conversion or screen calibration issues. If your PDF is for print, use CMYK colors in Figma. For digital use, stick with RGB, but be aware that colors may appear slightly different across various screens and devices.
- Layers or Elements Missing in the PDF: This can happen if layers are hidden or if there are issues with grouping and nesting in Figma. Double-check that all necessary layers are visible and properly grouped before exporting. Ensure no elements extend beyond frame boundaries, as they may be cut off in the PDF.
- PDFs Failing to Open or Displaying Errors: Corruption during export can lead to unreadable PDFs. Try exporting again, and if the problem persists, export in smaller batches or individual frames. Updating your Figma app or trying a different PDF viewer might also resolve the issue.
- Interactive Elements Not Working in the PDF: Remember that PDFs are static documents. Any interactive elements, such as hover states or animations, in Figma won’t translate to the PDF. Consider creating separate frames to showcase different states of interactive elements if needed.
- Inconsistent Page Sizes in Multi-Page PDFs: When exporting multiple frames, inconsistent frame sizes in Figma can lead to varying page sizes in the PDF. Standardize your frame sizes in Figma before export, or consider using a PDF editor to adjust page sizes post-export if necessary.
Conclusion
Figma’s built-in export handles most PDF use cases directly. Use layer export for individual components, frame export for complete page views, and a plugin when you need multi-frame documents, custom paper sizes, or print-ready output.
Before exporting, confirm that fonts are embedded or outlined, that images are compressed, and that colors match the intended output medium. If the exported PDF does not match the Figma design, the issue almost always traces back to font rendering, image resolution, or a color profile mismatch, all of which are straightforward to fix before re-exporting.
FAQs About Figma to PDF
Does exporting to PDF affect the quality of my Figma design?
Not if exported correctly. Vector elements like shapes, icons, and text retain full quality at any zoom level. Raster images lose quality if they are undersized in the original file or if export resolution is set too low. Always size raster images at 2x their display dimensions inside Figma before exporting.
How do I fix blurry images in an exported Figma PDF?
Blurry images occur when raster images are scaled above their native resolution or when the export resolution is too low. Increase the export resolution to 2x in the Export settings panel, and confirm that the source image in Figma is high resolution. For logos and icons, use SVG or vector shapes instead of raster images to eliminate this issue entirely.
Will interactive elements from my Figma prototype appear in the PDF?
No. PDFs are static documents. Hover states, animations, and prototype flows do not transfer during export. If you need to document interactive behavior, create separate frames showing each interaction state and export them as individual pages in the PDF.
How do I export a FigJam board to PDF?
Open your FigJam board, select the content area or frames you want to export, click the main menu, select Export, and choose PDF. FigJam exports the selected area as a single PDF suitable for sharing workshops, brainstorm sessions, and planning documents outside of Figma.
What is the best Figma plugin for PDF export?
PDF Export and Figma to PDF by Able are the most reliable options for multi-frame and print-ready PDF output. Both support custom page sizing, consistent frame ordering, and batch export. Install either from the Figma Community panel directly inside your Figma workspace.


