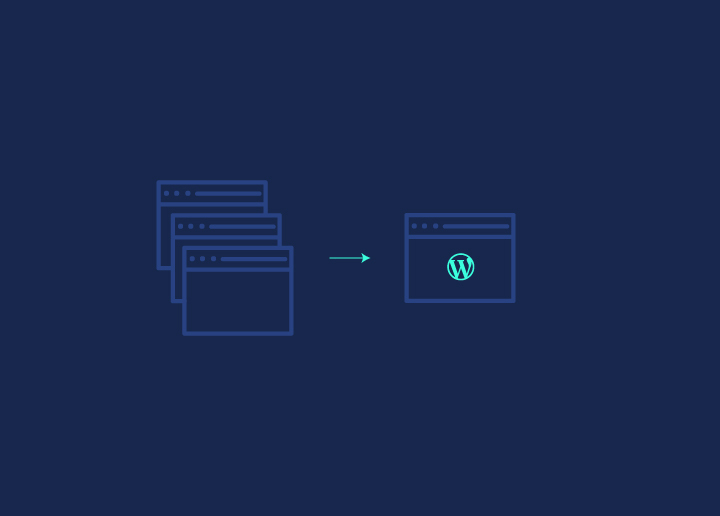


Converting Figma to Elementor is crucial in transforming high-fidelity designs into fully functional, responsive websites. In this guide, we’ll walk you through the process in five simple steps, ensuring your Figma designs transition seamlessly into Elementor pages. Whether you’re a web developer or a designer, these steps will help you maintain design integrity while making the most of Elementor’s powerful features.
Overview of Elementor and Figma
One effective way to convert Figma to WordPress websites is to use a page builder like Elementor. For this article, let’s take a brief look at Elementor and Figma.
Elementor is one of the leading WordPress page builders that lets you create exceptional websites without writing a single line of code. Its drag-and-drop editor and extensive library of pre-designed templates and widgets make it accessible for both beginners and advanced users.

Key features of Elementor include:
- Responsive design settings
- Theme builder capabilities
- Range of integrations
Elementor’s popularity is also due to its flexibility, ease of use, cost-effectiveness, and ability to build professional-quality websites quickly.
As a cloud-based design tool, Figma is known for its collaborative capabilities and ease of use. It allows multiple web designers to simultaneously work on the same project, making it well-suited for team projects.

Key features of Figma include:
- Vector editing
- Prototyping
- Developer handoff
This helps streamline the design-to-development workflow. Figma’s popularity also stems from its real-time collaboration features, varied plugins, and accessibility from any device with an internet connection.
Know more about: Elementor vs Figma: Which is the Best Tool
Seek Professional Help for Figma to Elementor Conversion – Seahawk

Just like converting Figma to WordPress, you can seek professional help for converting Figma to Elementor. Seahawk specializes in this process, ensuring a smooth transition from design to a fully functional Elementor website.
By following a streamlined approach, we take care of every detail, from exporting assets to setting up your Elementor pages accurately. Our expertise ensures that your design integrity is maintained and that a high-quality, responsive website is delivered as per your specifications.
Why are Figma and Elementor an Excellent Combination for Web Design?
Figma and Elementor complement each other exceptionally well in the web design process. Together, they streamline the transition from design to development, enabling both designers and developers to work more efficiently. Here are a few reasons why this combination is ideal for creating stunning, responsive websites:
Seamless Collaboration Between Teams
Figma is renowned for its real-time collaboration capabilities, allowing multiple designers and stakeholders to work together simultaneously on a project. This ensures that feedback is incorporated quickly, and design iterations happen without delays. When combined with Elementor, the handoff to developers becomes much smoother. Developers can recreate the Figma design directly in Elementor without having to deal with complex code.
Design Precision with Visual Flexibility
Figma enables designers to craft pixel-perfect, high-fidelity designs, providing complete control over every design element. Once the design is ready, Elementor’s drag-and-drop interface allows for the precise implementation of the design. This ensures that the final website matches the original vision of the design team without the need for custom coding.
Rapid Prototyping and Iteration
Figma’s prototyping tools make it easy to create interactive website design mockups that simulate how the final website will look and function. After client approval, Elementor’s fast and flexible editing tools allow developers to bring those prototypes to life quickly. The process of going from design concept to functional web pages is significantly sped up, making it possible to iterate rapidly and make adjustments on the fly.
Maintaining Design Consistency
Elementor offers global settings for fonts, colors, and spacing, ensuring that your website maintains a consistent style throughout. Figma’s design systems can be easily translated into Elementor’s global design settings, meaning that the overall look and feel of the website stays true to the initial design.
No Coding Required
One of the biggest advantages of combining Figma with Elementor is that you don’t need advanced coding skills to turn designs into live websites. Designers can focus on creativity without worrying about code, while developers or non-developers can use Elementor’s intuitive interface to recreate the design faithfully without touching a single line of HTML, CSS, or JavaScript.
Responsive Design Made Simple
Both Figma and Elementor prioritize responsive design. In Figma, designers can create multiple layouts for different screen sizes, ensuring that the design works well on mobile, tablet, and desktop. Elementor allows developers to fine-tune the website for different devices, ensuring that the design looks just as good in practice as it did during the design phase.
Preparing Figma Designs for Elementor Conversion
Before you begin converting your Figma designs into Elementor, it’s crucial to prepare your designs to ensure a smooth and efficient workflow. Proper preparation will save you time, minimize critical errors, and help maintain design integrity throughout the conversion process. Here are key tips on how to get your Figma designs ready for Elementor conversion:
Make Your Designs Responsive
One of the most important steps in preparing your Figma designs is ensuring they are responsive. Since websites need to look great on multiple devices (desktop, tablet, and mobile), it’s essential to create responsive versions of your design in Figma. Test different layouts and use Figma’s Auto Layout feature to easily adapt your design elements to different screen sizes. This will help ensure that your design works seamlessly when recreated in Elementor’s responsive settings.
Organize Layers and Components
An organized design file will make the conversion process much easier. Properly name and group your layers, components, and assets in Figma so that each design element is easy to find.
Use Figma’s grouping and component features to maintain a clean and structured design file. This is especially important when exporting assets, as an unorganized file can lead to confusion and missed elements during the Elementor build.
Export Assets in Web-Friendly Formats
When exporting assets like images, icons, and buttons, choose the appropriate web-friendly formats to ensure high performance. SVG is ideal for vector graphics like icons, while PNG or WebP works best for images.
Figma allows you to export assets in multiple formats, so always opt for the one that will maintain visual quality without compromising website speed. Additionally, compress images to reduce file sizes and improve load times when imported into Elementor.
Optimize Image and Media Assets
Ensure that images and media assets are optimized for the web before importing them into Elementor. Figma provides options to export images at different scales, but it’s essential to choose the appropriate resolution for each asset.
For example, icons and logos should be exported as SVGs, while larger images or photographs should be compressed to avoid slowing down the website’s performance. Keeping file sizes small without sacrificing quality is key for maintaining an efficient and fast-loading site.
Set Up a Style Guide for Consistency
To maintain design consistency throughout your Elementor site, set up a style guide within your Figma design. Define global styles for typography (fonts, headings, and paragraph text), colors, and spacing. This will ensure that when you recreate your design in Elementor, you can use its Global Settings to apply consistent styles across all pages, saving time and ensuring uniformity.
Prepare Interactive Elements for Translation
Figma’s prototyping tools allow designers to create interactive elements like hover states, transitions, and animations. While Elementor does support animations and interactive features, not all Figma prototypes will translate perfectly. Identify which interactions can be easily recreated in Elementor and plan for adjustments where necessary.
Consider how interactive elements will behave on different devices to ensure a smooth user experience.
Ensure Font Compatibility
When designing in Figma, use web-safe fonts that are widely supported in Elementor and across browsers. If your design uses custom fonts, make sure they are available for use in Elementor, or be prepared to upload the font files during the site build. Testing the appearance of these fonts in Figma will give you an idea of how they’ll render on your Elementor site.
Check for Consistency Across Components
In Figma, it’s easy to reuse components like buttons, icons, and form elements across multiple pages. Make sure these reusable components are consistent in style and size, as this will make recreating them in Elementor much simpler.
Consistent components ensure a uniform look and feel across your website and eliminate the need for repeated design adjustments.
Consider the Website’s Structure
While preparing your design in Figma, it’s helpful to think about how your pages will be structured in Elementor. Organize sections, columns, and rows in a way that aligns with Elementor’s layout system. This forethought will make it easier to translate your design into Elementor without losing any structural integrity. Use consistent grid systems and spacing in Figma to ensure alignment is easy to replicate in Elementor.
Steps to Convert Figma to Elementor
Converting Figma designs to Elementor involves a series of well-defined steps, which include exporting assets, setting up Elementor, and meticulously recreating your design within the page builder. Follow the below steps to achieve a smooth conversion.
Step 1: Preparing Your Figma Design
Before beginning the conversion process, it’s essential to thoroughly review your Figma design. Consistency in design elements (fonts, colors, layouts, and spacing) can help create a cohesive website. Additionally, check for responsive design elements. This step will help you identify any adjustments that are needed to maintain the design integrity across different screen sizes.
- Exporting Assets from Figma: The next step is to export the necessary assets from Figma. The export process includes images, icons, and other graphical elements. To ensure optimal web performance, export these assets in appropriate file formats, such as SVG, PNG or WebP, and resolutions. This is important as using the right image file formats and resolutions will help maintain the quality and load time of your website.
- Organizing Assets: After exporting your assets, organizing them is important. Best practices include creating folders for different types of assets and following consistent naming patterns. Organized assets make locating and using them easier when building your website in Elementor. This organizational step can help streamline the workflow and ensure that you have all the necessary components readily available.
Also read: How to Create a Website with Figma
Let Us Handle Your Figma to Elementor Conversion
Whether you’re looking to create a seamless user experience or bring a unique aesthetic to your site, we’ve got you covered.
Step 2: Setting Up Elementor
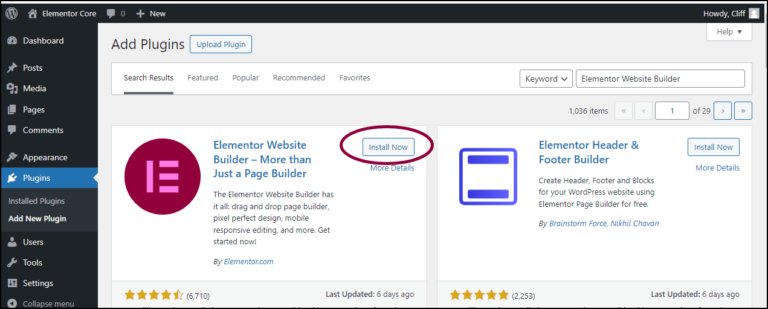
The first step in setting up Elementor is to install the plugin on your WordPress site.
- To do this, login and go to your WordPress dashboard ⟶ Plugins ⟶ Add New.
- Search for Elementor plugin, Install ⟶ Activate.
If you want advanced features, consider installing Elementor Pro, which requires purchasing a license and uploading the pro version plugin to your site.
Alongside Elementor, installing essential plugins like WPForms for forms and All in One SEO for search engine optimization is beneficial. These tools can enhance Elementor’s functionality and help build a robust website.
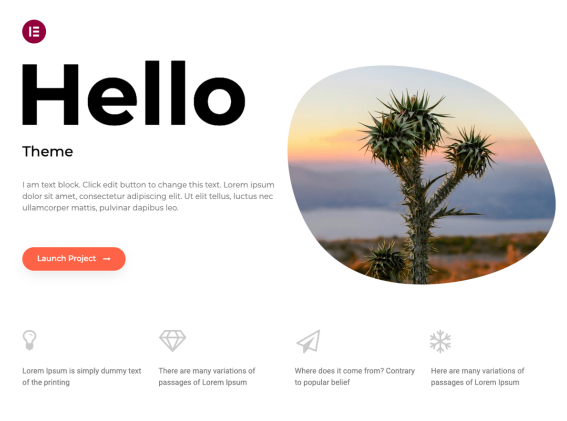
Next, select a suitable theme.
Some highly recommended themes compatible with Elementor include Hello Elementor, GeneratePress, and OceanWP. These lightweight themes provide a solid foundation for your designs.
Once you have chosen a theme, set up a child theme. A child theme allows you to make customization without affecting the parent theme’s updates.
To create a child theme, install the Child Theme Configurator plugin. This plugin guides you through the process step-by-step, ensuring your customizations are preserved during theme updates.
This setup provides a stable and flexible environment for your Elementor pages.
Related: Top Themes for Elementor
Explore Our Elementor Theme Development Services
Our team of professionals can craft a unique and responsive theme tailored to your needs.
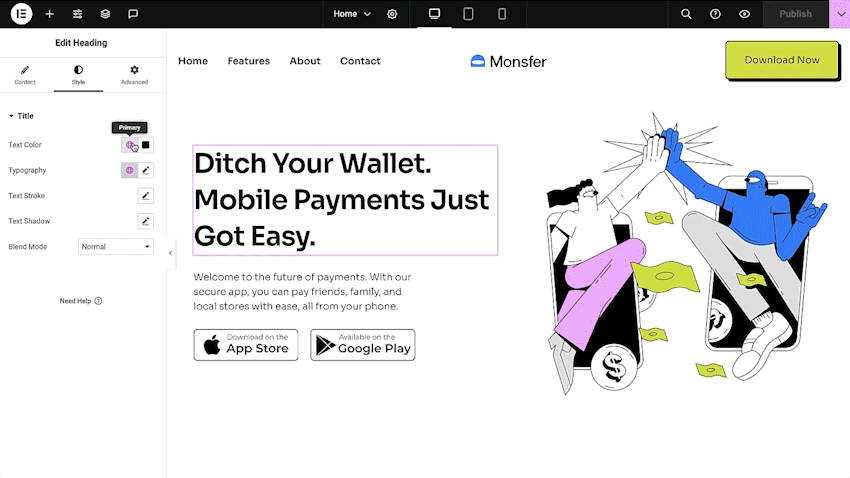
Step 3: Converting Figma Design to Elementor
To begin converting your Figma design to Elementor, start by creating a new page in Elementor.
- Go to your WordPress dashboard ⟶ Pages ⟶ Add New.
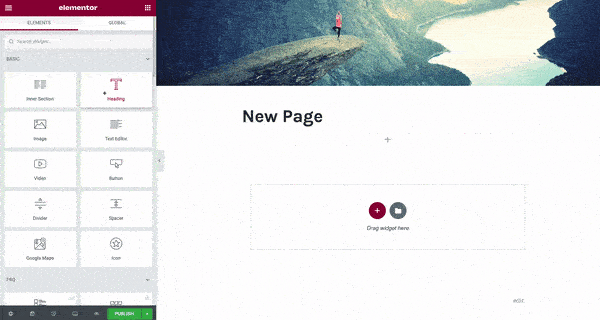
- Give your page a title, then click “Edit with Elementor” to launch the Elementor editor.
- Set auto layout by choosing from Elementor’s pre-defined structures or create a custom layout using sections and columns.
Also, setting global settings such as fonts, colors, and spacing is crucial at this stage to ensure consistency throughout your website. These global settings help maintain the design integrity and save time as you build the rest of your pages.
Building the Header and Footer
Elementor’s Theme Builder allows you to design custom headers and footers that match your Figma design.
- Access the Theme Builder from the Elementor menu in your WordPress dashboard, and start by creating a new header template.
- Use Elementor widgets to add elements like logos, navigation menus, and social media icons, ensuring they align with your Figma design.
Repeat the process for the footer, adding necessary elements such as contact information, links, and copyright text. Matching the design accurately ensures a cohesive look and feel across your website.
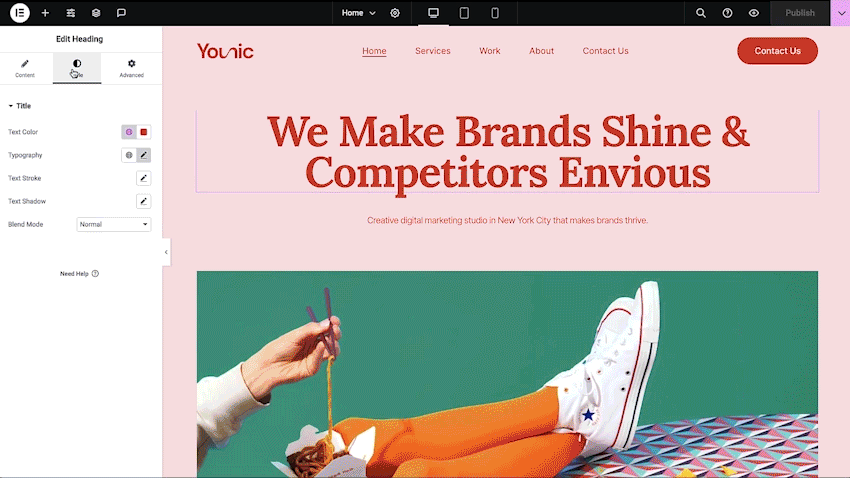
Implementing the Main Design
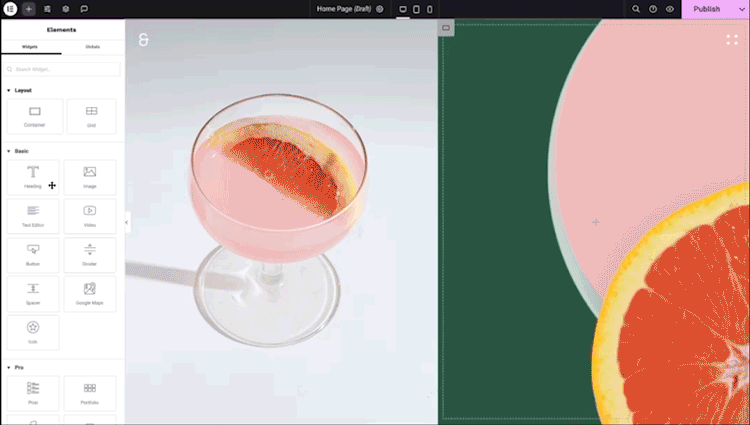
With the header and footer in place, it’s time to implement the main design.Start by adding sections and columns to your page in Elementor, reflecting the structure of your Figma design.
- Use Elementor’s drag-and-drop interface to import and position assets, such as images, icons, and text blocks.
- To replicate Figma components, use Elementor pro widgets like Image, Heading, Text Editor, and Button.
Customize these widgets to match the styling in your Figma design, adjusting settings like font size, colors, and margins. This step-by-step implementation helps translate your design vision into a fully functional web page.
Responsive Design Adjustments
Ensuring your website design looks good on all devices is critical to the conversion process. Elementor provides responsive settings that allow you to fine-tune your layout for different screen sizes.
- Switch to responsive mode in the Elementor editor to preview how your page looks on desktops, tablets, and mobile devices.
- Adjust elements, such as changing font sizes, modifying padding and margins, and rearranging content for better readability on smaller screens.
This responsiveness ensures that your website provides a seamless user experience across all devices.
Step 4: Advanced Tips and Tricks
While Elementor provides extensive customization options, sometimes custom CSS is necessary to match the intricacies of your Figma design. Custom CSS allows for precise control over styling elements, such as specific animations, hover effects, or unique layouts that are not achievable with default settings.
To add custom CSS, navigate to the Elementor settings and use the Custom CSS field within each widget or the Customizer for site-wide styles.
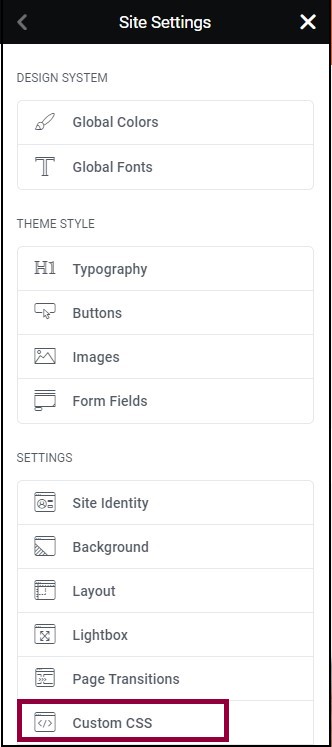
Knowing when and how to apply custom CSS ensures your design maintains its unique details and enhances the overall user experience.
Using Third-Party Add-ons
Enhancing your Elementor website’s functionality is easy with third-party add-ons. Recommended add-ons for expanding the capabilities of Elementor and which offer additional widgets, templates, and features are:
These add-ons can help you with complex design elements and interactivity that are difficult to create with Elementor alone.
Optimizing Performance
Ensuring your website loads quickly is vital for user experience and SEO.
- Start by optimizing images using tools like TinyPNG or EWWW Image Optimizer. These tools help reduce file sizes without compromising quality.
- Implement lazy loading for images and videos, deferring loading until they are needed, which improves initial load times.
- Use performance optimization plugins like W3 Total Cache to manage caching, minify CSS and JavaScript files, and enable gzip compression.
These site optimization tools help you maintain fast loading times, keeping your website user-friendly.
Is Your WordPress Elementor Website Running Slow?
Boost the performance and efficiency of your WordPress Elementor website with our expert site optimization services.
Step 5: Testing and Launching
Conduct thorough testing across browsers and devices before launching your Elementor website. Cross-browser and cross-device testing ensures that your website looks and functions correctly for all users, regardless of their platform.
Use tools like BrowserStack or LambdaTest to simulate various environments and identify any discrepancies. Pay close attention to layout consistency, interactive elements, and overall performance.
Once all testing and adjustments are complete, you are ready to launch your Elementor pages. Begin by publishing your pages from the Elementor editor and double-checking that all links and navigation paths work correctly.
Follow a launch checklist to ensure everything is in place:
- Verify SEO settings
- Configure Analytics tools
- Set up backups with plugins like BlogVault
- Test forms
- Test other interactive features
Launching your website involves both technical and content verification to ensure a smooth and successful deployment. This meticulous approach guarantees that your website is fully prepared for public viewing and provides a professional final product.
Common Mistakes to Avoid When Converting Figma to Elementor
Converting a Figma design into Elementor can be a straightforward process, but there are some common pitfalls that can lead to inconsistencies or performance issues. Avoiding these mistakes will ensure a smoother workflow and a better final website. Here are the key mistakes to watch out for:
Ignoring Responsive Design
One of the most common mistakes is failing to account for responsive design during the Figma-to-Elementor conversion. In Figma, it’s important to ensure that the design adapts well to different screen sizes. If not accounted for, this can lead to misalignment and poor user experience on mobile or tablet views in Elementor. Always test your design across multiple devices to ensure it’s fully responsive.
Not Exporting Assets in Optimal Formats
When exporting images, icons, or other assets from Figma, choosing the wrong file format can drastically affect the performance of your Elementor site. For instance, using high-resolution PNGs for icons instead of SVGs can increase load times. Ensure that you export assets in the right formats—SVG for vector graphics, PNG or WebP for images—and compress them for the web.
Overcomplicating the Design
Designers may sometimes create intricate, overly complex layouts in Figma that don’t translate well into Elementor. Elementor works best with clean, structured layouts. Avoid excessive layering, complex interactions, or overly detailed elements that can make implementation difficult and negatively affect site performance.
Skipping the Use of Global Settings in Elementor
A frequent oversight is not taking advantage of Elementor’s global settings for fonts, colors, and spacing. Without using global settings, you might find yourself manually adjusting each element on different pages, which can lead to inconsistencies in design. Setting up global styles ensures that your design remains cohesive across the entire website and simplifies future updates.
Failing to Optimize for Performance
Large image files, unoptimized code, or excessive widget use in Elementor can slow down the site significantly. Always optimize images before importing them into Elementor, use as few plugins and widgets as possible, and ensure that your site is optimized with caching and minification techniques to prevent slow load times.
Neglecting Mobile Design Adjustments
Even though Figma allows you to create multiple designs for different screen sizes, it’s crucial not to forget about Elementor’s mobile-specific settings. After recreating your design in Elementor, be sure to switch to Elementor’s responsive mode to adjust and fine-tune the layout for mobile and tablet users. Failure to do this can result in a website that looks great on desktop but is cluttered or misaligned on smaller screens.
Not Organizing Design Layers Properly in Figma
A messy or unorganized Figma file can make the conversion to Elementor more challenging. If your design layers aren’t properly grouped and labeled in Figma, you may spend extra time finding and exporting the right elements. This can lead to frustration and potential errors in the final design. Keep your Figma file organized to streamline the process.
Skipping Design Validation and Testing
A common mistake is launching a website without thorough testing. After converting from Figma to Elementor, always validate your design by testing across different devices, screen sizes, and browsers. Check for broken elements, responsiveness issues, or misalignments that might need to be addressed before going live.
Conclusion
Converting Figma designs to Elementor can be a seamless process if you follow these five steps:
- Prepare your Figma design
- Set up Elementor
- Build your pages
- Add advanced customizations
- Thorough testing before launch
By carefully executing each step, you can ensure your design vision is accurately brought to life in a functional, responsive website. However, this process can sometimes be complex and time-consuming.
If you need assistance, seek professional help from experts like Seahawk. We specialize in converting Figma to Elementor, ensuring a high-quality, efficient, and precise transformation of your designs into fully functional websites. Contact us today to convert Figma to Elementor!
Figma to Elementor FAQs
How do I export Figma to Elementor?
To export Figma designs to Elementor:
- Start by exporting your design assets from Figma. This includes images, icons, and other graphical elements, which should be saved in optimal formats like PNG or SVG.
- Organize these assets properly with consistent naming conventions.
- Set up Elementor in WordPress, create a new page, and use Elementor’s drag-and-drop interface to recreate your Figma design.
- Import the exported assets and position them according to your layout.
Can I convert Figma to WordPress?
Yes, you can convert Figma designs to WordPress. This process typically involves using a page builder like Elementor to recreate your Figma design within WordPress.
Export the design assets from Figma, set up WordPress with a compatible theme and necessary plugins, and then use Elementor to build your pages by importing and arranging the assets. This approach allows you to maintain design consistency and achieve a functional website.
How do I integrate Figma with Elementor?
While there is no direct integration between Figma and Elementor, you can achieve a seamless workflow by exporting assets from Figma and importing them into Elementor. Start by exporting your design elements from Figma.
Then, in Elementor, create a new page and use the drag-and-drop editor to build your design, importing the Figma assets and positioning them as needed. This manual process helps integrate your Figma designs into Elementor.
Can you import Figma into Elementor?
Direct import of Figma files into Elementor is not possible. However, you can manually transfer your Figma designs into Elementor. Export the necessary design assets (images, icons, etc.) from Figma. Then, in Elementor, create a new page and use the drag-and-drop editor to replicate your Figma design by importing and placing the exported assets. This method ensures your Figma designs are accurately represented in Elementor.